You might think that acquiring a $1,000 DSLR makes you a photographer. In truth, the first step down the “photographer road” is switching from auto mode to experimenting in AV, TV, and M. But, what do those letters mean?
Each mode is essentially a different way of controlling exposure, applying ISO, aperture, and shutter speed. Using full auto mode means you cede complete control to the camera. This can be fine, but the camera doesn’t really know what it’s looking at and the results can be wildly off. At the other end of the spectrum, M mode–or manual mode–grants the photographer full control over ISO, aperture, and shutter speed. Most professional photographers rarely leave M mode. If you are serious about photography, M should be your long-term destination.

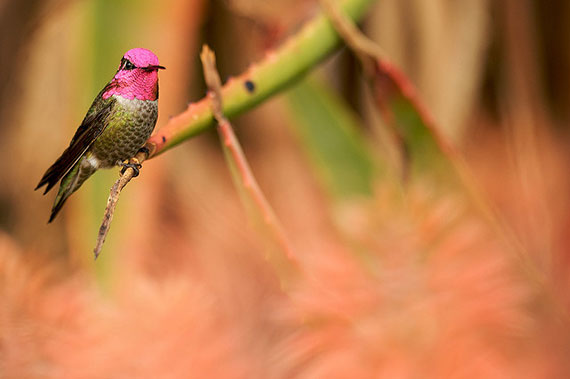
Photo by Danny Perez Photography; ISO 450, f/2.8, 1/250-second exposure.
Understanding the Different Camera Modes
Mode settings vary from camera to camera but generally you’ll find:
- Full auto (a green rectangle on my camera). The “easy” setting that allows you use your camera like a point-and-shoot. If you never get beyond it, your camera is probably wasted on you.
- P – program. This is auto with the capacity for adjustments to shutter speed and aperture. Marginally more useful than full auto but still something to move beyond.
- AV – stands for aperture value, more commonly referred to as aperture priority. This allows you to set the aperture you want, and the camera will decide the shutter speed to attempt the correct exposure. Ultimately you’ll want to graduate beyond AV, too, but it is very useful for experimenting with aperture. Aperture affects depth of focus/field (DoF), one of the photographer’s most creative tools. A large aperture (e.g., f/2.8) results in a narrow DoF–think of a portrait in which the eyes are in focus, but the ears are fuzzy. A small aperture (e.g., f/22) will result in a wide DoF. Think of Ansel Adams’ landscapes, in which a pebble at the foot of the camera is as sharp as the mountain peak in the distance.
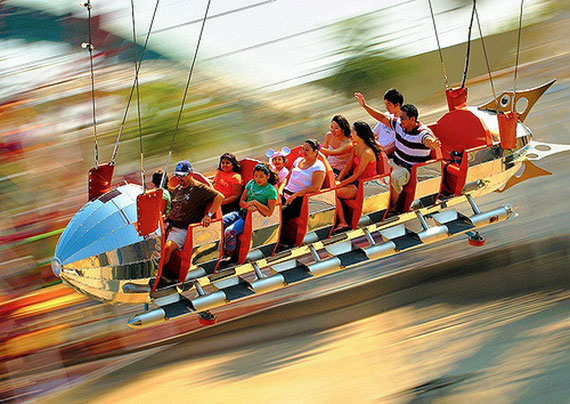
- TV – literally time value, better known as shutter priority. This allows the photographer to determine the shutter speed and lets the camera take care of aperture. Why control shutter speed? Shutter speeds can vary from 1/8000 of a second to many hours. Imagine you set a camera up on a tripod next to a busy road at night. You take a ‘long exposure,’ e.g., leave the shutter open for a minute. Anything (or at least anything bright) that moves in front of the camera during that minute will be recorded. Passing cars will be captured as dazzling ribbons of light. At the other extreme, a wildlife photographer might want to freeze the beating of a hummingbird’s wing with a very short shutter speed.

Photo by Joe Penniston; ISO 200, f/25.0, 1/20-second exposure.
- M – manual. In the days of film, M was pretty much restricted to those who knew what they were doing. Film, after all, costs money. One of the joys of digital photography is the freedom it gives to practice–limited only by the size of your memory card. If I’m not using a handheld light meter, I often take a test shot or two in AV or TV mode, see how the exposure looks, and then transfer the settings to M. Working in M, even if you are a beginner, helps familiarize yourself with the all-important numbers: f-stops and shutter speeds. Eventually you might even be able to guess exposure settings.
- B – ‘bulb’. The term goes back to the old days of photography when cameras were always propped on tripods, exposures were long, and the shutter was controlled with a handheld shutter release ‘bulb’, which could be squeezed to open or close the shutter. The same principle now applies. Most cameras allow shutter speeds in other modes, as long as 30 seconds. If you need longer–for night shooting–B allows you to open and close the shutter when you like.
Hope these explanations helped you understand camera modes better. Don’t be afraid to step out of auto mode and into the wonderful world of manual. The possibilities are endless.
About the Author:
I’m Tom Greenwood (http://www.sydneyportraits.com.au/). I am a people photographer. I love capturing not just faces, but also relationships, hugs, kisses, and even the occasional tear. I’m originally from England, now happily residing in Sydney. Not so long ago I was a journalist in Southeast Asia. After I made the switch to photography I worked as a photojournalist as well as shooting for organizations such as the UN World Food Programme, Oxfam, and Save the Children.
Like This Article?
Don't Miss The Next One!
Join over 100,000 photographers of all experience levels who receive our free photography tips and articles to stay current:


Leave a Reply