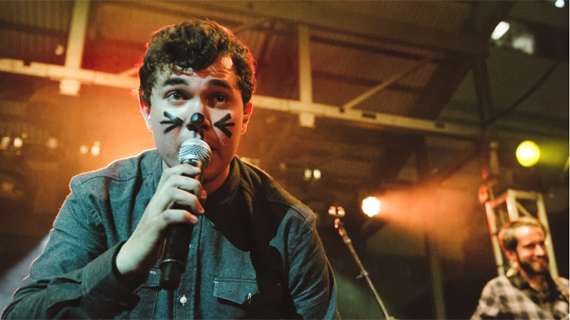
Where visual and audial obsessions overlap, you’ll probably find the concert photographer. This is an extremely exciting type of photography, with all the excitement and action of sports, the intimate close-up nature of portraiture, and the wild colours usually only found in a sunset. Nikon recently released this interview with concert photographer Lindsey Byrnes, in which she discusses her methods, her development, and of course, her favourite equipment:
The life of a music photographer grows very organically; first you’re a kid going to rock shows with a point-and-shoot, and you love it so much you buy your first DSLR. You keep going to concerts and keep shooting, until a band likes what you’re doing and asks you to do some publicity shots. You get noticed, get published, and the rest is history.
Of course, not every concert photo turns out great from the get-go. Venues are dark, crowded, and constantly moving fast, and a lot of shots can come out as grainy blurs with blown-out highlights, blocked-up shadows, and weird colours. Fortunately, there are a few things you can practice to put the musical magic into your images.
Use the right equipment.
In the video, Byrnes tells us about all her gear – a Nikon D4, a D800, and a D700, along with a 28-70mm f/2.8, a 70-200mm f/2.8, and a 35mm f/1.4. Of course all that is excellent, but the good news is, you don’t need to drop thousands of dollars to get a good shot. As long as you have a DSLR with a good capacity for low noise at high ISOs (low-end Nikons are getting better all the time), even a cheap 50mm f/1.8 will give you pretty excellent results – anything with a wide aperture.
Durability is also key here, as concerts tend to be wild places, saturated with alcohol (among other intoxicants) and reckless dancers. It’s one of the easiest places for your camera to take a tumble, so avoid plastic lens mounts and consider putting your camera on an emergency backup tether. Also, lens filters are your best defense against a smashed front element. Finally, you’re not going to use a tripod. Just leave it at home. A monopod maybe, if your lens is long, but you’ll probably have more trouble with your subjects’ movement than your hand’s.
Use the right settings.
No auto mode allowed, and certainly no on-camera flash. There’s nothing worse than a bright shot of the backs of heads in front of a pitch-dark stage. Turn your ISO as high as you can without destroying the image quality, use aperture priority mode, and set your lens to its maximum aperture. If your images turn out noisy anyway, try turning them black and white; it usually looks better.
Get close.
Move up to the front of the crowd to get unobstructed views. A close shot with a wider-angle lens will have a lot more detail and dimensionality than a distant telephoto. Even if you are way off to one side, you can still get some great angles—often even better than being center stage.
Stabilize yourself.
Spread your feet a little and plant yourself firmly to avoid getting knocked over. Hold your lens steady with your left hand, tucking your arm in close to your body for maximum stability.
Watch the light.
All the different colored stage lights can produce extremely interesting results, but they can also work against you very easily. Concert lighting technicians love to use red lights, which tend to make your subject look a little on the demonic side, and the high-contrast situation can lead to a blazing white face and black everything else; just be aware.
Include the crowd.
Part of what makes a concert is the people who are at it. Otherwise, you may as well shoot the band in rehearsal. Get some photos of the crowd, or even better, of the crowd and the band interacting with each other.
Like This Article?
Don't Miss The Next One!
Join over 100,000 photographers of all experience levels who receive our free photography tips and articles to stay current:


Leave a Reply