Family photos or vacation pictures make excellent gifts as canvas prints, framed artwork, or greeting cards. But, what photo gifts can you give your friends and family once you’ve exhausted the usual options?
Canon has collaborated with “A Beautiful Mess” blogger sisters, Elsie and Emma, to create DIY projects using your favorite photos. In this short video, they explain how you can use your pictures to decorate a common piece of furniture and make a great conversation piece:
How To Create Your Own Photo Covered Coffee Table
1. Locate (or build) a table. You will need a coffee table that has a 1 centimeter deep lip around the edge. The lip is necessary to contain the resin when you pour it on the surface of the table to cover the photos.
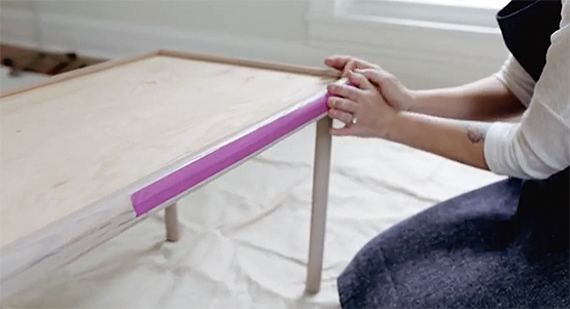
Use a table with a raised edge to contain the resin.
2. Tape off the edges. Use painter’s tape to cover the edges of the table (or any surface you don’t want coated with resin).
3. Print your photos. Create prints in any dimensions you desire–just make sure they will fit completely on the table top.
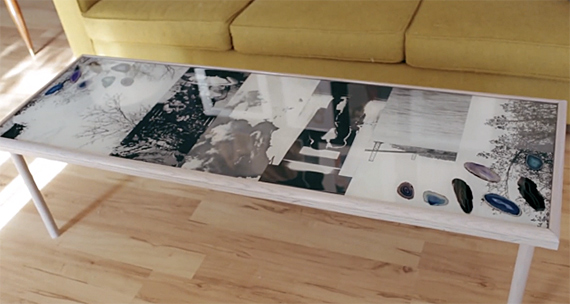
4. Plan your design. Arrange your photos on the surface of the coffee table. If you would like to add an extra dimension to your work, consider placing 3D objects like shells, rocks, or other mementos that compliment the images on top of the photos.
5. Glue the photos. Use a spray adhesive to coat the back of the photos and adhere them to the table top. Make sure you lay each photo flat on the surface, eliminating air bubbles as you smooth it down.
6. Mix the epoxy resin. Combine the two ingredients in the epoxy resin according to the instructions on the box. Choose an epoxy that does not yellow, as this will change the color of your photographs.
7. Pour epoxy. Coat the table surface with the epoxy resin, allowing the liquid to spread out. Make sure you pour enough resin on the table to fully cover the photos and any objects you embedded, but don’t add too much or you run the risk of overflowing!
8. Torch out any bubbles. Use a small propane torch (like those used to make creme brûlée) to heat the epoxy and bring all air bubbles to the surface. Keep the torch in motion to avoid burning the epoxy or the table.
9. Dry it completely. Let the table sit overnight to completely cure. Make sure nothing touches the surface until it is totally dry, as it may leave a mark.
That’s all there is to it!
Like This Article?
Don't Miss The Next One!
Join over 100,000 photographers of all experience levels who receive our free photography tips and articles to stay current:





Can anyone telk me where to get a cheap table with the lifted edge
Thats is also what I wanted to know. Do you use regular picture paper or what?
What kind of photos like pictures printed on regular paper???
Really splendid coffee table, a craft that can nestle memory is one true craft. Thanks for sharing this stunning one !
Where can you buy this epoxy mix?
An alternative to resin is just a sheet of glass cut to size with the edge ground to smooth it off. Then you can change the photos every now and again.
If you do go with the resin option be sure to have a well ventilated area to keep the fumes away. Also avoid anything that is going to raise any dust; vacuum the previous day, do not do any sweeping or baking!