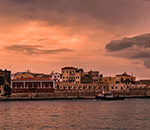
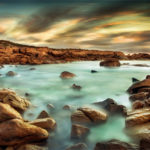
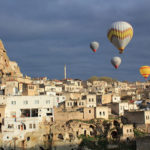
One of the key aspects to taking a great photo is exposure. To sum it up, your exposure is the amount of light you let into your camera. If your camera sensor receives too much light, your photos will be washed out, while having too little light will leave your photos left in the dark.

photo by Pascal Walschots
Although there are a variety of techniques you can use in post-production to correct inadequately exposed images, like anything else, there are some things you just can’t fix. To help alleviate these corrections in post-production, try using these informative exposure tips for your photography.
Photograph Using RAW Format
Depending on your camera’s specifications, photos are typically captured in one of two formats: JPEG or RAW.
RAW files contain all the information possible within your images, and can generate higher quality images.
JPEG files on the other hand are compressed. Therefore, these images lose some of the information you would capture using a RAW file format. Unfortunately, once this information is lost, you can’t get it back.

Use both images to create one RAW vs. JPEG comparison image. Photo by Rick Berk via Jared Polin
In most cases, you will typically have to adjust your camera manually, as most DSLR cameras tend to use JPEG (aka JPG) format as the camera’s default file setting.
Prepare and Research Before Your Shoot
As any professional photographer knows, just because you found a promising spot to photograph, doesn’t mean your session will be as simple as point and shoot. To ensure you have the best possible location for your setup, you should always plan ahead and research your destination. Check out the site ahead of time, and look around to see where you can capture the best angles and lighting for your photography. Also keep the weather in mind. Check ahead to find out what the weather will be like on the day of your shoot, and if needed, reschedule it to fit the specific needs of your images.
In photography, there are plenty of aspects beyond your control, so think ahead and avoid leaving the things you do have control over to chance.
Use the Correct ISO Settings
ISO is another useful tool you can use to help determine how sensitive your camera will be to light. Your ISO choice will depend on your specific conditions. For instance, when it is darker out, you will want to use a higher ISO (typically anywhere from 400–3200), while brighter situations require you to work with a lower ISO setting (or even the Auto setting).

photo by Gord McKenna
Use a Tripod for Long Exposure Shots
A good rule of thumb to when working with long exposure shots is to keep in mind the longer your exposure the more damage any type of movement or vibrations will be to your photographs. Therefore, it is vital that your camera remain as stable and sturdy as possible. Using a tripod or monopod, you can stabilize your camera, and when needed, either weight it down or use your body as a shield to prevent strong winds from moving the camera. The wind is the enemy, and when working with long exposures, even a few seconds of wind can compromise the entire image.
Avoid Using Your Flash Indoors
While your flash is a great tool for adding light to your image, unless you’re in a studio, it can often create harsh and unnatural lighting. To avoid resorting to your flash to brighten up your indoor images, try pushing your ISO up, while using the widest aperture setting possible. This will allow more light to reach your camera’s sensor and help you to avoid having a blurry background. Bear in mind, once your photograph is overexposed to the point where they become pure white (aka blown highlights), you will never be able to recover the details from these sections of your photo.
Use Exposure Bracketing
Sometimes you may experience tricky lighting situations where you are unable to determine the exact exposure speeds to use (e.g. when you have a start contrast between your light and shadows). This technique uses a series of photos captured either manually by the photographer or automatically by the camera. Each photograph is set at either one stop above or below the camera meter’s reading for the ‘correct’ exposure to ensure the best exposure level for the photograph.

photo by Carl Jones
Pay Attention to Your Histogram
Histograms are a graphical representation that show the distribution of dark (left side of histogram), light (right side of histogram) and midtones (middle of histogram) within your image. The histogram is one of the most useful tools you can use for determining proper exposure levels. If any portion of the histogram is touching either side of the histogram (known as clipping), this indicates a loss of detail. For example, if there are any completely white sections within the image, the graph will be touching the right side of the histogram, while completely dark areas will touch the left side—both of which can be fixed by adjusting your exposure settings.
Use a Remote Shutter
Cameras are extremely sensitive, and even the slightest movement can be detrimental to your photography. A remote shutter will help prevent you from having to actually touch the camera to capture your photos. Plus, if you program the remote shutter correctly, you can even get several minutes of exposure time without having to keep track on your watch.
Don’t Trust Your LCD Screen
Under no circumstances should you ever trust the LCD screen on your camera. While it does give you a representation of your image, the camera’s display screen is exceedingly bright. Therefore, the image you just took will appear brighter than it actually is. To avoid this complication, you should use your camera’s histogram to visualize your image and determine if your shutter speed calculations are correct. Plus if you’re shooting in RAW format, the LCD visual of your image will be a compact version of the photo, and as a result, will not be an accurate representation.
Avoid the Sun
Whether you’re working on portraits, still life, or any other type of photography; you should always try to avoid having the sun within your frame. This is due to the risk for overexposure. For example, if you have the sun within your camera shot for two minutes, it will completely override your image. Every surface (and every surface it reflects on) will be completely overexposed to the point where it is nigh impossible to recover (even using software programs like Photoshop).
Never Improvise
The perfect lighting for your shot can last hours, minutes, or even seconds. Therefore, if you are taking a longer exposure, you may only get one chance to capture your images. The best way to achieve your goals is to prepare, research, and never improvise. Take a couple test shots to determine what aperture, ISO, and exposure speeds work best for your settings; and always check out the area before you have your photo shoot planned.
The amount of light or exposure you use is a vital aspect to capturing an amazing shot. Without it, you can lose important data you can never get back. Whether you’re working with a nighttime shot, trying to create interesting effects, or trying to capture movement, you should never be afraid to play around with your ISO, aperture, or exposure. When used correctly, these can help to add life to your imagery and—once mastered—will provide more confidence in your abilities as a photographer.
Like This Article?
Don't Miss The Next One!
Join over 100,000 photographers of all experience levels who receive our free photography tips and articles to stay current:


I really would have appreciated being asked for permission to use my images. Jared Polin was given permission to use those. That permission was not transferable.
Iso does not change sensitivity in digital sensors. This is not film. Iso changes analog gain by amplifying the signal.
That exposure table isn’t exactly clear. What do the dots mean and how should we read that final row?