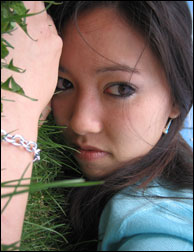
Without Effect

With Effect
This tutorial is to help you learn how to make a diffused black and white photo effect. Ok, once you have your photo open in photoshop:
1. Convert the photo to black and white using a new Channel Mixer Adjustment Layer. If you need more help with this step please refer to our tutorial on “Converting Photos to Black and White.”

2. Then (with the background layer selected) select Diffuse Glow from the Filters menu under the Distort submenu. (Filter>Distort>Diffuse Glow).
3.In the Diffuse Glow menu, adjust the Graniness, Glow Amount, and Clear Amount to somewhere around 5, 5, and 10. This may vary some depending on the picture.

For Further Training on Black & White Processing:
Check out this best-selling eBook training package on B&W which includes a masterclass on post-processing. It can be found here: Black and White Post-Processing
Like This Article?
Don't Miss The Next One!
Join over 100,000 photographers of all experience levels who receive our free photography tips and articles to stay current:


Thanks for this tutorial, I’ve been struggling to get the settings for diffused glow effects right for a long time.
You setting work really well and combined with an inverted layer mask I find I can apply the effect just where I want it. I mostly use this effect on wedding dresses, and it looks great.
Thanks again.
i realy want to know how to create the white on white effect, its kinda like this but has color in it. when photographers blend the skin into background, that sort of thing. please help. thanx :)