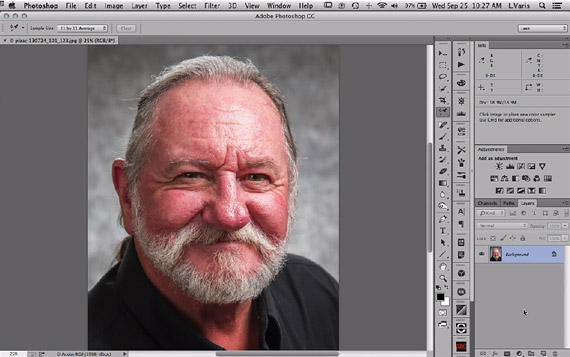
It’s becoming common practice to retouch the imperfections and blemishes that are found on everyone’s faces and skin. However, it’s sometimes easy to get carried away in editing and before you know it, your subject begins to look plastic and barely resembles their actual look. In the video below, Lee Varis, explains the process he uses to edit portraits and help tone down shiny skin to make a portrait just right. Take a look:
After you make your initial corrections, such as cloning out stray hairs and removing any minor blemishes, Varis begins to move into more advanced editing techniques. But, don’t worry if you are just learning Photoshop, Varis delivers a very informative and easy to follow tutorial. Here is brief summary of his workflow:

Varis’s portrait retouching workflow follows the above steps.
Varis’s technique is favored in part because it doesn’t drastically change the look of the subject. The simple method he uses simply corrects color imbalances and unflattering reflections of light. Below is the portrait that Varis works on throughout the video tutorial, before he has begun to retouch it.
You can see the redness and shine on the skin is distracting and does not do much to portray the subject in the most favorable way. After just a few minutes of editing and making adjustments in Photoshop, Varis was able to enhance the portrait and give it a much more pleasing feel.
When it comes to retouching portraits, more often than not, less really is more. That becomes evident in the work showcased above. The final portrait is balanced and true the subject, and the photographer did not have to spend too much time making it that way.
Like This Article?
Don't Miss The Next One!
Join over 100,000 photographers of all experience levels who receive our free photography tips and articles to stay current:


Thanks so much for this! I have been using Photoshop since its inception. I feel pretty comfortable with it, but this tutorial was very helpful and opened up whole new avenues of retouching to me. Thanks!
Thanks for this, I really like this technique.