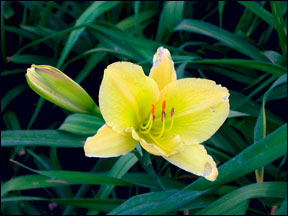
This tutorial is to help you learn how to adjust the Hue and Saturation of a photo without burning out colors. This tutorial uses a different technique that will prevent you from losing your exposure settings. This tutorial was made with the help of Dan Buxton.
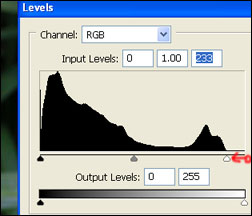
1. Adjust the Levels, (Image>Adjustments>Levels).
2. Make sure the levels range is set to fit the range of color, for this photo I had to move the right end of the levels range in to fit the colors.
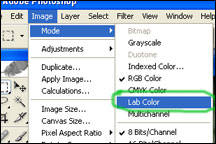
3. Change the Image Mode to Lab Color, (Image>Mode>Lab Color).
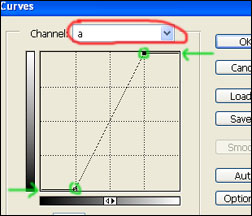
4. Create a New Curves Adjustment Layer, (Layer>New Adjustment Layer>Curves).
5. Change to Channel A
6. Move the corner adjusters in approximately one square, you may wish to adjust them more or less depending on the photo.
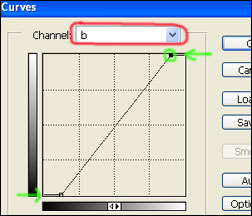
7. Change to Channel B
8. Move the corner adjusters in approximately half a square, you may wish to adjust them more or less depending on the photo.
Like This Article?
Don't Miss The Next One!
Join over 100,000 photographers of all experience levels who receive our free photography tips and articles to stay current:





Is this method of post processing the image is a good virtue of a photographer? I got beautiful pics after applying this method, but i have this feeling that i am destroying the genuinity of the original image.