If you’ve recently progressed to using a DSLR camera, these ten short tips will help you get off to a great start!
1. Keep Hold of Your Camera Manual
You will quickly learn that you can’t live without it. Make sure you keep it handy and take time to read it frequently, particularly in those first few months after buying your new DSLR camera.
2. Consider a UV Filter
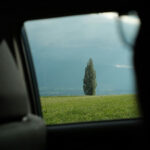
For each lens you own, consider a UV filter—not just to filter ultraviolet light but also to protect your expensive lenses.

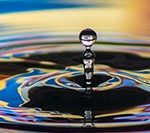
Photo by Flickr user Amanda; f/3.5, 1/8 exposure.
3. Learn to Use Your Camera’s Settings
It’s especially important that you become proficient at changing your camera’s ISO, aperture, and shutter speed settings quickly. So, practice doing this until it becomes second nature.
4. Get Yourself a Sturdy Tripod and a Remote Release
You might just have spent a small fortune on buying the camera, but try to stretch your budget to include these two important accessories. They will help you take photos where long shutter speeds are needed (e.g., night shots).

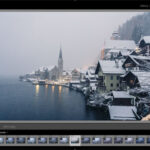
Photo by Judy van der Velden.
5. Read Lots of Books and Magazines
They are a great source of inspiration and information, particularly those that show what camera settings were used for the photos shown.
6. Treat the Mirror Inside the Camera Body Very Carefully
It’s very important that you don’t breathe on or touch the mirror when you’ve removed the lens. If you find spots on your photos, get a camera cleaning kit and use it to remove dust or smears from the lens.
7. Avoid Changing Your Lens in Windy Conditions
Ensure you have put the most appropriate lens on your camera before you leave home. If you must change the lens outside, point the camera downward to prevent dust from getting on to the camera’s sensor.

Photo by Andy Atmtx; ISO 100, f/2, 1.6-second exposure.
8. Beware of Camera Shake
If you find that a lot of your photos are blurred, it’s usually because of camera shake. To reduce the possibility of camera shake and consequently blurred photos, you need to increase the shutter speed. Alternatively, hold the camera close to your body or rest it on a firm object nearby.
9. Think About Your Future Needs
This is particularly important when buying a camera bag. It’s quite common for photographers to have three or more lenses, so consider having a couple of bags: a bag that will hold all of the lenses and equipment that you’re likely to have in the future and another bag that will hold a single lens will cover most situations.
10. Experiment, Experiment, Experiment!
The quickest and best way to learn to figure out what you can do with your camera is to experiment. Try using different apertures when shooting landscapes or different shutter speeds when photographing moving objects, such as waterfalls.
I hope you found this short list of tips useful. Take them on board and you’ll soon be making the most of your new digital SLR camera.
About the Author:
John is an enthusiast (digitalslrbrandtalk) when it comes to digital SLR cameras and is keen to help fellow enthusiasts.
Like This Article?
Don't Miss The Next One!
Join over 100,000 photographers of all experience levels who receive our free photography tips and articles to stay current:


Excess heat can also impact your battery. Never leave your DSLR sitting in direct sunlight. Not only will it heat up quickly, but if you keep doing it too often, the UV rays can warp or deteriorate the body over time.
Perfect timing with this post!
I hoping to buy my first DSLR camera this year and I was completely stuck on which one to get! I’m definitely going to look into the one that you have and any similar models
The information and tips to work on the basics of photography skills are properly explained but I have a doubt that according to your step #6 spot that comes on the image is due to dust on lenses but I feel it occurs due to having dust on the sensor.
Thanks a lot, I m new in the field of photography and I m using Nikon D3100 newest entry-level DSLR and your article helps me to work on my basics.
Nice article
Very well explained by you the use of DSLR camera for new comers as it is not that easy but following these tips one will surely do the best things.
Hey, thanks for the post. It made me remind the old days. I regularly follow these type of blogs to find some good stuff. Please keep posting and let me know for the upcoming posts.
There are lots of special features on a DSLR camera. Those who just newbies the camera might be not aware about these tips. For a better understand must have to learn about it. In this blog 10 tips mentioned for a user those who newbies a DSLR. You might be the user of the old analog camera but now in this modern time want to progress to use the DSLR camera then those tips will be helpful for your better beginning.
It’s good to know I should avoid changing the lens outside when possible so I don’t catch dust in the sensor. I’ve been interested in taking up photography for a while and my wife just hinted that she might be surprising me with one in a couple of weeks. I’m excited to get a chance to use it, but I’ll be sure to keep it in good condition when I do.
The information and tips shared are extremely useful. These are often forgotten while travelling and end up in a lot of hassle. Will definitely keep the points in mind. Also, it is good to go through various websites to understand pictures and cameras better. Nice work, keep up.
I disagree with one point in #6. If you find spots on your pictures, it’s almost always due to dust on your sensor, not on your lens. Sometimes, a dust bulb can take care of the problem. If not, you may need to use a wet sensor cleaning kit. Of if that makes you nervous, have a professional do it.
The UV filter may well add extra protection to the lens but it can also cause ghost images. Filters were great for lens protection in film cameras but the digital sensor behaves different when light hits it. The light reflects off the sensor back to the front of the lens. It passes no problem through the coated elements of the lens then reaches the filter on the way out. The filter does not have the coating that the elements have so the light then reflects back off the filter and on reaching the sensor again produces a ghost image.
It doesn’t mean you will get a double image of the entire photo but try it out by taking a picture containing pinpoints of light (for example the glint of the sun of a shiny surface) and have a look. You will often find the ghost images of these points. If anyone has a UV filter for lens protection then try this out on the same shot with and without the filter.
I want to second Ett Venter’s comment, that UV filters are extraordinarily unlikely to improve picture quality except under very unusual circumstances, and I’d like to add that there is considerable evidence available that no filter will prove more useful in protecting you lens than the lens hood that came with it. Shame on the editor.
The article did not suggest to buy a UV filter for every lens just to improve picture quality it recommended it as a protection for your expensive lenses. I am very careful with my equipment but recently dropped a 17-35 F28 Nikkor worth about $2,000 on the front element of the lens and thank God I had a high-quality UV filter screw down there which then shattered but my lens was not harmed thank goodness for the UV filter! Plus, it does remove some UV scatter
Precious advice !! I recently bought a new DSLR camera and this article will help me a lot. Thanks John for sharing this post.
“Reasons to buy a UV Filter: not just to improve the quality of your photos…”
I’m sorry, I don’t want to be a jerk, but how is content like this allowed to be published? UV filters do NOT improve image quality. If anything, you’re far more likely to have a NEGATIVE impact on image quality, unless you use an expensive, high-quality filter, which STILL won’t improve image quality.
If you’re adamant that UV filters improve image quality, I suggest you back statements like that up with some resources to prove it.
Seriously, PictureCorrect, you’re supposed to be a resource that photographers in the industry can trust. You were when I was just starting out, but articles like this make me questions that.