Black and white photos can be powerful and inspiring, but it’s not always simple. With digital photography it is easy to convert a color photo to black and white, but if you want to get quality black and white images you will need to do more than simply take that RAW file or JPG file straight out of your camera and convert it to black and white.
Lightroom is obviously a popular tool for photographers, and when you’re working in Lightroom, there are several different techniques that you can use for getting quality black and whites. In this article, we’ll look at four approaches and how you can put them into practice.

Oxford Street Sunrise by Dom Crossley
1. Covert to Black and White First Then Make Adjustments
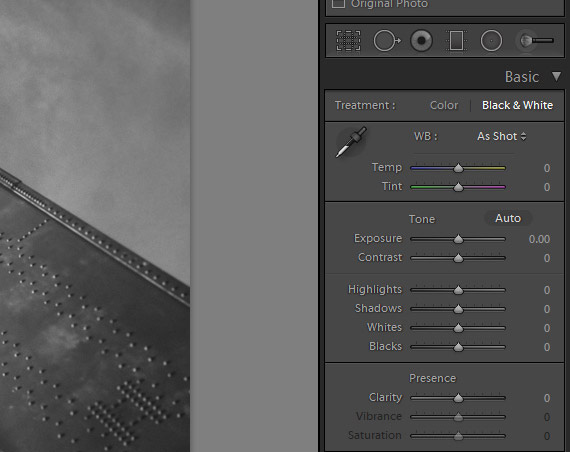
Probably the most common way to work with black and white conversion in Lightroom is to click on Black and White treatment in the Basic section of Lightroom’s Develop module. This will instantly convert the color image to black and white, and you’ll notice that it removes the option to adjust vibrance and saturation since they will not apply to black and white images.
After converting the photo to black and white you can continue to adjust any of the other settings, like exposure, contrast, clarity, the tone curve, etc. By converting the image to black and white first you will be able to see how each of the setting changes will impact the end result.
One of the most helpful tools for black and white conversions in Lightroom is the black and white mix settings. You can find these settings in the HSL / Color / B&W section, just below the tone curve.
These settings give you loads of control over your black and white conversion by allowing you to lighten or darken certain colors in the image. For example, if you move the blue slider all the way to the left it will drastically darken a blue sky (or any other blue object).
And if you were to move the blue slider all the way to the right it would drastically lighten the blue sky.
You can adjust the sliders for any color to get fine control over the look of your image. You can also click the “auto” button to get Lightroom’s best guess at the most effective settings. The auto button will rarely get it perfect, but it can serve as a starting point.
2. Process for Color Then Convert to Black and White
Another approach that sometimes works very well is to process the color image like you normally would, and then as the last step convert it to black and white. Sometimes you will find that effectively processed color photos also make quality black and whites. Settings like contrast, exposure, curves, clarity, and others may work equally well for black and whites as they do for the color version of the photo. This technique will not usually produce as consistently good results as converting the image to black and white first, but if you are going to be processing the color version of the photo anyway it may save some time. If you don’t like the result of converting your finished color photo to black and white you can always make further adjustments after the conversion.
3. Use Presets
Lightroom presets can be an extremely valuable tool for black and white conversions, and for developing in Lightroom in general. Lightroom comes with some black and white presets by default that may help you to get the type of look that you are after.
You can also purchase or download presets from other sites/shops that will add to your collection and allow you to quickly create beautiful black and white conversions.
Keep in mind that presets are a great starting point for your work in Lightroom, but no preset will work perfectly with every photo. You may still need to fine tune the settings after applying the preset. Still, presets can be a great time-saving resource and they can help you to achieve a wide variety of different looks.
4. Use a Plugin
The last technique that we’ll cover in this article is the option to use a plugin that will further enhance your ability to work with black and white images in Lightroom. There are several different plugins that have been created specifically for this purpose. Some of the most popular options include Topaz Black & White Effects ($59), Nik Silver Efex Pro ($149 for the Nik Collection), and Perfect B&W from onOne ($59.95). The plugins will allow you additional controls, options, and presets for working with your images in Lightroom
With these four different techniques as options, getting great black and white photos in Lightroom is very achievable. Find a technique that works best for you and implement it into your workflow when processing black and whites.
Black & White Lightroom Presets Collection:
This set of Lightroom presets takes out the guess work and makes it easy to create beautiful black and white photos. It includes 50 one-click presets that allow you to give your photos a variety of professional black & white tones instantly, and 44 stackable presets.
Found here: Black & White Photography Presets
Like This Article?
Don't Miss The Next One!
Join over 100,000 photographers of all experience levels who receive our free photography tips and articles to stay current:


Leave a Reply