It’s no secret that Lightroom is one of the single most helpful programs for photographers. With the ability to simultaneously organize and alter images, the processor has constantly evolved since its inception to provide the best user experience possible.
Like many of Adobe’s products, Lightroom is full of shortcuts. It would be difficult to discuss every intricacy over the course of a single article or tutorial. But, in this video, Lightroom guru Serge Ramelli discusses the five Lightroom discoveries that have had the greatest impact on his workflow:
1. Use the Brush Tool to Adjust Filters
Have you been taking full advantage of Lightroom’s brush tool? Most users tend to transfer images to Photoshop to apply local edits. What those people don’t realize is that Lightroom can accomplish many of the same tasks. When applying large, encompassing edits or filters, the brush provides some control. Using the erase mode, it’s possible to essentially mask out select adjustments. Selecting the Auto-Mask option can even help with getting around complex edits, making it possible to apply natural-looking improvements.
2. Make the Most of Presets
Presets can potentially save hours of time editing. Simply put, a preset is a predetermined combination of slider adjustments that can be automatically applied to a photograph. You can adjust your shot after applying a preset to make the edits fit your photograph best. As Ramelli mentions, a preset is just a starting point. But with a single click, this tool allows you to get the majority of your initial editing out of the way immediately. Better yet, it’s possible to save hundreds of presets at a time to your computer and keep them at the ready for any scenario that may arise.
3. Dodge and Burn
Dodging and burning isn’t exactly a new technique by any means. Photographers have been utilizing the process since the days of the darkroom. Nevertheless, the majority of Lightroom users don’t take advantage of the program’s capability to selectively lighten or darken specific areas of an image. When done correctly, dodge and burn can totally alter the light and make a photograph pop. If you’re new to the technique, try experimenting with subtle changes using the brush tool as well as the radial circle.
4. Sync Up Settings
If you’re shooting in manual mode, this trick may completely change the way you go about editing large batches of photographs. So long as you’ve got a consistent f-stop and shutter speed throughout a set of images, you can employ Lightroom’s Sync settings feature to dramatically cut your time in post. All there is to it is applying the changes you’d like to a single RAW image. From there, you can make a selection and apply the same changes to a large group of images with just the click of the Sync button. You can even customize which settings you’d like to sync. Even if you just use this feature to get a consistent color correction, it can save countless hours of adjusting.
5. Build Panoramas
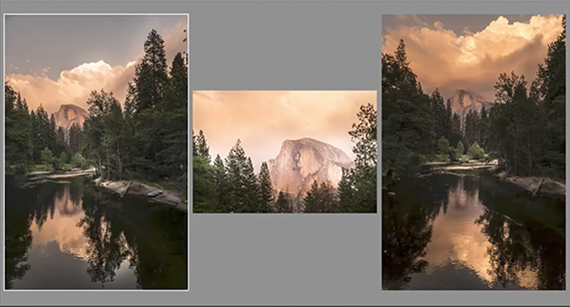
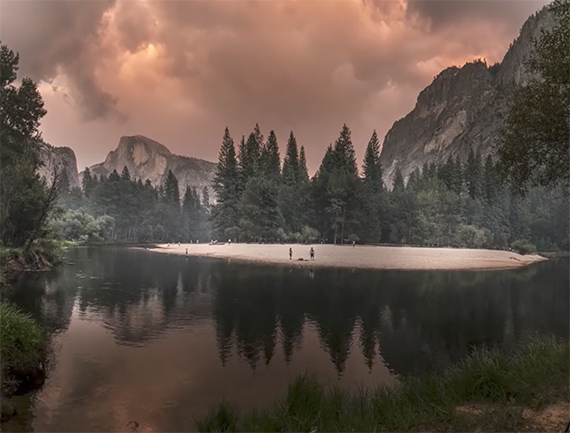
Who doesn’t love a good panorama? Creating one in Lightroom is as easy as selecting your desired images, right-clicking, and selecting the Photo Merge option. Panoramas help minimize the distortion that comes with using a wide angle lens. With Lightroom, you can further enhance your shot with the Boundary warp slider. Better yet, even after stitching, you retain the RAW file, allowing users to make global edits to the entire composition rather than making individual adjustments piece by piece.
“I’ve been using Lightroom for many, many years, and really, these are the five things that I love the most about Lightroom.”
Like This Article?
Don't Miss The Next One!
Join over 100,000 photographers of all experience levels who receive our free photography tips and articles to stay current:





I loved this article. Just traveled and took over 900 exciting moments. Now to edit. With so many links for lightroom (I’m a newbie), please send me a link. Thanks.