Many photographers feel that taking photos of neon signs is tricky and calls for expertise and thus they try to avoid it altogether. But with the right photography techniques, exquisitely beautiful shots of neon signs are possible.

Photo by Steve Harvey
Time of Day
As a first step, you must select the best time to take a photo of neon signs. If your intention is to confine your focus only on the sign, you can take the photo at any time of your choice. But, if you plan taking a photo that also covers the surroundings, the ideal time to take the photo is either 15 minutes before dawn or 10 minutes after sunset. This is called the blue hour. It’s dark enough to allow the neon tubes to show up well, and there’s also adequate light to see the surroundings.
Flash
Override the automatic flash feature of your camera by following the instructions in the user manual. You can use your camera’s internal light meter, and the matrix meter function is best for this. If your camera has a spot meter feature, then you can meter over a wide range of the photographic area, including the lightest and darkest areas.
Camera Stabilization
Place your camera on a tripod to shoot. A tripod lends stability to the camera and helps eliminate the blurriness that may occur if you hold the camera by hand. You can also further minimize the blurriness by using a remote shutter release.
ISO
Set your ISO to 100 if using a digital camera, and if it is a film camera, you can select a corresponding film ISO.
White Balance
Adjust the white balance of your digital camera for the ambient light, and if you balance your camera for daylight, the image will depict a pleasing warm glow. Further, a tungsten balance will make the sky appear more bluish.
If you’re using a film camera, it has to be balanced for daylight photography. You can buy film that is balanced for tungsten or fluorescent and then obtain the same effects by using filters.
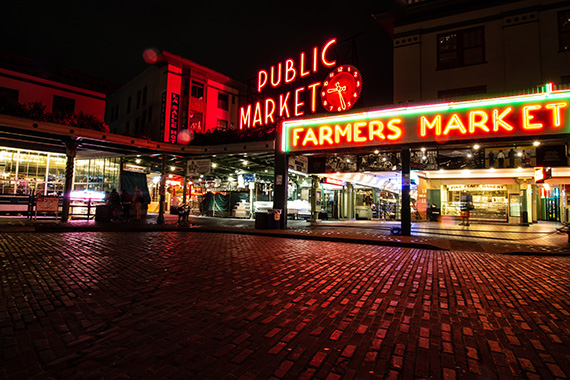
Photo by Ryan Stone
Basic Tips for Photographing Neon Signs
For those who wish to take crisp and clear photographs of neon signs at night, the following tips should be of help.
- Get as near to the sign as you possibly can.
- Open up your aperture to its fullest extent. The aperture is your f-stop and it is measured with numbers—2.8, 4.0, 5.6, 8.0, etc. Keep this number as low as you can.
- Do not go below 1/100 of a second on your shutter speed.
- Never use flash, as it will only lighten the background and spoil the overall effect.
The tricky issue about shooting neon is you are shooting light. As a camera functions by recording light, it is almost certain to capture a neon sign, even if the sky around the sign is utterly black.
It may be worthwhile to study how some eminent photographers have captured images of neon signs, as that will serve as an inspiration for you. You can have a look at Thomas Hawk, Devil Doll, and Tom Spaulding, among others.
About the Author
This article was written by John Peter.
Like This Article?
Don't Miss The Next One!
Join over 100,000 photographers of all experience levels who receive our free photography tips and articles to stay current:



I’m looking forward to trying some of this for my site. Cheers!
Thanks, we’ve had to do some product shots for our neon signs and it was a pain getting it to look professional.
Thanks for the great tips. I have been to New York recently and I’ve had some serious problems with taking quality photos of streets that consisted basically only from neons. It was nearly impossible. Next time I hit neon streets again, I’ll hopefully succeed.
nice tips, but, do you have more tips about taking picture with compact camera by result like pro..?
off to HK soon, looking forward to trying this out….