To the uninitiated, the idiot mode functions on their newly acquired DSLR camera could be viewed as a real feature that will transform their photography. The idiot modes are the little face, landscape scene, runner, or flower on the mode dial on a camera. If you really aren’t going anywhere in your photography then they will assist in shooting average photos. My advice though, is to take a black permanent marker and blot them out. They are not going to help you as you learn photography.
The nice thing about pro cameras is that these options have been removed, and there are no longer these choices. So you’re forced to use the creative modes of Aperture Priority, Shutter Priority, and Manual. The reason to use these modes is answered in the following points.

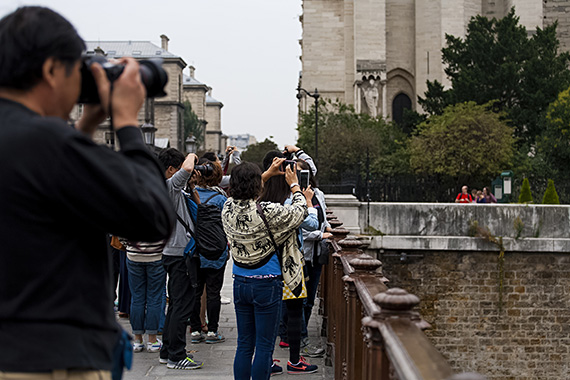
Photo by Daniele D’Andreti
1. Aperture Value (A or Av on most cameras)
By choosing aperture value you get control of—you guessed it—your aperture. You choose the aperture and the camera gets to choose the shutter speed. This gives you complete control of depth of field, (i.e. how much of the photo is in focus in front of and behind the subject you are focusing on). You can blur out the background or have a sharply focused landscape from foreground to the background. You have control of the size of the aperture, which controls depth of field and the amount of light allowed through the lens. Now the problem you’ll experience when controlling the aperture is that the camera has no idea of fast movement in the scene. So it will choose a shutter speed that doesn’t necessarily achieve the effect you intended. So what do you do? Look at point 2.
2. Time Value or Shutter Priority (S or Tv on most cameras)
The problem you have experienced needs to be corrected by choosing the shutter speed and allowing the camera to select the aperture. You might want the action blurred, so a slower shutter speed is selected, or perhaps you want the action or movement frozen and in sharp focus so a fast shutter speed is selected. All nice and simple and for most of the time a really creative shot.
Now another issue raises its head. What happens when you want to select both the aperture and the shutter speed? Say, a frozen movement with a shallow depth of field? You can’t rely on the camera to get it right, so what do you do? Look at point 3.
3. Manual Mode (M on most cameras)
A whole chapter can be written on manual mode, but the bottom line is that it gives you the control you need over all aspects of the image. The camera meter will give you a recommended shutter speed and aperture, but you may want a slightly different effect, so, choose the aperture and shutter speed you require. But, by doing this there might not be enough light and you are left with a dilemma: a bad exposure.
That’s where the exposure triangle comes to your rescue. The third element of exposure after aperture and shutter speed is ISO. By increasing the ISO level you will make the sensor more sensitive to light thereby adding the necessary light to the image and allowing you to use the aperture and shutter speed of your choosing.
I just want to stress that this is a very simplified look at taking control of the creative controls of your camera. As you learn digital photography, take time to explore and experiment with each of these controls. Once you master them you will never shoot on automatic again. The freedom it gives you to create the perfectly exposed image will change you forever. Happy shooting!
About the Author:
Wayne Turner has been teaching photography for 25 years and has written three books on photography. He has produced 21 Steps to Perfect Photos; a program of learner-based training using outcomes based education.
Like This Article?
Don't Miss The Next One!
Join over 100,000 photographers of all experience levels who receive our free photography tips and articles to stay current:


I found this really useful, i shoot only in AV and TV modes currently but will take a while to get onto fully manual mode. Need some more practice! Thanks…
nice tips thanks…
First off all, thanks for not only this article, but the whole series which i find very inspiring in my journey towards one day – hopefully – to become a photographer.
And I have to agree that using especially M but also on occasion AV and TV (Canon) and right now my favourite B (Bulb) for shooting in the blue hour – have changed my pictures, and my skills as an amateur photographer.
That been said, I also have to confess, that whenever my camera is in standby mode, it’s always set on “the idiot runner”, because, I hate when I walk around with my camera on my shoulder, and something really nice – motive wise – appears in front of me, before I get my camera adjusted, birds have flown, storms have passed, vulcanoes died out, or whatever, so therefore, YES I agree, do always use the creative settings to improve, but why totally discard helpful options when somebody gives you the opportunity – I for one is glad that they are there.
check out my loveswans at flickr, I would have never captured them, if it wasn’t for idiot settings of my camera.
Looking forward to more inspiring articles, and again – thanks a lot.
:-) Ivan
I disagree about never using the “idiot” modes. While I am not a professional, I do shoot in Manual 98% of the time. I will use either Aperture or Shutter priority mode when I am shooting on the fly–when I don’t have a ton of time to make camera adjustments. I will also use those modes when I want to either stress depth of field (A mode) or slow down my shutter speed (as in taking photos of waterfalls). I mostly shoot in Manual mode, but I have not forsaken A and S, when it suits my purposes.
Very nice article..
Thanks a lot.