Are you looking for some interesting and out of the ordinary project ideas for your close up or macro photography? Want to break away from the usual flowers, leaves, plants, and mushrooms? Tired of bugs, butterflies, and spiders? All of those can make great close up subjects, but certainly not unique ones. Here are a few macro photography project ideas that may inspire your creativity:
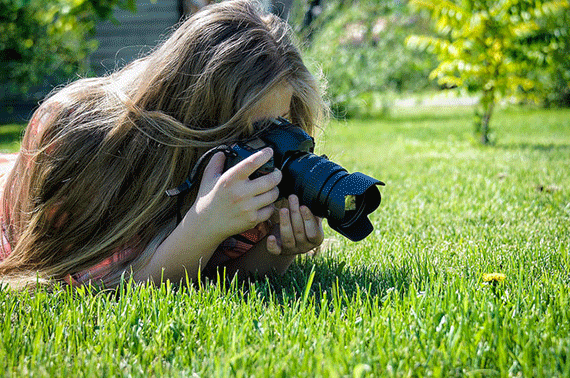
Photo by begemot_dn; ISO 400, f/4.8, 1/640-second exposure.
1. Cutlery. Knives, forks, and spoons can make great macro subjects. Arrange like pieces together to create lines and patterns.
2. Feathers. Feathers are beautiful close up. The central shaft creates a strong line which may be curved or straight, while the rest of the feather provides a soft texture. Use bird feathers that you find or purchase, or pluck one out of your down pillow or duvet!
3. Water droplets. This one is a classic, but be creative, and find your water on unusual surfaces like a wire fence, a cobweb, or a rear-view mirror. Early morning dew makes almost any subject magical. In the spring or fall, your can look for frost instead of dew.
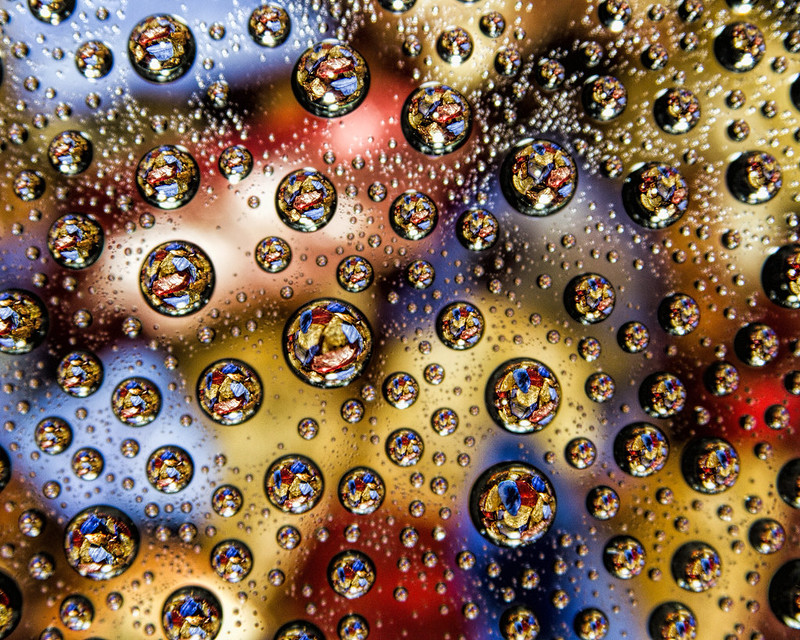
photo captured by Ken
4. Glass. Close up photos of fine crystal glassware can yield wonderful abstracts filled with curved lines and reflections. For added fun, place glasses side by side, or one behind the other to create lines where they overlap. You can fill the glasses with colored water for even more creative images. Finally, you can add a sheet of clear, but textured glass (available for purchase at stained glass craft stores) in front of your glassware. The possibilities are endless.
5. Foil reflections. While you have your glasses full of colored water, why not pull out a sheet of kitchen foil or some shiny silver craft paper? Use your macro lens to shoot down into the foil and capture the reflections of the colored water in its folds and creases. This exercise is a tricky one and requires patience, but the results can be very rewarding.
6. Fruit and vegetables. They’re not just good for your diet! Fruit and vegetables make great macro photography subjects. Try kernels of corn on the cob, citrus slices, or go for more exotic fare like dragon fruit. You can place translucent slices on a lightbox for a clean, bright white background. You can also photograph the fruit or vegetables on plates in complementary colors.
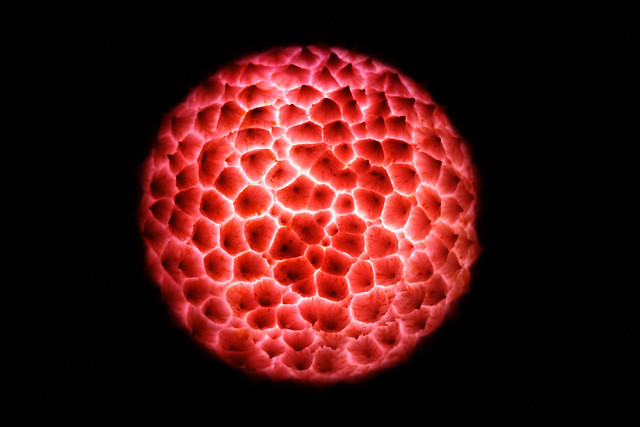
“La Terre magmatique” captured by Didier
7. Rust and peeling paint. Fascinating rust patterns can be found on an old car, or even a metal garbage can in the park. Peeling paint graces old fences and walls. Most people pass by such items without a second glance. Not you! Break out your macro lens, and reveal the hidden beauty. Just beware of harsh shadows if you’re photographing in bright sunlight.
8. Car details. The sleek lines of shiny chrome and trim on a polished car can provide hours of photographic entertainment. You can photograph your own car, but don’t be shy about taking your camera to an antique car show. Car owners are usually proud of their vehicles and won’t mind you photographing the details.
9. Animal bits. The texture of fur on your dog or the wrinkled skin of an elephant at the zoo can make a great close up shot. Paws, claws and teeth are fun, too, as long as you keep out of harm’s way. Finally, eyes always make compelling subjects. Shoot close ups of the eyes of your dog or cat (or a person!).
10. Tissues. For some high key abstracts, and a really unusual subject, try photographing a tissue. With a little imagination, the lines and shadows formed by the soft folds can create some intriguing images.
For a bonus, take a fresh look at ordinary objects around your home, such as light bulbs, shoe laces, book pages, clothes pegs, straws, holiday ornaments, or pencils. Try to find interesting patterns, lines, shapes, and colors, and create a little close up magic.
I hope these ideas inspire you to get out there with your macro lens and start shooting!
About the Author:
Julie Waterhouse writes for Ultimate Photo Tips, which provides friendly education and encouragement for photo enthusiasts around the world. It’s presented in a way that’s clear, organized, and easy to understand (ultimate-photo-tips.com), whether you’re looking for the answer to a specific question or just want to explore and learn.
Like This Article?
Don't Miss The Next One!
Join over 100,000 photographers of all experience levels who receive our free photography tips and articles to stay current:




Great tips – thanks so much for sharing.
For the liquid on glass image – any special glass treatment, or non-water liquid? The drops seem especially round and deep. Thanks.
I just met a photographer from Sydney who has got into Marcro. He uses a 1.8 Canoon 50mm prime, along with extension tubes. He captures small insects – spiders, ants, etc. He also uses a home-made snoot to direct the internal flash light to the subject. The end result looks like a creature fro a Sci-fi movie – stunning.
Boy am I glad to see that I am not alone on the subject of macro photography. I’m not sure if it’s approiate to ask for suggestions here or not but what’s the worst that could happen,not get posted. Anyway here’s my question. I’ve tried several times to capture rain drops on various foliage without any really good results. I’ve tried every angel conceavable and I’ve even tried using indirect off camera bounce flash without any luck. What am I not doing? The pictures are just so-so.
Try Focus stacking – multiple layers of focus of the same photo
I’m a sucker for #7. 30 years ago one of my first forays into macro involved a basket of very weathered clothes pins and b&w film. A couple of those old shots remain favorites. I’ve taken hundreds of pictures of textiles for a friend who is writing a reference resource on the subject, and not a few of those are quite fascinating and beautiful (plus there is something to be said for shooting indoors instead of kneeling on rocks or lying in wet grass!) I second @JP on the electronics too.
Glad you enjoyed my article! I just love shooting macro. I can add one more idea that I’ve recently discovered. I had been shooting coloured water reflected in foil, as mentioned above. Sometimes, I would add water droplets on the foil to add interest. I found that the droplets wouldn’t always stay where I wanted them, and their shape was usually the same: round and uniform. So — try honey! If you drizzle some honey in an interesting pattern onto the foil, it’s loads of fun to photograph — you don’t even need the coloured water any more. The honey takes on and holds interesting shapes, and has its own (slight) colour and texture. Happy shooting! :)
My fave is flowers, especially with bees on them. I only have the macro filters, but with a little learning curve they work fine for now until I an afford an actual macro lens.
After reading this, I want to go back out with my camera! Thanks :)
Macro photography is my newly found passion. I have always hated taking “people” pictures,they do nothing for me but when you’re the guy with fancy looking camera/lens combination at the popular people gathering events you’re almost doomed to take the obligatory pictures. But macro is where my heart is and when I look through the view finder or screen I discover a whole new world to capture. If there is a down side It would be the necessity for some special equipment but you show me one photographer that isn’t ready for more new gadgets or lenses I’ll show you fifty that are. I use a Canon 5D MK II and my preferred macro lens is Canon’s EF 100 f2.8 IS USM. I use a Novoflex Castel – XL focusing rail which is mounted on a Manfrotto 488RC0 ball head and a Manfrotto 055MF4 magfiber tripod. Once I became familiar with the equipment the results where nothing short of amazing. Another great thing about macro photography is that you don’t have to leave your house or your back yard to find truly interesting subjects. Now I’ve inspired myself so I’m going outside a shoot some macro pictures of newly fallen rain droplets as suggested here in the terrific article.
Don, I hear you on the obligatory picture taking, which is why I (nearly) never take any of my “real” cameras to a social gathering, particularly family. Mother’s pink Olympus point+shoot suffices just fine and nobody expects me to be the photographer. I see Canon makes a tripod mount ring for your lens – if you don’t already have it, get it, it’ll make the landscape/portrait transition completely painless.
I can add a few as well, as macro photography is something I’m really interesting in trying:
– Electronics (boards, connectors, transistors, etc)
– Hot wheels (for a mini car show)
– Beach sand and corals
– Boats, yachts, etc (you can get close to all of those shiny, polished surfaces
Thanks for the article, definitely feel inspired.
Don M:
One of your posts (the one where you list your equipment and say your results are “nothing short of amazing”) would lead me to believe you know how to use your equipment, so please don’t be offended by what what follows. Your second post lists your Macro shots as “just so-so” and I’m consequently confused. It’s hard to offer tips without knowing what’s missing.
Water droplets, especially on plants, are one of my favorite subjects for Macro shots. I also really like frost, weathered wood, and metallic objects. I was bit by the Macro bug when I got my Nikon L18 point & shoot and started playing with the Macro mode. I now have a Nikon dSLR & several lenses. My favorite lens is my Macro!
I’ve never really had a “bad” Macro shot as long as what I wanted to be in focus was in focus. By “just so-so” what do you mean? Low contrast? No sparkling highlights? Focus problems? I’m afraid your question is far too general to offer accurate solutions. I could give general Macro tips though. Some basic and general things I try to do for my Macro shots are
1. Focus. Keep your aperture as small as you can to increase your depth of field IF you are having problems with focus. If you’re having problems with distracting backgrounds keep your aperture as large as you can while retaining enough depth of field to keep your intended subject in focus. This is pretty basic but I thought I’d call attention to it, just in case. Composition is very important to all photography but especially in the unique world of Macro. Something I’ve noticed with my Macro lens is as long as I keep my shutter speed at or above 1/200s the image is super-sharp. Personally, I have issues with pushing too hard on the shutter release, causing camera shake. Generally speaking you want to keep your shutter speed at least as high as your focal length for best results. Also, if it’s windy, it seems to help a little to use continuous auto-focus mode.
2. Exposure. If you’re getting lackluster contrast try underexposing or overexposing by maybe .3 to .7 EV. I almost always shoot in RAW+JPG and get good results by underexposing slightly. If it is good other than exposure it’s easy to fix in RAW editing as long as nothing clipped (“blown” highlights, for example). Different cameras are different and your results may vary. Experiment; it’s easy with a dSLR. That is one huge advantage that digital has over film.
3. Contrast. Macro lighting can be tricky but I always use natural light if I’m outside. Overcast days will, of course, not always yield high-contrast exposures. Are you shooting in, say, the shade of a house? I have found flash to be almost useless for Macro shots but you might get better results than I have so far. I don’t have a cool ring-light flash and I imagine that might help. Sometimes. Maybe. It might pay to just sit in one place and watch the light, taking shots of your subject as the light changes naturally. Or you could set up a bounce-card. There are many options and possibilities for lighting.
4. This just hit me and please don’t be offended but is your lens clean? I recommend actual lens-cleaning fluid and a NEW or carefully hand-washed 3M microfiber towel. Be careful with dust though! This has served me far better than the lens-cleaning towelettes which seem to just spread stuff around. If you have a filter on it, take it off. Especially if it’s a cheap filter. There is a lot of debate and very good points on both sides of the filter issue. Personally, the only filter I use is a good, optical glass Circular Polarizer for landscapes. I used to put cheap UV filters on all my lenses. I’ve never yet bumped them into anything so I took them all off. My results have improved. Having said that, if you tend to bump into things while shooting Macro (which is easier to do for obvious reasons) then maybe put one on. But I advise against using a cheap one.
5. Take time to wait for a good shot. Don’t rush things.
That’s about all I can think of that might help without knowing what you’re after. It would also help if I could see an example of what you consider a “so-so” shot. Good luck!
Thank you for sharing this article.. One of the best tips
Thanks for the article,comments and tips, time to go practice!