To better understand what aperture is, we must first know how a camera works. Your camera is essentially a light-capturing device; light gets bounced off an object and is reflected into the camera. Light-sensitive materials in the camera then pick it up and save it either as a digital image (JPEG, RAW) or onto traditional film.
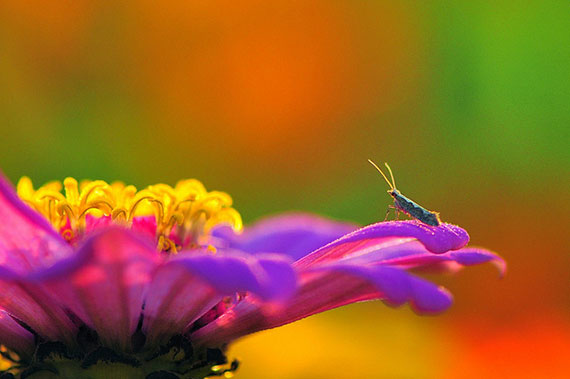
Photo by lwtt93
Size of the Aperture
The aperture of a camera works just like the iris of your eye. It controls the amount of light entering your camera; the bigger the hole, the greater amount of light, and as it gets smaller, less light comes through.
To change the size of the aperture, switch your camera to aperture priority mode. This is indicated by either Av (for Canon cameras), or simply A (for Nikon and Sony users). When you switch into this mode, it just means that your camera goes into semi-automatic. You select the size you want, and your clever camera does the rest.
Depending on your camera, as you turn the dial or push the left-right buttons, notice that the f-number changes as well. This f-number indicates the size of the aperture you’ll be using. The bigger the f-number (e.g. f/16), the smaller the hole, the smaller the number is (e.g. f/1.8), the bigger the hole.
Note: The smallest and largest f-number can vary depending on the lens you have on your camera. It can go from f/1 all the way to f/22.
Take a bit of time to let this sink in as it works inversely on how we think about numbers and size, but with practice it will be second nature to you.
So what does this change of size do?
As it turns out, the size of this hole–aperture–also affects the amount of focus you can have with your pictures.
This amount of focus is called depth of field. When you have just the subject in focus and the background blurred out, you have a shallow depth of field. When both the subject and the background are in focus, it’s called a deep depth of field.
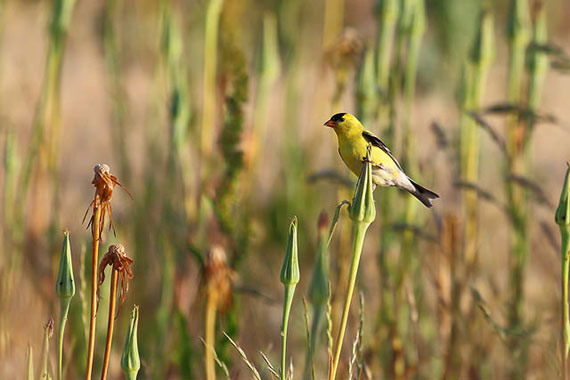
Photo by Don McCullough; ISO 800, f/7.1, 1/1600-second exposure.
Exercise: Controlling Depth of Field
The best way to learn a new concept is by trying it out first-hand. So grab your camera and put into practice what we have learned so far.
Tools needed:
- A camera, preferably a DSLR
- Your subject (a few pencils, for example)
- Optional: a tripod, or mini-tripod
Setup
By default, your camera will look at the scene and try to determine where to focus. As we want control over where to focus on, we need to change some settings. We want to tell the camera where to focus, rather then let it choose for us.
Go to your camera settings, and change the AF point to the one in the center.
- Set your camera to aperture priority mode, and dial to the smallest f-number you can get (e.g. f/2.8).
- Focus on the pencil nearest to you by half-pressing the shutter button.
- Once it’s in focused, press down fully to take the picture.
- Next, without shifting your camera around much–this is where the mini-tripod comes in handy—increase the f-number to f/8. Focus on the same pencil and take the picture.
- Lastly, dial to f/16 and take your picture.
- Load all three images onto your computer.
Notice how in the first image, the pencil you’ve focused on is sharp, but the pencils behind it are blurred out. Look at the second and third image. Notice how the pencils behind the first one become sharper as we increase the f-number (f/4 -> f/8- > f/16).
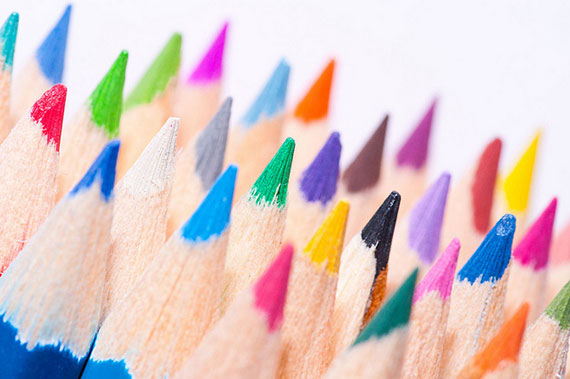
Photo by D McG; ISO 800, f/8.0, 1/180-second exposure.
If you’ve followed our exercise, congratulations! You’ve just moved out of the automatic mode and started to gain more control over your photographs.
Summary
- Aperture controls the amount of light coming into your camera.
- The smaller the f-number, the bigger the “hole,” the bigger the f-number, the smaller the hole.
- Varying the size also controls the depth of field, which is the amount of focus we can have in our pictures.
Taking better images starts with taking control over your camera. Learning what aperture is and how it can improve your photography is a good start. But nothing beats taking what you’ve learned and applying it.
About the Author:
Alan Clarke from audiliew dot sg is a web designer living in Singapore.
Like This Article?
Don't Miss The Next One!
Join over 100,000 photographers of all experience levels who receive our free photography tips and articles to stay current:



Leave a Reply