White balance (WB) is really important for accurate re-production of colors in a photo. If WB settings are not properly tuned in your digital camera, you may find your final shot to be colored slightly in hues of blue, orange, or yellow. Not a good thing.
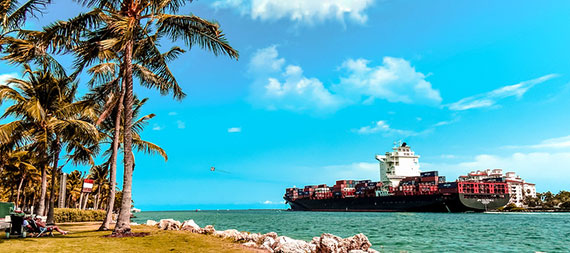
Photo by Aglez the city guy ☺; ISO 80, f/3.5, 1/1000-second exposure.
In this article, we’ll look at three important aspects of white balance that you need to understand in order to make better use of it in your photography.
1. What is White Balance?
Let’s start with the definition of white balance. If you’ve taken photos on your camera, you’ll notice that sometimes the pictures come out with a hue of colors—usually blue or yellow. This is particularly the case when photographing indoors. As human beings, our eyes are able to adjust to changes in light source. However, cameras don’t have that eye and can’t always recognize different light sources and adjust accordingly.
Hence, many digital cameras come with WB settings—tungsten, fluorescent, shade, and so forth—to offset the color hues and make the photo colors look “correct.” These usually come in preset modes. You can also manually adjust WB settings if you wish.
2. Preset WB Settings
Let’s look at some of the standard WB settings used in digital cameras. The default WB setting used is the Auto mode. In this mode, the camera will auto adjust for any color hue that is introduced into the photo. It may not always work, but it’s a good “fire-and-forget” mode.
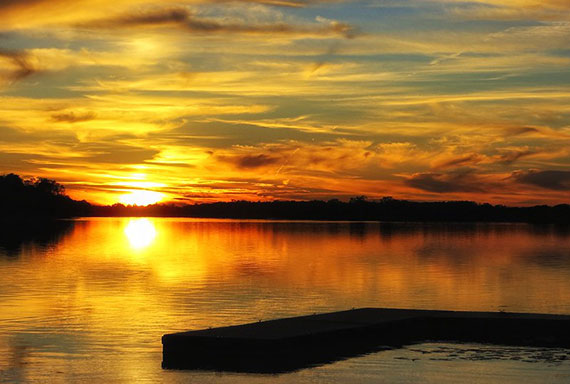
Photo by Chris Sorge; ISO 160, f/5.0, 1/800-second exposure.
Another common setting is that of a Sunset mode. If you’re bathed in the light of dusk, when taking a photo, the colors may look too yellowish. The Sunset WB setting offsets this so that the color is re-produced accurately in the final shot.
The Tungsten mode is used when you’re under tungsten light bulbs. If your subject looks like he or she is too illuminated by light bulbs, switch on the “Tungsten mode” in your WB settings to calibrate the camera.
Other modes include the Flash mode, which corrects for the harshness of flash indoors, as well as Cloudy mode, which compensates for dark, cloudy sky colors.
3. Manual WB Adjustment
If you’re a more advanced user, you should consider doing the WB calibration manually. These kind of settings are usually available on higher end cameras like DSLRs. Here’s what I typically do. I hold up a piece of thick white paper and point the camera at it. This allows the camera to know what “white” really is, then I base the WB settings against that. Whenever I do this, I find I hardly run into any coloration issues in my final pictures. Try it and see how it works for you. (Note: If you use a white piece of paper you’ll have to use manual exposure or exposure compensation to let your camera know it’s white. For a simpler solution, you can use a gray card to set white balance.)

Photo by Hans Leatherman
In summary, white balance is an important but often ignored aspect of photography. All photographers, novice or expert, should apply WB concepts in their photography so as to snap better photos. Now that you understand what white balance is, make sure you adjust those settings before you run out and take photos. With practice, you’ll be able to calibrate your camera to the right level and offset any coloration issues in your photos. Good luck!
About the Author:
Gary Hendricks runs a hobby site on digital photography. Visit his website at Basic-Digital-Photography.com for tips and tricks on buying digital cameras, as well as shooting great photos.
Helpful video on Understanding White Balance:
The video discusses how different sources of light affect the colors of your photographs. Mark Wallace explains color temperature and white balance, and demonstrates how you can get the most accurate color in your images.
Like This Article?
Don't Miss The Next One!
Join over 100,000 photographers of all experience levels who receive our free photography tips and articles to stay current:


Step #1 : forget this article
Step #2 : shoot RAW
@Al — yes it is very blown out. I opened it in GIMP to see if it could be salvaged and had no positive outcomes. It is just too blown out to save as a JPG. Maybe a RAW file could be worked on but I even doubt that. The funny part of showing that image is that I suspect by the background that it was taken on a cloudy day or the sky would have some blue to it.. Yet they used brightening to overcome the darkness rather than a white balance adjustment to start off!!!! This image cannot even be justified as “high key” since the subject is equally blown out as the surrounding background. In high key photos the subject is properly exposed with the background deliberately blown out.
Isn’t the photo under #3 a little blown out in the trees? I would expect the sky to be blue, not white? In an article about white balance and quality photos, I’m a little surprised that this photo was chosen.??
By the way, white balance can be adjusted in post processing. I found a plug-in for GIMP from FX-Foundry that allows you to adjust a JPG file by degrees Kelvin. It is tricky to use until you learn which way and how much to adjust any certain photo, but after a while you can tell by just looking at the image. If you shoot in RAW you always have the option to adjust to several presets or by degree Kelvin as well. However it is nice to get it in camera if possible.
I am sorry to correct you here, but you don’t want to use a white card to set “white balance” DSLRs set the white balance by using an 18% neutral grey card in front of the lens. The metering systems use neutral grey to adjust and if none is present in the scene when focusing and metering are done, it “guesses” what might be neutral grey equivalent which it gets wrong sometimes. There are tons of posts that are accurate, but the best way is to consult your camera’s manual on how to set this using a grey card.