Flower photography is one of the most stunning aspects to photography. Not only are flowers abundant, but they are the personification of beauty. It’s painless to capture a stunning flower photo, although every now and then we come across a predicament.
In order to capture delightful flower photos we first have got to be able to have a target in mind. This means we must know what the outcome might look like. In other words we must have an idea in our minds eye about kind of photo we want to create. A cool way to do that is to have a checklist.

Repair photos in Lightroom
On your checklist ought to be methods that assist to create beautifully clear flower photos. At the top of your list should be what light to shoot in. (More on this in a jiffy). Also, it is a good idea to have a sturdy tripod so your camera is kept as motionless as possible. The tripod permits for sharp photos. Thirdly, shoot RAW rather than JPEG. When you shoot in RAW you produce the finest quality in your shooting and the photograph will stay in good quality for many years.
Photography is all about getting the right lighting for your flower photo, and given that your flowers are outside, you need to read the lighting carefully. If you shoot in brilliant sun you can possibly overexpose the photo. Alternatively you can retain too much shadow within your shot. Both of these aspects can absolutely ruin your flower photo.
Once in a while we capture a flower that is resting right in bright sunlight. We may not possess control over the lighting or the flowers position. (Taking pictures in the botanical gardens is an illustration.) If your flower is a cream color, light yellow or soft pink, then too much bright light can overexpose several or every single one of the flowers petals. When we have too much luminosity on our flowers, the flower loses finer details as a result of this saturation.
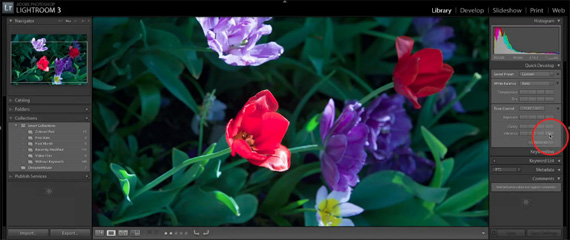
What can be done about this? Go into Lightroom. Lightroom is owned by Adobe who also created Photoshop. Lightroom is an alternative photo editing program. I find it the greatest photo editing program I have ever come across. You can trial it free for thirty days at Adobe’s website.
Lightroom has a panel made of various controls. These controls are in the shape of sliders you can move from either side- left to right.. Each of these sliders controls various elements of light. The “Highlights” slider increases or lessens the amount of stark, bright light in your photo. “Exposure” controls the amount of bright and darkness the photo has (literally controls the exposure of the image). “Whites” is a control that alters how illuminant your white areas are in the photo.
In the case of an flower that has too much exposure, we want to examine these three various controls. If you want to reduce any of these elements of the photo all you have to do is reposition the slider toward the left. Your flower photo will look less stark and have a lesser amount of harsh, intense brightness light within it.
How about increasing the sharpness in your flower photo? Lightroom has a little panel known as “Detail”. Once you open this small panel you will then see 4 sliders that manipulate sharpening of the photo:
- Amount
- Radius
- Detail
- Masking
All these four sliders manipulate how sharp your flower photo is. The effective way is to reposition the sliders to the right hand side until you see the image has increased in sharpness to an acceptable amount. “Amount” means how much sharpening you increase as a result of moving the slider. “Radius” relates to how big the area of sharpening is. “Detail” refers to how much detail you want the increase in the sharpening to have. “Masking” merely removes sharpening over the regions that doesn’t really need as much sharpening. Areas of deep black and deep navy blue would be an example.
Would you be interested to see how I have done this myself in Lightroom? Now you can I have done a video that you can observe at Digital Photography Secrets that teaches how to complete this process from start to finish.
In order to take begin photographing take lovely flower photos it is ideal to photograph in gentle light (from an overcast day), and employ a sturdy tripod to keep the camera immobile. Even if you make use of the auto setting on your camera, it doesn’t matter too much. The significant thing is that good lighting will give you the most excellent results.
About the Author:
Amy Renfrey writes for DigitalPhotographySuccess.com. She is a professional photographer and photography teacher. She shows you how to take the most breathtaking, brilliant and incredibly stunning photos every single time you press the shutter button, even if you know nothing about photography and have never used a digital camera before.
Like This Article?
Don't Miss The Next One!
Join over 100,000 photographers of all experience levels who receive our free photography tips and articles to stay current:


Alternatively get the exposure right when taking the shot. There’s no excuse with digital especially when you are locked down on a tripod with all the time in the world.
Learn to use the histogram on the camera before trying to ‘fix’ the image in Lightroom. That’s just a fix for sloppy photographic technique.