Any photographer who does team and individual photos frequently runs into a situation when some players in a team photo have their eyes closed. While taking multiple photos usually prevents the need to do advanced editing in Photoshop, sometimes it doesn’t work out that way. Here is a simple way to use Layer Masks in Photoshop to solve this dilemma. The beauty of this technique is that it works great for any group photo, including family and wedding photography.
This is a quick and easy tip that will work wonders for your photography. We’re going to combine two images using a layer mask and the Brush tool. While we’re using Photoshop CS6 in this tutorial most of the features are available in earlier versions of Photoshop.
A Few Pointers
I’ve mentioned this in previous articles but it’s worth repeating because it’s a huge time saver. One of the best time saving tools in Photoshop is the use of keyboard shortcuts. You can find a full list of the keyboard shortcuts available in Photoshop or use the keyboard shortcut “Alt+Shift+Ctrl+k” in Photoshop. It’s important to note that all of the keyboard shortcuts I reference here are for PC. Rather than give you two options for every shortcut, just follow this rule: if you’re using a Mac, just swap “Control” for “Command” and “Alt” for “Option”.
As always, I recommend saving your work often. Simply pressing “Control+S” after making changes will save you a lot of headache if Photoshop crashes. If you don’t have a powerful system this can happen from time to time.
Combining the Photos
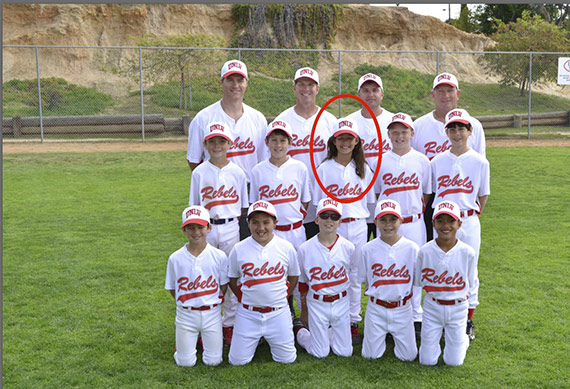
We need to place the “eyes closed” image on top of the “eyes open” image as a new layer. This can be done by simply dragging the layer from one image to the other. However, if you use the Photoshop default that opens your documents as tabs, this isn’t as easy. A quick trick on how to move a layer to another Photoshop document is to use the Duplicate Layer command. To do this, click on the Layer drop down menu and select Duplicate Layer. This will bring up the Duplicate Layer dialog box as seen in Figure 3. In this case we want to change the destination to our other image. Simply select that image in the drop down menu and click OK.
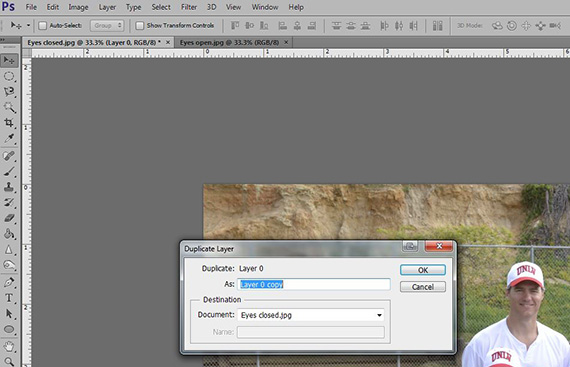
Duplicating The Layer To A New Document
Aligning the Layers
Now that we have our “eyes closed” image on top of the “eyes open” version, we need to align the layers so her eyes line up properly. In some cases this can be done using the Align tool, but if the images were not taken at the identical focal length this may not work. In this case it is easier to just do it manually by adjusting the opacity of the top layer. With the top layer selected press “V” to select your direct selection tool. Now press 5 to adjust the opacity to 50 percent. You can do this manually by adjusting the opacity in the Layers Panel as well. The result is going to look a little weird at first but use your arrow keys on your keyboard to nudge the top layer around until it lines up nicely over the person to whom you are making the changes. As you can see in the photo below, the girl is lined up properly even though the rest of the team isn’t Remember, we are only making changes to her so the rest of the team doesn’t matter here. Now that they are aligned, press “0” to set the opacity back to 100 percent.
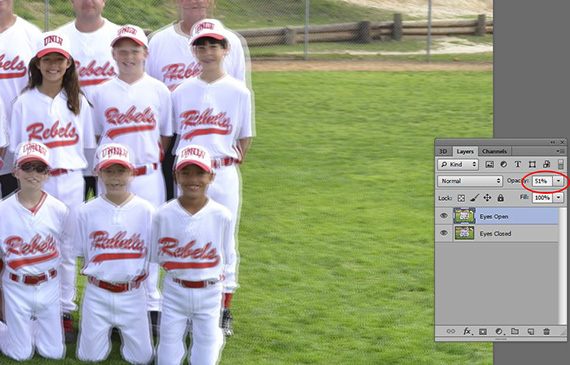
Aligning The Layers
Using Layer Masks
Layer Masks can be a little intimidating at first but once you get the hang of it you will wonder how you ever lived without it. When we use a Layer Mask we are not changing the actual image, which is why it’s called “non-destructive editing”. In this scenario, if you used the Eraser tool, we would be making permanent changes to the layer—we can avoid that by masking. The most important thing to remember with masking is that white reveals and black conceals. Before you add the layer mask you need to make sure that the layer you’re adding it to is selected in the Layers Panel. The selected layer will be highlighted in blue. Here I can see that my top layer is selected so I’m ready to add the mask to it. In the Layers Panel, click the Create New Layer Mask icon as shown in the image below.
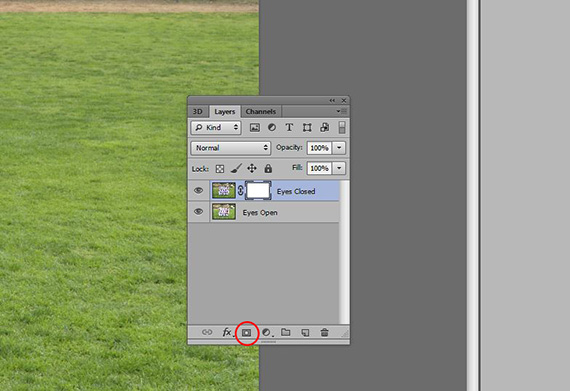
Create New Layer Mask
By default, layer masks are added as white, meaning whatever they are masking is 100 percent visible, so you won’t see a change in your image when you add the mask; however, you will see a white layer mask thumbnail next to the layer’s preview thumbnail as seen in here.
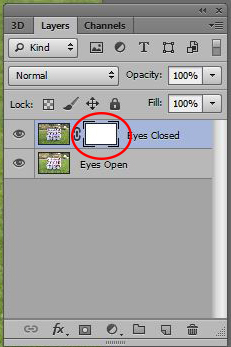
Layer Mask Thumbnail
It is important to understand that layer masks use only white, black, and shades of gray. These colors are simply used to control the transparency of the layer under the mask. Now, we know that white means 100% visible so what do you think black is? That’s right, black “masks” the layer making it 100 percent transparent. Gray is going to be somewhere in between. In our case, we want to show the photo of the girl with her eyes open without affecting the rest of the team. We are going to paint on the mask in black to reveal the layer below. To do this, select the Brush tool from the Tools Panel or with the keyboard shortcut “B”.
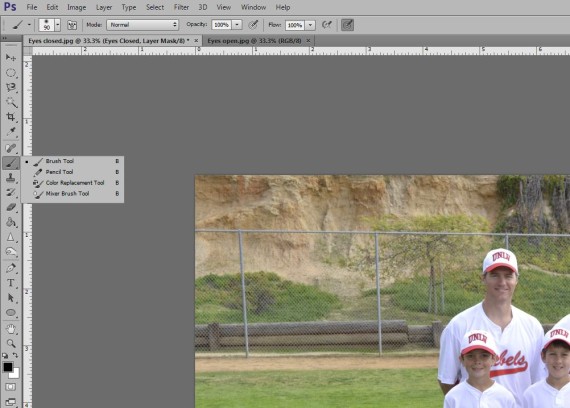
Select The Brush Tool
We will be painting in black so we need to make sure black is selected as our foreground color which is the Photoshop default. You can always set your colors back to this with the keyboard shortcut “D”.
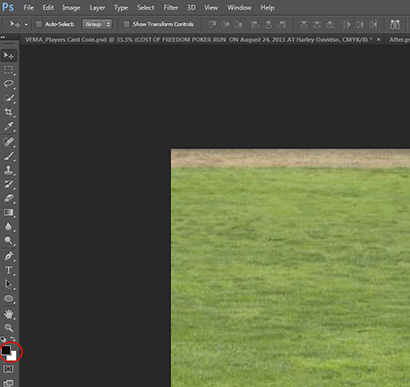
Setting Black As Foreground Color
You need to make sure you are painting on the mask and not the layer itself, so make sure to click on the white layer mask thumbnail in the Layers Panel. When it is selected a white box will appear around the thumbnail. You won’t get too far if you have the layer selected by mistake because you will immediately see black being painted directly on your image, which is not what you want to see.
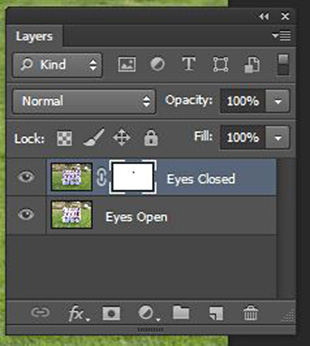
Targeting The Layer Mask
You should be able to see a circle for your cursor that shows you the brush size. As a real quick side note, if you don’t see the circle indicating your brush size make sure that your Caps-Lock is set to OFF. If Caps-Lock is on it disables the brush size indicator, it took me forever to figure this out so hopefully this saves someone a little hassle. You can adjust the brush size manually in the upper left side of the toolbar or by using the open or close bracket “[ ]” keyboard shortcuts. You want to use one of the fuzzy brushes because you need to blend it in nicely or it will look unnatural.
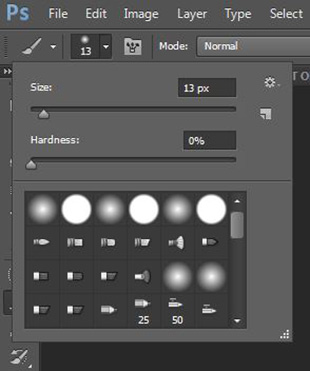
Brush Size
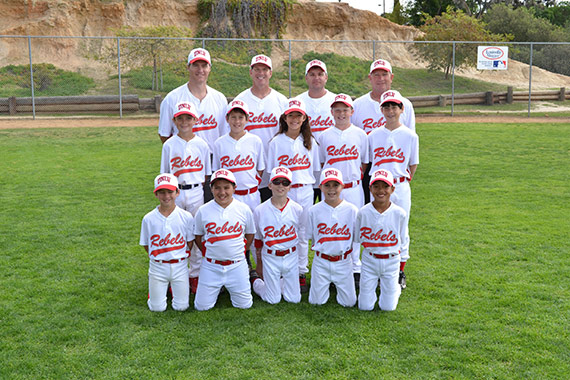
Now we just paint in black on the mask over the girl’s face and, like magic, it reveals the layer below which has her eyes open. If you mess up and paint too much black just use the keyboard shortcut “X” to swap the foreground and background colors and paint the area back in with white. As you can see in our finished photo below, the girl’s eyes are now open and the rest of the team photo hasn’t been modified at all.
You can see how layer masks can save you a ton of time and headache when you need to blend group photos together. This is just the tip of the iceberg when it comes to the power of layer masks in Photoshop CS6 and countless hours can be spent on the different ways to use them. However, by starting out with a simple project like this one you can easily learn the basics of masking without getting discouraged by the complexity of the tool.
About the Author:
Andy Stockglausner is a Marine Corps veteran, and he owns MVP Studios and The Marine Corps Gift Shop with his wife Michelle. MVP Studios provides youth sports, event, and school photography services all over Southern California.
Like This Article?
Don't Miss The Next One!
Join over 100,000 photographers of all experience levels who receive our free photography tips and articles to stay current:



This is a very good and more effective idea. I have more proud for this best idea. thanks a lot for this best tips
Hi
I would like to know why every time I create a new layer the mask it on by default.
I can’t change this.
I don’t know if that makes sense but I’ll try explaining it.
I have a plane white background.
I create a new layer and draw a square shape.
As soon as the shape is drawn it turns into a mask and not a standard shape.
Please help me.
It’s more straightforward to lasso the eyes, copy and paste them into the closed eye shot. Then you can soft mask around edges to blend, adjust curves to match exposure and flatten.