Ever wondered how photographers happen to catch that one magic moment when a glass is dropped and the liquid splashes out in a perfect gravity-defying arc? Well, in this photography tutorial, Evan Sharboneau shows us how to capture a perfect shot of bright colored liquid flying out of a wine glass:
All you need is a nice, clean wine glass, water with some food coloring or holi powder, a DSLR camera and lens, and a few useful pieces of equipment that will help you capture the optimal moment of awe-inspiring splash. And of course, Photoshop.
Recommended Equipment
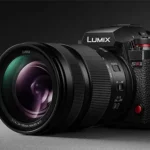
- Sharboneau uses a Nikon D800, but you can use any DSLR/lens combination. For the lens, he recommends a 70-200 mm.
- Paul C Buff Einstein E640 Strobe with the soft-box attached (again, you can use any light/light modifier you want, but the listed combo provides exceptional non-reflective images).
- Paul C Buff Einstein E640 Strobe with 7″ cone reflector attached aimed at the background.
- PocketWizard Mini TT1 + AC3 Zone Controller for Nikon (Canon versions are available too) on camera’s hotshoe to trigger the flash and adjust the flash power. Instead of the Mini TT1, Evan says you can use a Flex TT5, which can also be attached to the foot of portable speedlight flashes to receive the signal.
- Power MC2 plugged into the Einstein E640 strobe to receive wireless signal from the Mini TT1.
- RFN-4 Wirelesss Shutter Release, which allows him to take pictures from any position in the room.
The background Sharboneau uses is black but for the purpose of these photos, he wants to make it blue. To do so, he uses the second Einstein E640 strobe aimed at the background and places two blue gels over it. The AC3 Zone Controller allows him to control both strobes independently.
Evan knows what it’s like to be a new or hobby photographer, so he’s quick to suggest alternatives if you don’t have or can’t afford all the fancy equipment. Keep in mind, if you go this way, the results may not, be as crisp. One important thing to remember is that if light is placed too close to the camera, it will bounce right back into the lens, causing distracting photos. So, for clear, glare-free images, a softbox is bestas it gives a simple, clean highlight.
Cheaper Gear Alternatives
- The strobe can be replaced with a LP180 speedlight, but you might have to raise the ISO and widen the aperture, depending on different factors.
- The PocketWizard wireless trigger system can be replaced with the RF-603 trigger.
- You could also buy a cheap light stand and umbrella.
How to Photograph Splashing Liquid
To get the shots he needs, Sharboneau uses manual focus and sets his camera at f/14 and 100 ISO, to provide a noiseless image. This is up to you, though. Then you simply want to follow these steps:
- Line the glass up with the camera slightly to one side to allow for the splash and glass to remain perfectly in frame.
- Mark on the table where the glass should be so you don’t lose the perfect spot.
- Manually toss the glass from side to side, up and down, however you want to create splash, at the same time using the remote to snap the photos.
- If you have been holding the stem of the glass, you’re going to want to take additional photos holding onto the top of the glass so you can use a clean image of the glass stem in Photoshop later.
Post-Processing in Photoshop
- Drag and drop RAW files into Photoshop, which will then be opened in separate documents.
- Make sure the images are clear at 100 percent.
- Copy each image you want to use into the same Photoshop document so you can work with them with layers (ctrl + A to select entire canvas; ctrl + C to copy that selection; then move to the document you will be working in under the Layers panel and push ctrl + V to paste the copied image into the document).
- Select the image of the wine glass stem that doesn’t show your hand in it and move it to a layer that does show the hand.
- Lighten the selected image so you can see where to place it (ctrl + T to tilt the image to where you want it).
- Click the Layer Mask and erase the part you don’t need.
More Creative Ideas and Tips for Splash Photography
- Create different color puddles on the table and drop the glass into the puddles to add some color to the image.
- Try experimenting with different liquid densities. Add a different color to each density and see what happens as you create a splash.
- To eliminate the need for Photoshop (at least as far as erasing your hand goes), you can throw the glass in the air. But if you also want to eliminate the shattered glass cleaning up process, then make sure the wine glass lands on something soft, like an elevated sheet.
We want to hear your ideas! If you have creative tips or ideas for capturing amazing splash photos, please leave a comment.
Like This Article?
Don't Miss The Next One!
Join over 100,000 photographers of all experience levels who receive our free photography tips and articles to stay current:


Apart from an interesting subject that you know and explained well, I must congratulate you on your video presentation. For once a video that was cleanly filmed, your explanation was easily understandable because you spoke clearly, no mumbles, outside noises etc. I will certainly subscribe to your channel as I’m sure you can help me improve and it’s very agreeable to watch and listen. Well done.
This was so much fun but now I have to find some water proofing for my set up table (and floor)!
Love this. Very inspiring.