How many times have you photographed something on a white or black backdrop only to find the intended background has somehow ended up in the grey zone? When posted on a website or pure background, the supposed pure white now appears greyish blue, tinted, murky. The black now an ugly brownish grey. If you’re tired of this, there is an easy way to make sure your final images are coming out on a pure white or black background that will blend perfectly with most websites. And, you can do it without losing a ton of detail in the image:
The Threshold Test
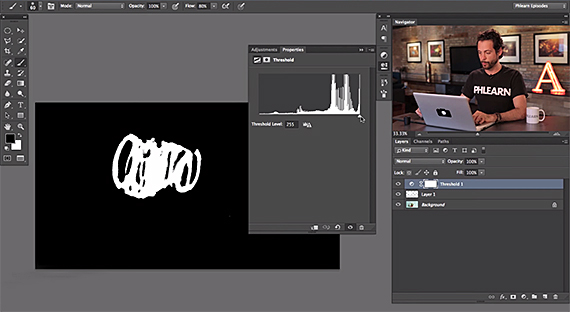
The fastest and easiest way to test your image background’s pureness is with the Threshold Adjustment Layer. If you want to check if your background has any pure white, then move the Threshold slider all the way to the right. If the image is then completely black, that means you don’t have any pure white in your image. If, however, you see some white, that is pure white. Same goes for black—just move the slider all the way to the left.

Threshold Test
Making the Background White
The easiest way to make your background pure white is with the brush tool. Adjusting curves will cause your image to lose too much detail. Here’s how to do it:
- First, take your saturation all the way down to zero.
- To bring the color back where you want it, paint black over the Layer Mask where you want the original color to appear.
- Paint the areas of your image that you want to be pure white.
- Remember, the edges are the most important part, because they will be directly against the background you’re posting on. They need to blend in seamlessly—take extra care and time with the edges.
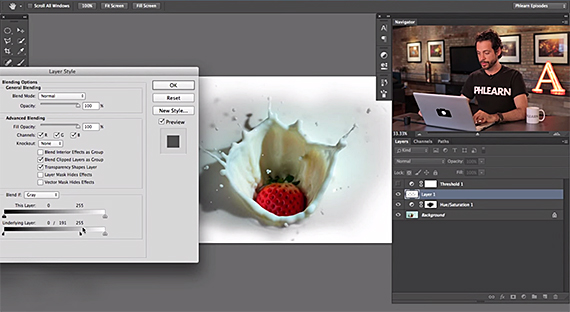
- After you paint over the areas you want to be lighter, use Blend-If to allow the layer to only be visible where the underlying layer is lighter, maintaining shadow detail—to do this, double click on the layer and adjust the underlying layer.
- Repeat these steps as needed.

Making a White Background
Eliminating the Border
If you want to check your final image to make sure it will look perfect on pure white, like a white web page, you can view your image on a pure white backdrop in Photoshop. Right click on the Photoshop background, click on “Select Custom Color” and select white. Of course, if you’re testing for pure black, you can choose black in the list.
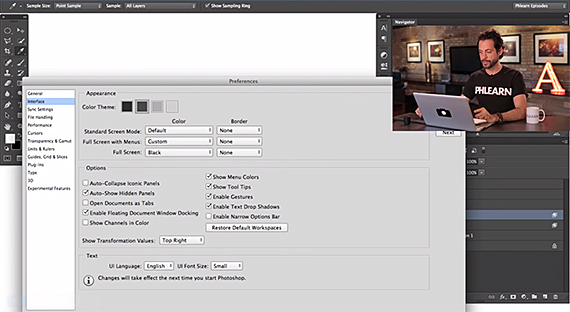
You’ll be able to see if your white matches the background now, and where you might need adjustments. If you see a border around your image, you should remove that. Find Preferences in the menu (either by clicking on Photoshop in the top left corner or under Edit) and select Interface. In the Appearance box at the top, change all the border options to “None.”

Change the border options to None.
By following these simple steps, you can make sure your images get the purest background possible. Your white background will look like it extends all the way out and that’s how your images will impress!
For further training: Essential Guide to Fundamental Photo Editing
Like This Article?
Don't Miss The Next One!
Join over 100,000 photographers of all experience levels who receive our free photography tips and articles to stay current:


Leave a Reply