Are you looking for a quick way to instantly improve your photography? Aren’t we all? Phil Steele has some great tips for taking it up a notch by understanding how to work with and customize white balance in the following video:
Steele says that if you want accurate color in your photographs, you need to know how to set white balance. He gives us two ways to do so: setting white balance directly in your camera while shooting, and altering white balance in post-production.
Customizing White Balance in the Field
To set white balance while taking pictures, you’ll need a gray card. Steele explains that there are inexpensive and expensive gray cards, and that he’s perfectly happy using the cheaper ones. If you don’t have a gray card, get one! But if you don’t want to get one, Steele says that you can sometimes get by by using a white sheet of paper. That said, not all white sheets of paper are created equally—some have a color cast that you’ll need to watch out for, because that will skew the color of your images.
How to Set Up Custom White Balance in Your Camera
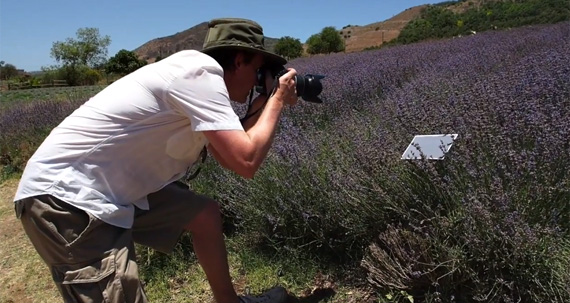
1. Set your gray card against your subject. In Steele’s example, he’s shooting a field of lavender flowers:
2. Fill the frame with the gray card. If you’re shooting in autofocus mode, you may need to switch to manual mode. Take a picture of the card.
3. Individual cameras vary, but you should be able to go into your menu after photographing the gray card and set the white balance using the image you just shot. Refer to your camera’s manual for instructions on how to do this.
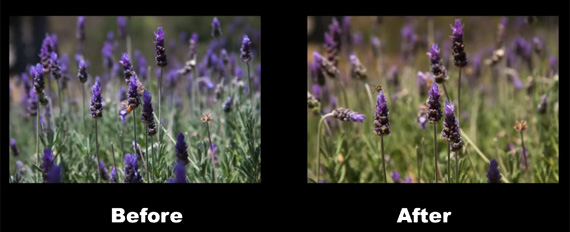
Steele explains that setting the white balance using the gray card allows you to get perfectly accurate color in different lighting situations. Check out his before and after shot of the lavender field:

The first image was shot without customizing white balance; the second was taken after setting the white balance in the camera using a gray card.
It’s important to remember to reset your white balance after shooting, or to just switch it back to the default settings—otherwise you may end up with weird color casts when you shoot in different lighting conditions than the one for which you set the custom white balance.
Customizing White Balance Post-Production
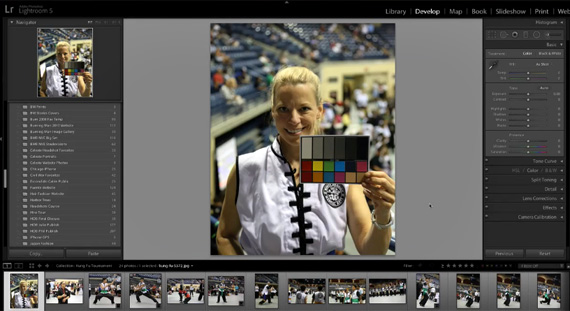
Sometimes you don’t have a chance to set white balance inside the camera, and you end up with an entire set of photographs that have an odd tint. Steele explains that this is quite easy to correct in Adobe Lightroom. In his example, he’s photographed a sporting event with awful fluorescent indoor lighting that has given his subjects a sickly yellowish greenish tint. He planned ahead, though, by shooting a gray card as part of the series:
The first image in Steele’s set contains a gray card. This can be used to set white balance for the entire set.
You don’t have to have someone around to hold the gray card–you can just lay it down someplace and photograph it that way, as well. If you forget to do this or don’t have a gray card, you can probably use a neutral gray object in one of the photographs within the set to modify white balance.
Setting White Balance for a Set of Photos in Adobe Lightroom
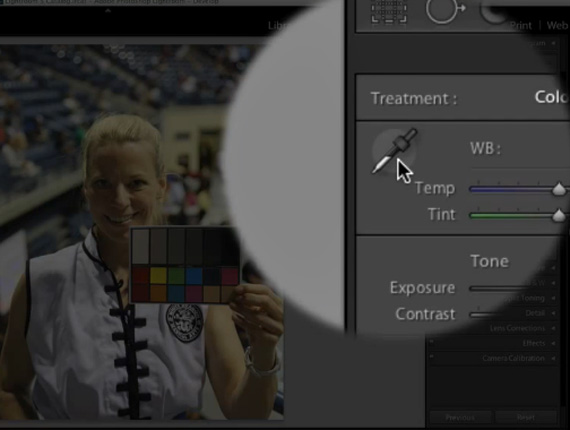
1. Open up your set of oddly tinted images in Lightroom. You’re going to use the White Balance Selector tool to select one of the gray blocks on the gray card:

The White Balance Selector tool looks like a little eyedropper.
2. Light or dark doesn’t matter here–the important thing is selecting a neutral tone. Click on that neutral color block, and the tone of the photograph will change.
3. Select the photo you just changed by clicking on it. Then, navigate to the last photo in the set that you want to alter, and select the entire set by Shift+clicking the last image.
4. You’ll see that the first photo is highlighted a bit more than the others–that’s because it’s your source image for white balance changes. Next, click on the Sync button:
5. A menu is going to pop up here–just go with the defaults, Steele explains, because you’re only changing one thing (white balance).
Voila! The entire set now has better white balance.
We hope that you can use these tips to improve your own photographs–let us know in the comments if this was helpful or if you have additional tips and tricks for tweaking white balance in your work!
For further training: Understanding Your Camera Course
Like This Article?
Don't Miss The Next One!
Join over 100,000 photographers of all experience levels who receive our free photography tips and articles to stay current:


Leave a Reply