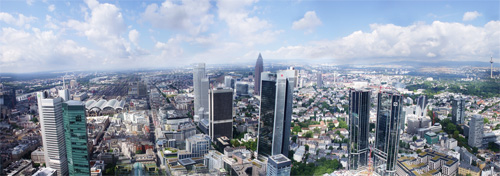
These days you don’t need a special camera to create awesome panoramic photographs. With Photoshop CS using Photomerge makes the process quick and easy. Photomerge was created especially for panoramic photography. The process itself is really quite easy, but the results of the merge will be depend on the layout and image source quality. The Photomerge feature permits the selection of images intended for automatic panoramic Photomerge and it also allows for manual arrangements.
Since your final photo depends on the quality of the source images, it is necessary to make note of some tips when shooting scenic photographs:
- Use manual exposure when shooting pictures. Merging the pictures later on will be difficult if different exposures are used for each shot.
- Try to keep the camera as steady as possible when shooting. If you can, use a tripod.
- Keep a long distance between the camera and the subject, especially when working with landscapes. Chances of parallax are greater when objects are too close to the camera.
Instructions in Photoshop Photomerge
Follow these step-by-step instructions to come up with great panoramic images using Photoshop CS Photomerge:
- Open several images of a single scene in Photoshop CS.
- Go to the File option, the select Automate, and then go to Photomerge. This will open the Photoshop dialog box.
- Check that the images you want to merge are in the dialog box.
- Next check the Attempt to Automatically Arrange Source Images box and then select Ok.
- The program will then automatically select the images one by one and attempt to merge them into one panoramic photo. If your photos don’t quite match, you may get an error because the program cannot merge the images automatically. If this happens, don’t panic. It is still possible to arrange the images manually.
- If an errors does occurs, integrate the image or images that were not merged by pulling that image or the images from the top window into the panorama and arranging to the desired position. Photoshop CS will then integrate the image into the panorama automatically.
Tips for Great Panoramic Photos
Sometimes, clear lines that separate the images in the panorama may appear. It is possible to blend the lines so that they disappear. Select the Advance Blending option located at the right of the Photomerge window, then select Preview. Inconsistencies in color will be calculated by the program. At this point, the images will blend together.
Photoshop will combine all the individual images for your panoramic into a single layer. If you select the Keep as Layers option, it is easier to edit each image individually. This is a great help if one of the images is brighter or darker then the other images. You can select that image in layers and adjust the brightness for just that image.
It is a good idea to save the layers as a .psd file so that you can always come back and correct any mistakes or make any changes later. It’s a real pain to have to redo everything from scratch just if you made a mistake or want to change something later.
You can also distort the pictures so that the scene will look like it is in perspective. Choose the Perspective option on the bottom of Settings. You can also do this by choosing Set Vanishing Point in the Photomerge window, then click to an area in the panorama.
Using the Perspective mode can often produce panoramic photos in a more accurate manner then the Normal mode. The Normal setting usually does not match the images seamlessly where Perspective does.
You can also use Cylindrical mapping which is where images are projected into a cylinder.
Beautiful panoramic photos are easy to create with Photomerge in Photoshop CS. Photomerge will make the task a breeze for just about anyone to produce inspiring and professional-looking images.
Like This Article?
Don't Miss The Next One!
Join over 100,000 photographers of all experience levels who receive our free photography tips and articles to stay current:


awesome , thanks
great tips thank you
Great tutorial! We wrote a similar step-by-step tutorial about when and how to use photo merge:
http://www.flitehaus.com/blog/2010-08-12-photoshops-photomerge-when-and-how-use-it
Hope someone finds it useful!
hi
may i ask what version of photoshop do you use?
you said that “Select the Advance Blending option located at the right of the Photomerge window, then select Preview” but in the photomerge dialog box there is none…
and also here “Choose the Perspective option on the bottom of Settings. You can also do this by choosing Set Vanishing Point in the Photomerge window, then click to an area in the panorama.” which is not also in the dialog box of photomerge!!!
Great tutorial, I normally take panorama shot with a nice background, a great work is needed on adobe though