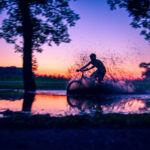
Timelapses of sunsets are wonderful to watch, but they require an understanding technique and a whole lot of patience. Photographer Cal Thomson explains quite lucidly what it takes to produce a day to night timelapse:
Manual Exposure
There are two basic ways to capture images for this type of timelapse: manual mode and aperture priority mode. With the manual mode you can control everything and there is no room for introducing a visual jerk in the timelapse. White balance needs to be set on auto, since it will change over the course of the shoot as the light changes.
Thomson uses the following camera settings for manual mode:
- Aperture: f/5.6
- ISO 500
- Shutter Speed: 1/1000 of a second
He shot in RAW to ensure that the images could be post-processed later. When you blend JPEG images in photo editing software there is some loss in quality.
As the light dropped, Thomson manually changed the shutter speed, first from 1/1000 of a second to 1/800 of a second, then gradually all the way to a 1 second exposure.

An intervalometer helped Thomson to automate the whole shoot.
The intervalometer was set to a 10 second delay, which gave Thomson plenty of time to adjust the shutter speed between each shot as necessary.
Aperture Priority
In aperture priority mode, the aperture value remains the same while the camera adjusts the shutter speed to allow for the dropping light. The only problem with the reflected light meter in your camera is that the exposure might be slightly over or under from time to time, as the camera is never quite sure about the scene. Thomson’s 6D, however, did a good job in aperture priority mode.
Flicker
One major issue with a 10 second delay between each shot and the changing light is the visual jerk/flicker which is inevitable. This is something that you have to account for. You can only try to correct it during post-processing.
Two images, shot seconds apart. Notice the difference in exposure
Editing Process
The editing process involves the following steps:
- First, import all your photos to Adobe Lightroom.
Thomson used LR Time Lapse, a piece of software that gives you a bunch of options including a preview window, shooting information, a variety of workflow, and the option to render your timelapse video.

For this process you need to complement Lightroom with LR Time Lapse.
- Initialize Keyframes Wizard in LR Time Lapse. This option will highlight all the transition points where exposure changed from one frame to the other.
- The key frames in the sequence of shots will now get highlighted. You can see them indicated in the preview window as well as the shot details.

With Keyframes Wizard activated frames where exposure changed are highlighted
- Hit save to save all the information as an .xmp file. This file can be read by Lightroom.
- Back to Lightroom, open all the images. Depending on how long your shoot was you could have several hundred frames. Editing all of them could take ages, unless you use a couple of neat tricks. One of them is editing only the key frames and allowing LR Time Lapse to blend all the other frames.
- But first you need to read the metadata that you saved from LR Time Lapse. Right-click on an image, click Metadata, and click on Read Metadata from File. You will notice that all the key frames that LR Time Lapse marked will be copied over to Lightroom with one, two or even three stars. These are the frames that represent change in exposure.
- Next, click on one star. This will bring up only the images which represent any change in exposure—this will be a significantly lower number. The trick that you need to use here is a tool in Lightroom called Match Total Exposure. This is applicable for all frames where the exposure jumped from one frame to the next. This would be instances where you adjusted the shutter speed to accommodate for the drop in light.

Matching total exposures for the two frames where exposure changed
For the rest of the frames where exposure did not change, all adjustments done to one frame like exposure, color balance, clarity, vibrance etc. can be copied from one frame to the other using Copy Settings. This would save several hours of boring work.

Image settings copied
- Just remember one thing, for the frames where you apply match total exposure, don’t copy the exposure setting when copying settings from one frame to the other.
- Make any finer adjustments you wish to make for each of the shots before finally saving all the information to the metadata file. Next step back to LR Time Lapse.
- Back to LR Time Lapse first hit the Reload button to export all the changes you made in Lightroom.
- Next, click Auto Transition. This ensures that all the changes you have made thus far are automatically smoothed out so that there are no obvious jumps from one frame to the next. When you’re ready, click on Save to save all the information to the metadata file.
- Back to Lightroom, again click Read Metadata from files to update the work done in LR Time Lapse.
- The final step is to export the images from Lightroom as JPEGs to be compiled into the video footage in After Effects. You could render the final video in LR Time Lapse as well.
Have you tried this type of timelapse? What tips and tricks can you share?
Like This Article?
Don't Miss The Next One!
Join over 100,000 photographers of all experience levels who receive our free photography tips and articles to stay current:


Leave a Reply