How much time do you spend trying to perfect your lighting and camera position when taking portraits? Is there an easier way? Ed Gregory thinks he’s found the exact angles you should use to get the best looking portraits. And he aims to back it up with science:
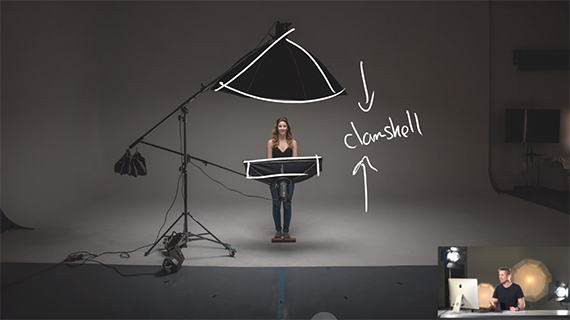
Here’s the basic setup for the experimental shoot. Gregory used a standard clamshell lighting arrangement. He set up two lights on booms: a large octabox mounted over the model’s head and a smaller stripbank below the model’s face to fill in shadows.
Camera Position
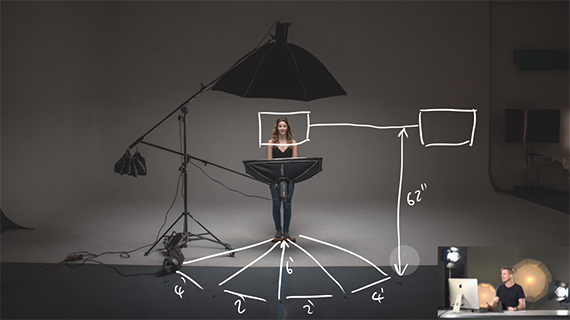
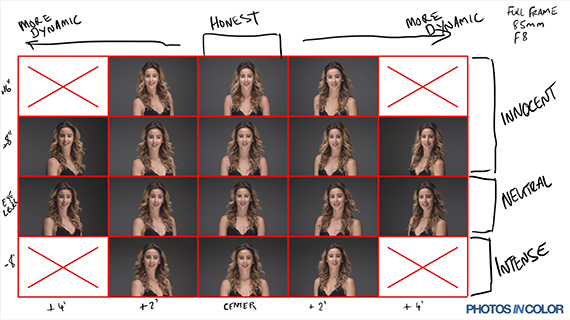
He placed the camera six feet away from the model in landscape mode, which gave slightly more breathing room on either side of the frame. The camera was moved throughout the shoot; it wasn’t fixed in the same spot. Each time the camera was moved two feet, it continued to maintain that same distance of six feet from the model.
Camera Height
Gregory used a series of four camera heights for the shoot. The first camera height was set at exactly the eye level of the model at 62 inches. The second camera height was 8 inches below eye level. The third was 8 inches above eye level, and the fourth was 16 inches above eye level.
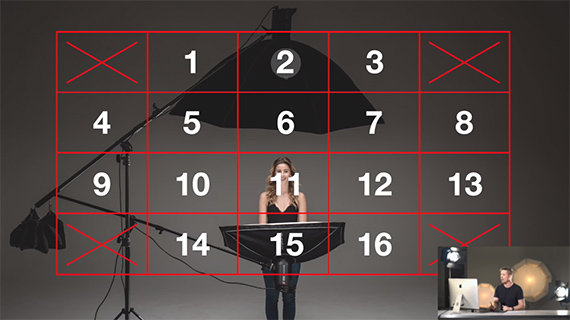
This created a grid to use for the experiment.
The Perfect Portrait Angle Experiment
Shooting all images with a Nikon D800 paired with an 85mm f/1.8 set at f/8, Gregory took one good image to represent each spot in the grid.
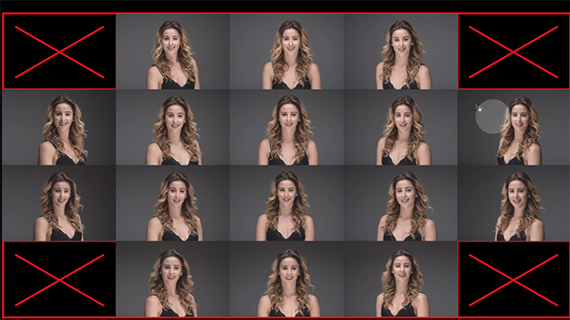
Bear in mind that as the camera moved from one grid to the next, the shadows changed slightly. Although he employed a large octabox to counter these shadows, this is factor that should be taken into consideration.
Also as there was a real person facing the camera, each image looks a bit different—emotions captured at different moments of time.
Even then, he made the best efforts to keep things as comparable as possible.
The Results
Here is a round-up of all the images and what they visually represent, according to the photographer.
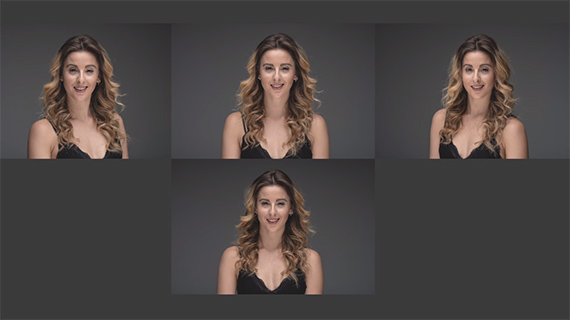
His personal favorites were images 5, 6, 7, and 11, representing the center T (pictured below).
What do you think? Can portrait photography really be so simple that you can break it down into a scientific experiment?
Like This Article?
Don't Miss The Next One!
Join over 100,000 photographers of all experience levels who receive our free photography tips and articles to stay current:






I found exactly the sam thing when I hd my studio. Eye level or slightly above and don’t deviate too far from the same axis as the eyes. This is an unbeatable combination unless you want something very dramatic. If you look at the great masters, both in art and photography, you’ll find this worked for them. Advice – don’t mess with what works unless you want to: a) try something daring, or, b) fail miserably.