Photo lighting. It’s one of the most important aspects to the way you take your photos and they way they turn out. The difficulty lies in the different, constantly changing lighting conditions of certain settings: photography can be indoors or outdoors, in the morning or evening, sometimes in changing conditions. This article will try to set out some basic ideas and tips for you to use.

Photo captured by Mirenchu (Click Image to See More From Mirenchu)
Various techniques that are used by professional photographers when shooting and processing photos can reverse the poor lighting and get good shots. Consider the basic methods of shooting in different light and lighting facilities.
Street Lighting Conditions
When shooting in the street, special attention should be given the choice of the day (weather) and time of day, as these factors could significantly improve or worsen the quality of the photographs. For example, in cloudy weather images obtain a boring and less positive tone/look than on a sunny day, but on the sunny day, you run the risk of too much contrast in the photo. The optimum conditions for most photo sessions on the street are a sunny day with little clouds in the sky. The sun must be behind and slightly to the side of the photographer. And, of course, a favorite time to take my pictures is just before morning, for at this time of day the photo lighting conditions are close to ideal.
If you are photographing on the street, be careful when shooting against the sun, in this case, the photo lighting may cause the pictures to turn out faded, low-contrast, and the colors are not juicy. In photography, there are techniques for shooting in backlight, or opposing light, and when you use these you can get great quality photos. Do not forget to turn the flash on when an object in the picture is very dark. When using this type of shooting, do not aim the camera lens directly at the sun, because direct sunlight can spoil a matrix camera.

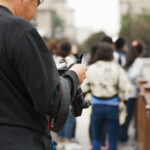
“Terreiro do Paço” captured by José mbrito (Click Image to See More From José mbrito)
Indoor Lighting Conditions
The choice of lighting when shooting indoors is no less of an important factor. Optimum light for filming in the room is daylight, but if there is not enough, you will need to use the built-in flash or additional outbreak. The approach to the choice of lighting for each image is an individual and often depends on your exposure and subject. Nevertheless, you should always be guided by certain rules.
First of all, remember that the illumination varies considerably depending on the distance to the source of light. This means that the farther you are from the window, the more deteriorating conditions of illumination you’ll notice. Always try to shoot as close as possible to the window, and don’t stand between the light source and the subject, because you can cast a shadow. Shooting in backlight, when the object is between you and the light source, can be done only with the flash, otherwise you’ll only get the silhouette of the subject.
Insufficient Light in General
In case of insufficient natural light, the easiest way to achieve a good photograph is the use of your camera’s flash or an increase in sensitivity. Using large values of sensitivity leads to a grainy image that is noticeable even on small images, so unless you’re a pro with lots of knowledge and experience, stick with the flash.
“Moon Through Hazy Trees” captured by Ruthanne ReidFirst of all, make sure you are the proper distance from the subject. Photographs taken with the flash from a distance of 1-1.5 meters may reflect light, and images in which the subject is farther than 10 meters away, dark. Therefore, the optimum shooting distance using the built-in flash should be from 1.5-10 meters. When using the flash, the photos often have the so-called red-eye effect, so you can remove it using the camera’s built-in feature. When photographing with flash, pay attention to the various reflecting objects that fall into the frame. In order not to spoil your image, change the angle, getting rid of this effect.
About the Author
When you’re ready for more photo lighting tips, you can check out my other online resources on digital photography with lots of more tips, methods, examples, and more on all topics of photography. Here’s my: Photo Lighting lens on Squidoo and a Photo Lighting hubpage.
Like This Article?
Don't Miss The Next One!
Join over 100,000 photographers of all experience levels who receive our free photography tips and articles to stay current:


Leave a Reply