Night time cityscapes can look amazing, especially when they are done in HDR. In this article we’re going to look at how Aurora HDR is now up to 2x and 4x faster on MacOS and Windows computers, respectively, and is now compatible with the brand-new Loupedeck+ photo editing console.” Aurora HDR can take your cityscapes to the next level.
For this tutorial, I’m going to use a single image and Aurora to create an HDR image, But for traditional HDR you would shoot and merge at least three of the same image at different exposures to end up with one unedited HDR shot. Aurora HDR lets you use single RAW files to “re-imagine” images, so it’s great if you have old single RAW images you would like to bring up to date and give a fresh look.
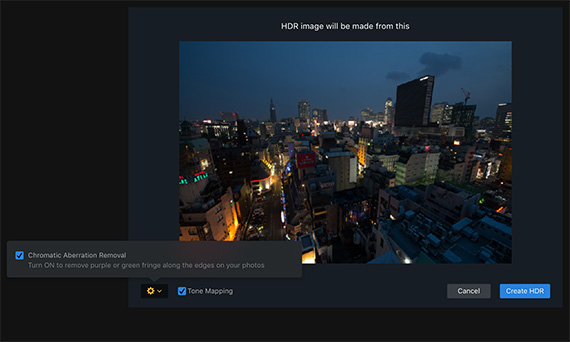
Open Aurora HDR and choose which image(s) to open. As I have chosen a single image, Aurora asks if I want to create the image from this and gives a Tone Mapping checkbox option.
Tone mapping in Aurora HDR reduces noise and gives a much more realistic image, so it’s best to keep it on. You also have a choice to reduce chromatic aberration by using the drop-down:
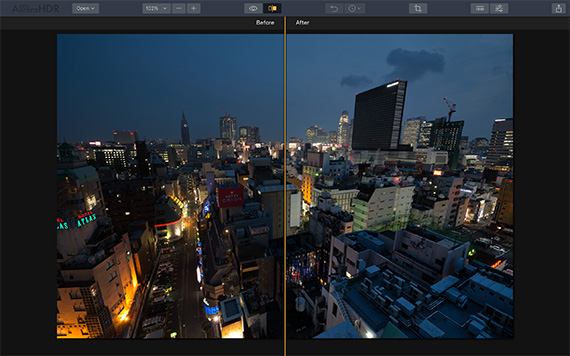
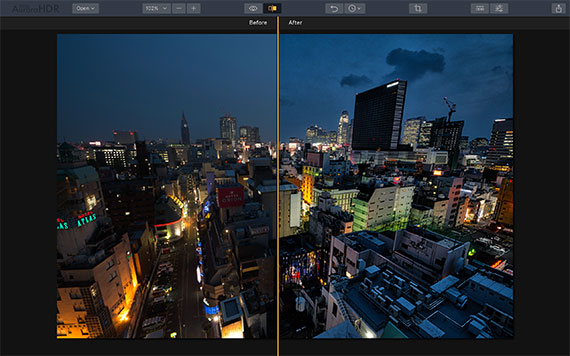
Click the “Create HDR” button. The image below shows the before/after split, with the before shot on the left and the after shot on the right. You can see that there is already a difference, and that’s before any other editing is applied:
Basic Adjustments
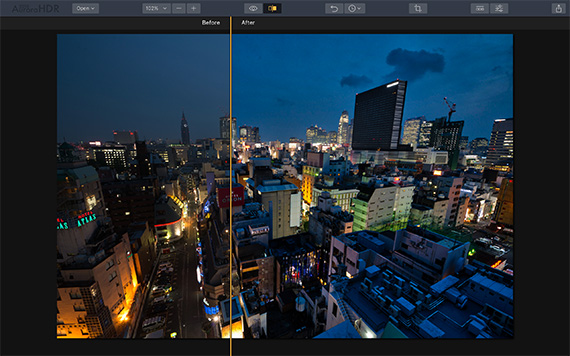
Once you’ve loaded your image, you will see the HDR basic adjustment panel on the right-hand side of the screen. This is where you can start to make manual adjustments, such as exposure, shadows, highlights, HDR enhance, etc. The before/after image below was after a few quick adjustments in the Basic, Color, and Microstructure panels:
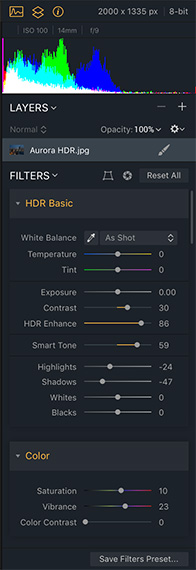
Just those few quick adjustments have made a difference. You can see by how much I changed each category below:
I used HDR Enhance quite a lot, and the Smart Tone to do a lot of the heavy lifting on the image adjustments. I chose to up the contrast, drop the shadows and highlights, increase the vibe and saturation, and add a little bit of HDR Microstructure.
Color Toning
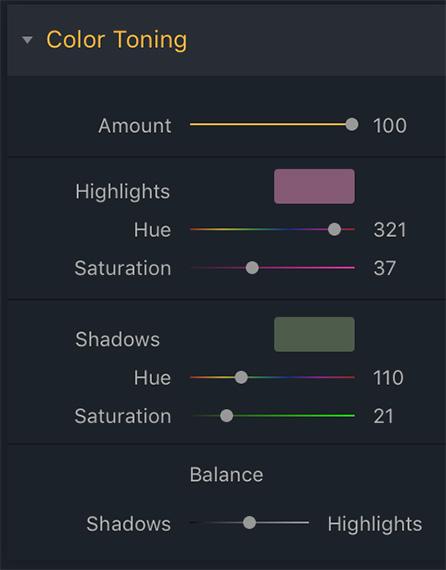
You can have fun doing color toning on night time cityscapes in Aurora. This is where you shift the hue of the shadows and highlights, usually to complementary colors. This is the color toning filter panel:
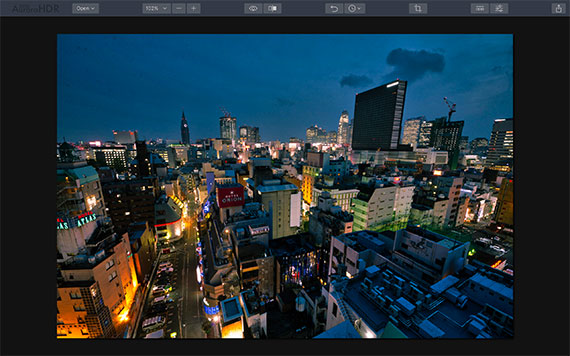
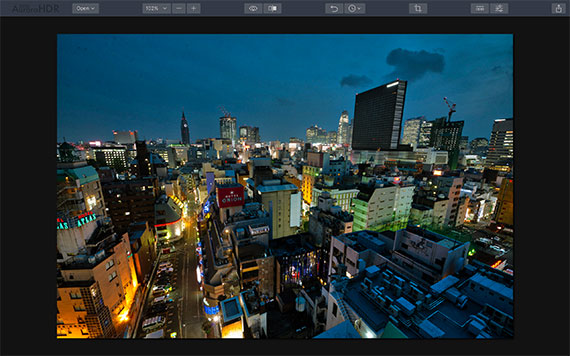
As you can see, I have changed the highlights and shadows to a magenta/yellow combination. Here are the results:
The color shift is quite subtle here, but you can have your colors as bold or muted as you want. Here I have done a more vibrant blue highlights/yellow shadow shift:
Adding Presets
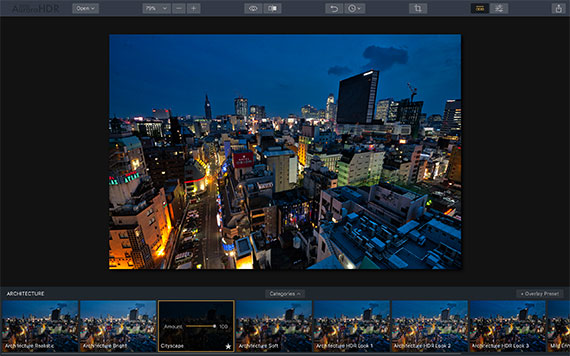
One of the quickest ways to enhance your cityscapes is to use one of the many presets available. There are a range of presets that give your image a distinctive look and feel, from realistic and subtle to dramatic and extreme—it all depends how you like your HDR!
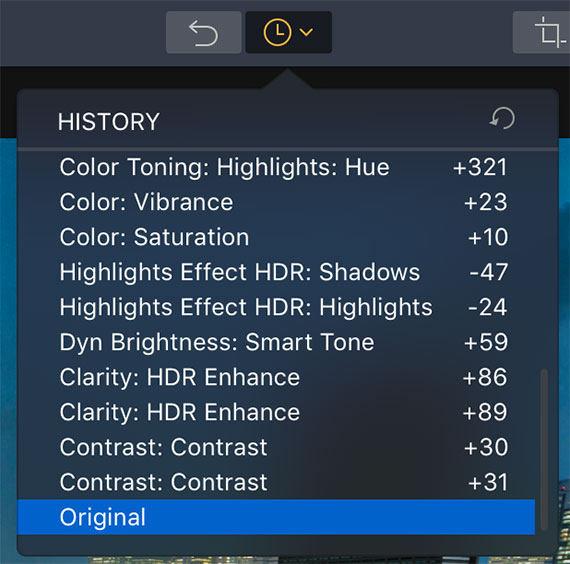
I returned the image to its original state by using the History drop-down menu along the top of the menu bar:
The History drop-down is a very useful tool, as it records all the changes you make to an image up to a certain limit. If you have forgotten what steps you took, the History will tell you. And if you want to return your image to an earlier state, clicking on the one you want in the drop-down will take your image back to that.
This before/after uses the Cityscape preset in the Architecture category to change the look of the image, making the colors and tones richer and more vibrant, and the shadows lighter:
I have the preset at 100 percent strength, but it is possible to adjust the slider downward to give a subtler look. You can also add filters and adjustment layers with other presets on to give a totally customizable signature look to your HDR image.
Adjustment Layers
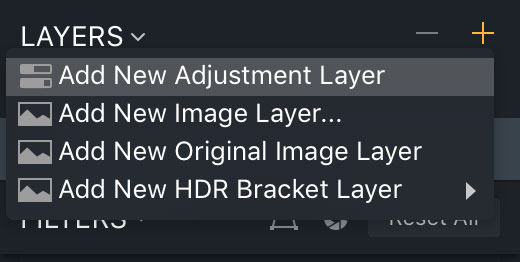
Aurora HDR’s adjustment layers give you the power to change your image as much as you like. When you add an adjustment layer, you are making the changes on the layer, not the image underneath, so if you don’t like what you have done you can simply delete the layer without affecting your original image.
For the image below, I chose Trey Ratcliff’s preset “Epic Vodkaparty” and added a new adjustment layer by clicking the + icon next to the layer in the top right-hand corner:
I then added the Architecture preset “Cityscape” and reduced the strength slider to 60 percent.
You can add as many adjustment layers as you like, and you can also change the layer blending mode to give yet another look. All the layer blending modes do different things to the image, so play around with them to see if you like the look of any. You can also adjust the opacity, so you can add a lot or a little bit of blending mode change to your image.
Below, I added the “Desaturated” preset from the “Basic” collection:
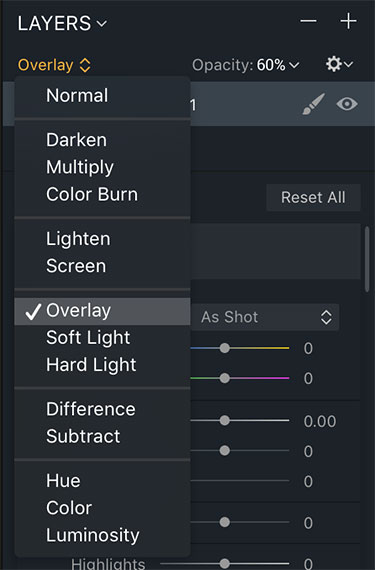
I then added an adjustment layer and changed the blending mode to “Overlay” from the drop-down menu and adjusted the opacity to 60 percent:
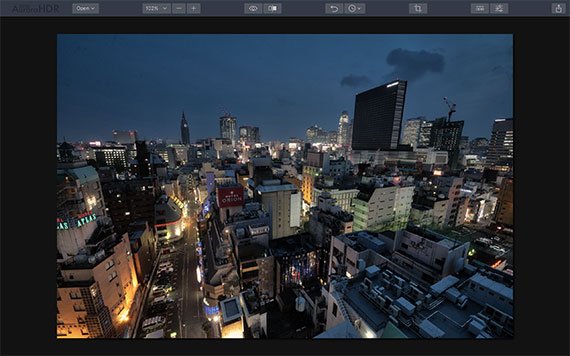
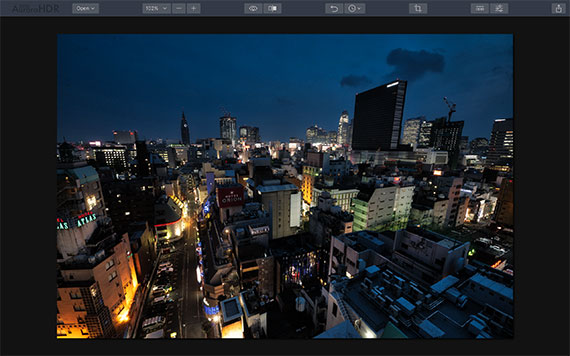
This is the result:
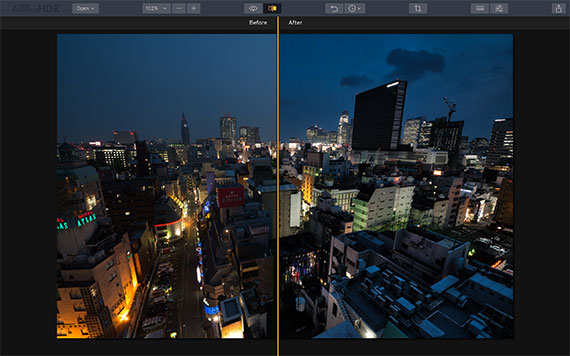
Overlay blending mode tends to add contrast and richness to the tones. Here is the before/after split:
Final Thoughts
These are just a few ways to inspire you to boost your night time cityscape photographs in Aurora HDR, and you can tailor your adjustments to suit your personal style.
How to Try Aurora for Photo Editing:
Aurora HDR has Skylum’s new AI-powered Quantum HDR Engine with new tone mapping technology to create the most realistic, immersive high dynamic range photographs possible.
All in all, Aurora HDR is designed to create the natural-looking HDR images without the need for a complicated workflow. No halos. No artifacts. No chromatic aberration. It is currently on sale today together with Luminar if you want to check it out.
Found here: Aurora HDR & Luminar Photo Editor Offer
Like This Article?
Don't Miss The Next One!
Join over 100,000 photographers of all experience levels who receive our free photography tips and articles to stay current:



Leave a Reply