Macro photography is an exciting and adventurous field where you capture the details of small objects at close range, making them appear larger than life. Noted photographer Gavin Hoey recently embarked on a ‘garden safari,’ highlighting key aspects of macro insect photography. If you’re intrigued by the minute details of the insect world and are considering trying out macro photography, this video is a great starting point. Below, we outline the key takeaways from Hoey’s video:
Gavin’s first advice is to “stop and wait and look.” Rather than hastily scouting for subjects, taking the time to look for movement allows you to spot insects that you would have missed otherwise. Remember, this form of photography is about observing tiny, often overlooked, details.
Essential Gear for Macro Photography
For beginners in macro photography, a standard kit lens with a close-up filter or extension tubes can suffice. However, for serious macro photographers, an actual macro lens is necessary, one that can achieve life-size reproduction of one to one. Hoey uses the Olympus 60 millimeter macro, but all camera manufacturers offer their own versions.
Light is another critical component. Natural light can be used initially, but Hoey suggests using flash for better control and quality of images.
Adjusting for Natural Light
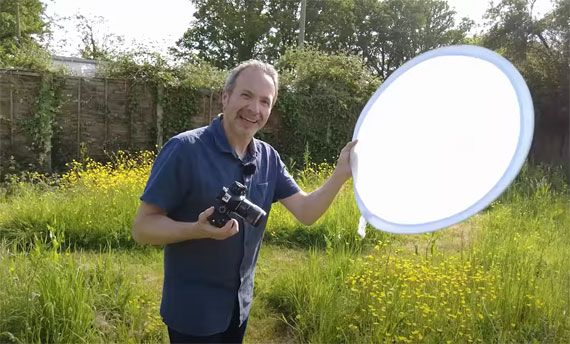
Natural light, particularly full sun, can be harsh and create unflattering shadows. To counter this, Hoey suggests shooting in the shade and adjusting camera settings accordingly. However, if your subject is in the sunlight, using a five in one reflector can create artificial shade, providing softer lighting and enabling more detailed shots.
Getting Close-Up Shots
Gradually moving closer to your insect subject, beginning from a reasonable distance, allows you to get more intimate shots without startling the insect. Using autofocus, either single point or continuous, helps maintain focus on the moving subject. To avoid disturbing the insect, it’s best to avoid using the viewfinder at close range. Burst shooting is also recommended, as it increases the chances of getting a perfectly focused shot.
Flash Setup for Macro Insect Photography
Flash photography in macro insect photography offers advantages like sharper, crisper images, more details, and the control of light. Hoey uses a basic manual flash, Flashpoint Zoom lithium ion, connected to his camera via a PC sync cable. Using a magic arm, the flash is positioned a few inches in front of the lens for the optimal lighting effect.
Camera Settings for Macro Photos with Flash
When using flash, the camera should be set in manual mode. Hoey suggests using a flash sync speed (250th of a second for his Olympus OM1), an aperture of f8 for more depth of field, and the lowest possible ISO for best quality.
However, using a flash also has its disadvantages. It can cast shadows that might scare off insects, and it is less convenient due to its size and bulk.
Composition Techniques
Leveling with your insect subjects rather than shooting from above can give your photos more power. For an even more impactful shot, try to get eye contact with the insect. Although difficult, it gives remarkable results when achieved.
Depth of Field
For maximum sharpness, it is recommended to work at f8 to avoid the blurring caused by diffraction at narrower apertures. If more depth of field is needed, take multiple pictures and stitch them together in post-processing.
Photography is not just about capturing beautiful frames; it’s also about observing and discovering the unseen world around us. Gavin Hoey, though primarily a studio portrait photographer, finds macro photography a fascinating hobby. His journey into his garden is a perfect example of how macro photography allows us to explore and appreciate the intricate details
Like This Article?
Don't Miss The Next One!
Join over 100,000 photographers of all experience levels who receive our free photography tips and articles to stay current:


Leave a Reply