How many times have you struggled with getting the proper exposure? Your camera has built in features to help you out, but you have to learn how to use them before they’re of any use. Arthur Morris provides a great tutorial for using your camera’s features to master exposure:
Metering Mode
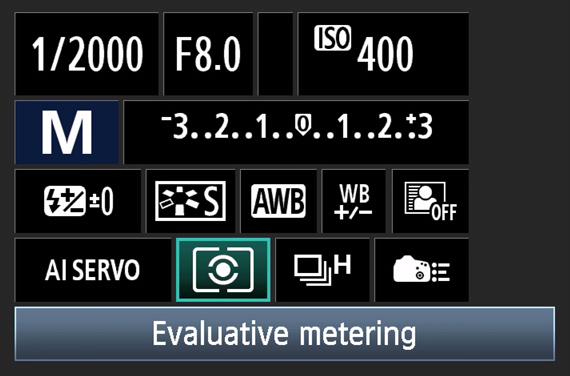
First and foremost, Morris recommends you set your metering mode to Evaluative Metering (Matrix Metering for Nikon). This is important because camera light meters take into consideration the whole image, but they are a bit more biased to the center. So, unlike Spot Metering, where only the center point is taken into consideration, Evaluative Metering takes the spot metering and an average of the full frame, then it combines both to generate a solid exposure.

What Are Blinkies?
“Blinkies” is photography slang for the blinking, overexposed areas on your preview on the camera display. Most cameras have this feature turned on by default, but if you don’t see them, dive into the menu to turn it on. On Canon cameras, this feature is called “Highlight alert.” Blinkies are helpful, because if you overexpose your image, you’ll know immediately.

“Blinkies” show you blown out highlights.
How to Use a Histogram
A histogram is basically a chart that shows the amount of data in every part of the luminance spectrum.

The histogram is divided into 5 sections with dark tones on the left and light tones on the right.
“The basic trick that people are missing in getting the right exposure is learning to read and evaluate the histogram.”
The histogram can be really useful if you know what you are looking at. It is divided into five sections, the left-most section is the dark parts of your photo, and the section all the way to the right represents the light parts of your photo. The goal is for the histogram to be mostly on the right side, with a tiny bit of it creeping into the section furthest to the right. If there is too much information to the right, you’ll have overexposed images.
Don’t Forget ISO
ISO is often overlooked in the exposure triangle. Remember to use it to increase your sensor’s sensitivity to light and get a good exposure. If you shoot RAW, you can correct underexposure in post easily. But a great deal of added noise will be the side effect. With the noise performance getting better on cameras nowadays, it’s better to have your camera at ISO 800 and expose to the right than to have the camera at ISO 400 and underexpose by a stop.
“You can have the greatest thing in the world happen in front of you, and if you blow the exposure you have no photograph. So we’ve gone over a bunch of the basics. The key–get some data in the fifth box of your histogram without any blinkies, and you’ll be just fine.”
Like This Article?
Don't Miss The Next One!
Join over 100,000 photographers of all experience levels who receive our free photography tips and articles to stay current:


Good stuff, but as a small correction/amendment: Canon’s Partial Metering mode is essentially a large Spot and they also have a Spot Metering mode which, from memory, closer to the 10% frame coverage of film days.
I’m not a Canon user so my screens are different but the basic info is great and very useful and will help me improve my shots. Thanks for providing these guides.
These articles are extremely useful for people like myself who have taken a lot of pictures but are far from being a photographer. This helps give an understanding of how a camera works and what I might do to get better shots rather than rely on the camera automatically producing pictures. Thanks for allowing access and keep up the good write ups.