Here’s a rare look at the making of a cover for the Macworld Magazine done by Peter Belanger, a photographer who has worked with Apple for years. In order to fit in a lot of information into a short amount of time, Belanger set up his 5D to collect timelapse footage of the project. While the video does leave out a lot of the early development stages of the cover design, such as meetings, the video is still fascinating as it take viewers on a tour of an otherwise relatively unseen side of the work that goes behind photographing Apple products:
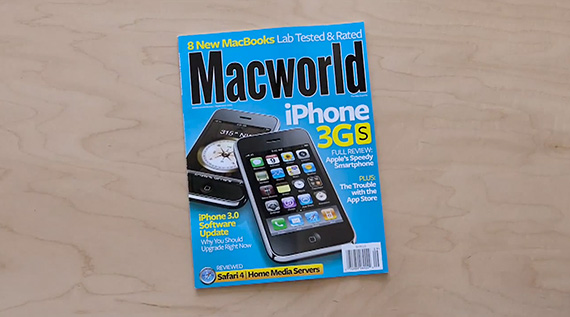
To capture the cover that you see below, Belanger started arranged the iPhones in different ways until finally settling on this placement. As you saw in the video, he also experimented a bit with different light setups. Using large, white diffusers he was able to light the iPhones using soft light, which also helped to eliminate any shadows.
As far as equipment goes, he used a Phase One P65+ digital back that he attached to a 4×5 Sinar X camera. A 65mm prime lens was used to capture the image.
“After working on the latest cover for Macworld Magazine I wanted to show what is involved in making a cover. I focused on the three main areas: the photography, photoshop and design.”
Regarding his time working with Apple on product photography he has said this to The Verge,
“The team at Apple always has a really well developed shot list and sketches of what they need. I work with their talented art directors to translate those sketches into photos. We start by getting the position of the product and then move forward on lighting. Because Apple products have such carefully selected materials it is incredibly important to light the product in a way that will showcase the various materials accurately. I pick an area to start with and think about how that material needs to be described. Once that section is done I move on to the next. This is how my sets get so complicated! I need to have control over each and every surface so when the client asks for a highlight to be elongated, I can do that. It’s similar to working on a file in Photoshop: you don’t do all your work on one layer. I think of my lights as layers that I can adjust individually to get the desired results.”
Like This Article?
Don't Miss The Next One!
Join over 100,000 photographers of all experience levels who receive our free photography tips and articles to stay current:





Being a 3D fan, i can tell you that it’s really not easy to get that 100% realistic look with 3D. I’m using Blender with Cycles render. Also like Apple is using some special materials it will make your 3D materials harder to simulate (reflection, shininess, material texture etc). The “3D plan” should also match tip top the real object like the final result is meant to be on a magazine cover. That sound peace of cake, but in practice the pro see the difference. Note also that even the photographer is fiddling a lot with his composition and light setup.before he get satisfaction. With a 3D program, each time you recompose, adjust the light setup, you need to re render (read: computer compute and draw) the final image. Which can easy take ages especially, especially when fiddling! Product photography is much more traditional and still faster as one could do with 3D software.
This video is excellent btw! Thanks for sharing!
Thank you for this detailed answer, I appreciate it. :)
M
I know this is a heretic q, but wouldn’t it be easier to simply just throw in a rendered image form a 3d modeling program?