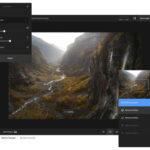
I have been using Lightroom for a couple of years now and it is a very powerful program, especially if you are a wedding photographer and you have a large quantity of photos to cull and edit. Not only is it great for organizing photos, but it is very good for editing. It is most advantageous when used to edit RAW images, because, as we know, they keep every bit of information stored just as the image was shot. This is not to say that it is not good for editing JPEG, but you will not unleash the true power of Lightroom until you start editing your RAW files.
I’m going to share with you five Lightrooom tips that I feel you must know to improve your image workflow and also your editing capabilities. These are tips that I have accumulated over the couple of years that I have been using Lightroom and they help me tremendously. So, without further delay, let’s get to it!
1. Use Brightness Instead of Exposure
Okay, okay… so the header of this tip is a little misleading. I am in no way saying to use brightness over exposure all of the time. But, there are times when you will have more control over your image when using brightness, opposed to exposure. The difference between brightness and exposure is that exposure takes priority on shifting the highlight range of the image. Say you take a landscape picture and everything is a touch underexposed, except for the sky. If you bump the exposure up by using the exposure slider, then you will potentially blow out the highlights, because when using the exposure slider, it increases the highlight area more than it does the rest of the tonal range in the image. Now, if you use the brightness slider, you will shift the tonal range evenly. This has the same effect when darkening and image, or lowering the exposure. You will notice that the exposure slider takes priority of the highlights and lowers them more than the rest of the tonal range. Don’t believe me? Give it a shot and see what I mean. Take two of the same images, load them into Lightroom, and look at the difference between brightness and exposure. By the way, +50 equals one stop of light on the brightness slider and +100 would be 2 stops of light, and so on and so forth.
2. Control Your Use of the Clarity Slider
The clarity slider can really make the details in an image stand out and also help out with inherent blur from the camera. What the clarity slider does is look for contrast in the middle of the tonal range and boost the contrast. In images with a lot of detail this can really make a huge difference. I usually set mine to +30 for starters and then gauge it from there. Now, there are times when you will not want to bump the clarity slider up because it can counterproductive. If you are editing a portrait, you will more than likely not want to bump your clarity slider up. As we know, every person has pores and those pores just happen to be in the middle to upper tonal range, which the clarity slider affects. When you are trying to get nice, smooth skin, you should try backing off of the clarity slider and seeing what it does to the skin. I usually start with -15 and make changes from there. The good thing is that you will not lose detail overall in the image, unless you make a dramatic adjustment, but you will start to see the skin smooth out quite nicely. With a few more adjustments, you will have some really smooth skin that look very pleasing. This brings us to our next tip…
3. Use the Adjustment Brush for Smoothing Skin
This is a feature that I think is far better than anything Photoshop can accomplish, and it’s much faster, too. When trying to smooth the skin of a nice portrait, just grab the adjustment brush by pressing K and then click on the little arrows (one pointing up and one pointing down) to the right of “Effect”, and click on “Soften Skin”. This will change the settings of the brush to lower the clarity and also lower the sharpness. I paint over the subject’s face, being careful not to paint over the eyes, eyebrows, lips, or hair. Don’t worry, if you do paint over one of these features, you can hold the “alt” on PC, “option” on Mac, to erase your brush strokes. Another quick tip is to press “o”, for overlay, to see where you are painting. This will show the red mask of the areas that are painted. Once you paint where you want, turn the overlay mask off by pressing “o” again, and then adjust your clarity and sharpness sliders for your brush to get the overall intended result. Remember, don’t overdo it. You do not want your subject to look fake.
4. HSL Works Magic for Skin Tones
As a wedding photographer, my goal is to always give my subjects pleasing skin tones. If I have to correct the exposure of an image, chances are that my skin tones are going to need to be adjusted further than just white balancing. Of course, we all want to shoot a perfect exposure every shot that we take, but unfortunately, this just doesn’t happen—or at least not for me. So, when I have to adjust the skin tones, I head to the HSL panel for the rescue. With an underexposed image, I start off by de-saturating the skin tones just a bit. Not too much or you’re your subject will look like they have grey skin and we don’t want that and I’m sure your subject doesn’t either. The best way to do this is to grab the target selector tool, which looks like a target and is in the top left side of the HSL panel. Grab on the subjects skin and drag down. This will target only the colors that you grab with the target selector. Once you have lowered the saturation a bit and got it looking decent, I move to my luminance and brighten things up a bit. This will really make your subjects skin glow. (And it will glow a LOT if you are not careful.) This takes a bit of practice but you will get the hang of it by trial and error. This is probably the most complicated tip and takes some getting used to, but it will really help your workflow once you get the hang of it.
5. Post-Crop Vignetting
I absolutely love Lightroom’s Post-Crop Vignetting tool. In my opinion, it applies the most natural looking vignettes of any method that I have tried, and I have tried a few. There is something about a good vignette that helps make an image complete. It takes your eyes and pushes them to the center of the image and keeps them from going outside of the photo. This is another feature that I believe is better than anything Photoshop has to offer, because it looks so great and you can add one in about 5 seconds. I will give you a recipe that I often use. Once you’re through editing your photo, scroll down to the “Effects” panel and use there settings for your vignette. Amount = -52, Midpoint = 67, Roundness = +20, Feather = 50, Highlights = 0. This should darken the corners just a little without interfering with the rest of the image.
About the Author:
Those are the Lightroom tips that I believe every photographer should know, especially wedding photographers. Please e-mail me and let me know what you think. I would love to hear your feedback and I would be more than happy to answer any questions you may have. Until next time, happy shooting! Deric Cain Photography is a professional portrait and wedding photographer providing maternity and newborn photography, engagement photography, wedding photography, high school senior portraits, children and family portraits located in Pensacola, Florida. You can also subscribe to our Pensacola Wedding Photographers blog!
For Further Lightroom Training
The video below will take you on a journey from start to finish of fully tweaking a RAW file from out of the camera to finished product. You may need to watch this video a few times to really pick up on all of the tricks that the instructor is using here.
As you can tell there is a huge difference between the unedited RAW file and the fully edited RAW file. Look at how the image pops off the screen and almost looks 3D.
Adobe Lightroom Lowest Price:
It can be found here: Adobe Lightroom Currently On Sale at Amazon
Like This Article?
Don't Miss The Next One!
Join over 100,000 photographers of all experience levels who receive our free photography tips and articles to stay current:


Can Lightroom be made the default upload location?
A novice question. When I plug my camera into my Mac, iPhoto opens and that is where I’ve always stored my photos. Is it possible to continue doing this, and to select just those photos I wish to edit in Lightroom? Can Lightroom upload from iPhoto? Thanks for any advice!
Tip about brigtness is one of the most important. I understand that basic difference mostly when doing post processing on high iso shots, which were underexposed :)
It’s really nice to see people share their knowledge; thank you. I, like most others, try for a perfect shot. I use lightroom for my photo management software and when I edit; lightroom is my first stop. Your brightness and exposure recommendation was great; thanks!
Audiomind,
There are some awesome tools in LR that you don’t get in CR.
Check out the 30 day free trial of LR3, and/or the new Beta version of LR4!
You’ll like LR – trust me!
Gavin
What’s the advantage of Lightroom over the use of Bridge and Raw?
Thanks for an excellent article. I also love vignetting in post with Lightroom. I was almost afraid I was using it too often , so its nice to hear someone else likes it as well.
Thanks for all you give to the community,
Gavin
just discovered the brightness vs exposure thing too….