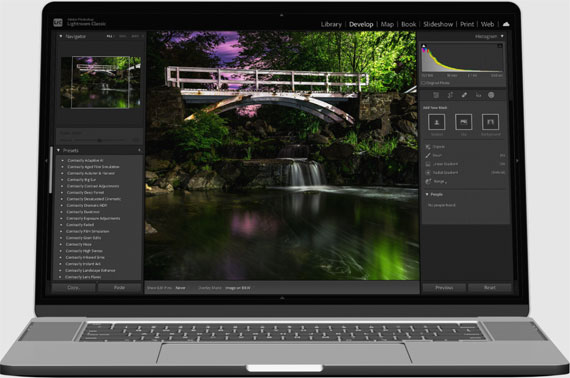
Lightroom is a powerful tool for photographers, offering an extensive range of features for photo organization and editing. Knowing a few shortcuts and hidden features can significantly speed up the workflow and enhance your editing process. Here are some helpful Lightroom shortcuts and secrets that can benefit photographers.
Related note: limited spots available for the Post-Processing Secrets Webinar

Quickly Compare Before/After: Pressing “\” (backslash) in the Develop module lets you quickly switch between the before and after views of your image. This is a straightforward way to compare your edits with the original photo.
Solo Mode: To avoid scrolling through numerous panels in the Develop module, right-click on one of the panel titles (like Tone Curve, Basic, Detail, etc.) and select “Solo Mode.” This ensures that only one panel is expanded at a time, keeping your workspace uncluttered.
Batch Editing: Lightroom allows you to apply edits from one photo to others, which is a great time-saver. After editing one photo, you can press “Shift + Ctrl/Cmd + C” to copy the settings, then select other photos and press “Shift + Ctrl/Cmd + V” to paste these settings across multiple images.
Visualize Spots: The “Visualize Spots” feature is incredibly helpful for spotting dust or sensor spots on your images. While using the Spot Removal tool in the Develop module, press “A” to toggle the visualize spots feature, which helps to highlight imperfections that are otherwise hard to see.
Quickly Adjust Brush Size: When using adjustment brushes, you can quickly change the brush size and feathering by dragging the mouse while holding down the corresponding keyboard shortcuts. Pressing “[” or “]” adjusts the size, while “Shift + [” or “Shift + ]” adjusts the feathering.
Rate and Cull Quickly: Use the number keys (1-5) to rate your photos and the “P” key to flag them as picks. This makes the initial culling process much faster and more efficient.
Use Auto Mask: When using the adjustment brush, turning on Auto Mask helps to apply your adjustments more accurately by detecting and respecting edges within your image. This is particularly useful for selective adjustments like brightening a subject without affecting the background.
Create Virtual Copies: Press “Ctrl/Cmd + ‘” to create a virtual copy of an image. This is useful for experimenting with different edits without altering the original file.
Color Label Shortcuts: Assign color labels to your photos for better organization using “6” for red, “7” for yellow, “8” for green, “9” for blue, and “Ctrl/Cmd + 9” for purple.
Quick Develop in Library Module: The Library module’s Quick Develop panel lets you apply basic adjustments to a selected photo or group of photos without switching to the Develop module. This can be a great time saver for minor tweaks.
Sync Settings Across Multiple Images: In the Develop module, you can synchronize edits across several selected images. This is particularly useful for photos shot in the same conditions. After adjusting one photo, just click the “Sync” button, choose the settings you want to synchronize, and apply them to the selected images.
Targeted Adjustment Tool (TAT): In the Tone Curve, HSL/Color, and B&W panels, you can use the Targeted Adjustment Tool to directly click and drag on the image to adjust parameters like hue, saturation, and luminance for that specific color or tone.
By integrating these shortcuts and hidden features into your workflow, you can make your Lightroom experience more efficient and enjoyable. Whether you’re a seasoned professional or an enthusiastic amateur, these tips can help streamline your editing process and give you more time to focus on the creative aspects of photography.
For Further Training:
The current educational webinar titled Six Post-Processing Secrets You Cannot Live Without offers a unique opportunity for photographers of all levels to deepen their knowledge and enhance their skills in using Lightroom and Photoshop.
By providing a blend of technical knowledge, artistic insight, and practical advice, this event aims to equip photographers with the tools and understanding necessary to bring their creative vision to life.
Limited spots available: Six Post-Processing Secrets for Photographers
Like This Article?
Don't Miss The Next One!
Join over 100,000 photographers of all experience levels who receive our free photography tips and articles to stay current:


Leave a Reply