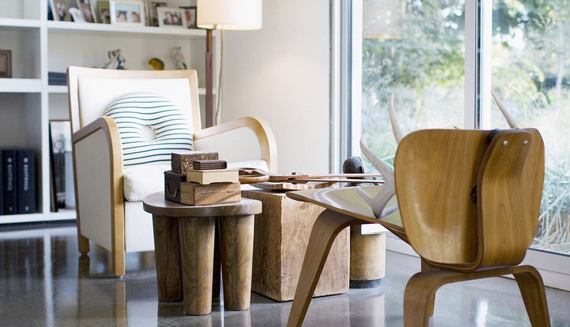
With any art form, the quality of light is an essential component in the work. This is true when it comes to photography, as well–especially when it comes to architectural and interior photography. Whether it be lighting for hotel photography, residential interiors, or larger architectural corporate interiors, light defines the textures, planes, and atmosphere of the space. The professional architectural photographer uses light to emphasize and reveal these characteristics in the space that is being photographed.
Light is used to direct the viewer’s eye to areas of interest, to separate spaces and planes, and to create the illusion of light flooding the interior. Light defines space. Textures and colors can only be made visible through light, and although the trend these days is to shoot natural light, which is just a euphemism for ambient or available light, in almost every situation, the judicious use of additional lighting makes for a much higher quality interior photograph.
There is no reason to buy the latest and greatest system. My lights are basic Balcar strobes with 2400 and 5000-watt power packs. They are over 25 years old, and they are just fine. I say this because light is just light. What is important is how one uses it.
The following is a run down of my lighting equipment.
Flash system
I usually travel with 25,000 watts of power (approximately 7 power packs and 12 flash heads), and I frequently use it all. This is not necessary, however, to achieve good lighting. Although my style and lighting setups are generally complicated, one can still produce a nice effect with a much simpler setup.
These are the advantages of strobe lighting:
- The ability to overpower or balance with the ambient light
- The ability to convert the color temperature of the flash head, which is daylight, (5K) to other light sources, i.e. tungsten or fluorescent
- The ability to control the shutter speed–this is critical when there is strong interior daylight or when you want to capture the exterior view through a window
If you were to have only one lighting system, I highly recommend a high-powered flash system with 4 to 6 flash heads and enough power packs to use them at 1200 watt-seconds of power for each head.
Other Lighting Systems
- Professional studio lamps: If the primary light source is tungsten, I will use hot lights or studio lights. These hot lights, either spots or floods, are balanced to 3200K, so a 1/8 CTO (Rosco #3410) correction is required. Otherwise, these lights will appear too cool in relation to the rest of the scene where the lighting is tungsten.
- Modeling lamps in my flash heads: These are used to supplement the ambient tungsten lighting. These lights don’t require additional color correction because their color temperature is very close to that of tungsten lights–especially when dialed down from full power. I also like the quality of the light from the modeling lights. They are directional but not too powerful.
- PAR Bulbs: I also use standard bulbs (Par lights 30-75 watt in spot and floods) in inexpensive work lamp reflectors. These lights are used to spot and open up small areas and are very helpful in creating drama and interest. I also use these lights when lighting building exteriors at night. You can put together a nice lighting system very economically with these bulbs.
Other Light Control Tools
- An assortment of umbrellas for fill lighting: large, small, hard, soft, diffused, and shoot-through
- Grid spots to focus the light for a spot effect
- Black wrap foil to put on the reflectors for controlling light spill and direction; also for Gobos to keep the light from hitting a surface or to prevent light from entering the camera lens and causing flare. The more distance from the light source the more precise the control.
- Various diffusion sheets: to put over and to diffuse the lights. The more distance from the light source the more diffused the effect.
- ND filters for over the lights: ½ stop, 1 stop, and 2 stop
- Black Chiffon material: to put over the top 1/3 or 1/2 of the umbrellas to keep light off the ceiling or sides; also effective when stretched out to cut down the light from a window or adjoining room
- Matthews flags and scrims for cutting down the light by flagging it off
- Reflector cards: white and silver, to bounce light for fill or reflection, or to block or subtract light
- Radio and optical slaves to set off flash packs remotely
- Rosco (Lee also makes these) Conversion light gels to go over the flash heads to convert the color temperature
Gels
- To color balance flash (5000k) to tungsten (2900k) I use a ½ CTO (Roscosun #3408). A ¾ CTO conversion may be required under some situations (½ CTO 3408+ ¼ CTO 3409).
- When in a mixed light scene with daylight and tungsten lights, a ½ to ¼ CTO works well.
- In commercial environments (fluorescent or metal halide) I usually use the Rosco tough ½ plus green which, although only a half correction from daylight to cool white fluorescent, is ample for digital media. A full tough minus green (3304) filter was required in the film days, but it is too much with digital.
- I find that most modern lighting in commercial spaces is considerably warmer than the old standard cool white fluorescents, so I usually use the Rosco ½ tough plus green and a ¼ CTO (3409) or a ½ CTO (3408) to warm up the color temperature.
- Rosco also makes CC filters to go over Studio hot lights, but I don’t use them much anymore.
- To convert 3200 to daylight: Rosco 3202 Full Blue
- To convert 3200 to half day 4100: Rosco 3204 Half Blue
- To convert 3200 to 3800 Rosco 3206 Third Blue
Lighting is a critical factor in quality architectural and interior photography, and it should be regarded as a key component that is no less important than composition, color, and contrast. The proper use of light maintains proper color balance, reveals textures and colors vividly, and can create a dramatic atmosphere of light that would not be possible if the scene were photographed using ambient light only. Although you could spend a small fortune on lighting equipment, it certainly isn’t necessary. Watch for older equipment on the used market and, with patience, a collection of adequate gear can be acquired very affordably.
About the Author:
Paul Schlismann is a professional architectural photographer and has specialized in photographing architecture and interiors since 1980 for the professional architect, interior design, hospitality, architectural product and corporate markets (www.schlismann.com). Having been established in his career for over 30 years as a Chicago architectural photographer, he now also has an office located in Arizona as well and is working in Chicago, Phoenix, Las Vegas, Los Angeles, San Diego, and California statewide.
Like This Article?
Don't Miss The Next One!
Join over 100,000 photographers of all experience levels who receive our free photography tips and articles to stay current:


Leave a Reply