In the beginning, photographer Trevor Jones made photographs with little more than a smartphone and a manual telescope. Now, he spends nearly every clear night capturing shots deep in the night sky. But for most beginners, this poses a perplexing question – how exactly did he get from point A to point B?
With a lot of moving parts to it, astrophotography certainly isn’t a hobby anyone masters in a day. Luckily, we’ve compiled a Q&A using Jones’ expert experiences to make the process of getting started a little less daunting.

What is astrophotography?
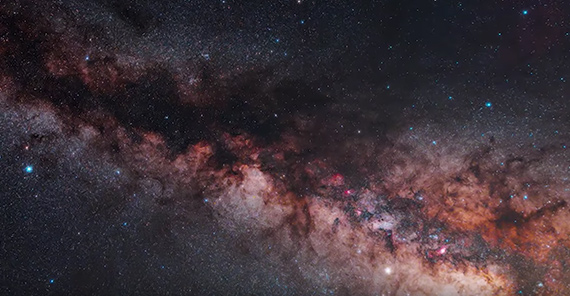
The term astrophotography covers a wider gamut than most people realize. Some use this term to refer to planetary images of the moon and other objects floating around in our solar system. Others focus on broad terrestrial night scapes encompassing the entire Milky Way.
Every approach presents its own set of challenges and obstacles to overcome. However, the practice has a lot in common with more approachable genres like landscape.
What tools do you need?
Having the right equipment is critical when getting started with astrophotography. But it’s difficult to know where to start when it comes to gear.
Obviously, the first thing you’ll need in your hands is a DSLR or mirrorless camera with manual controls. Being able to take long exposures is an absolute must, meaning that your run of the mill smartphone or point-and-shoot camera won’t cut it for most astrophotography.
When starting out, the lens you use matters a bit less than you might expect. Even a standard kit lens or short prime can work just fine. The key to astrophotography is to capture faint details and pull them out in post. So long as you are working with a set up that can capture subtle changes in light and focus properly, you’re in good shape.
On that note, you’ll also need access to editing software like Adobe Photoshop. There’s a huge range of programs available, and everyone has their own personal preference. Just be sure to choose one that you feel comfortable with, as you’ll spend hours tinkering with files in post.
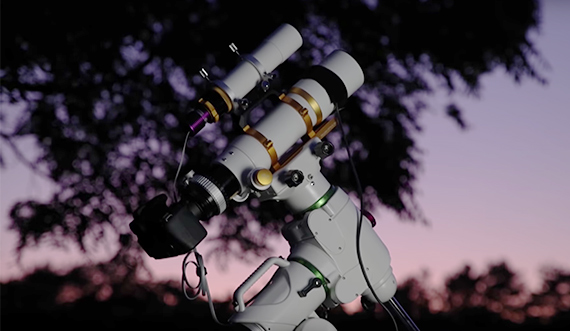
Lastly, you’ll want a telescope. Jones recommends a compact apochromatic telescope, which in many ways is similar to a telephoto lens. This versatile option is a bit more forgiving than some more specialized models, making challenges like pinpointing targets and focusing much easier.
How much will it cost?
Astrophotography is expensive. However, some routes to getting started are more affordable than others.
The most important thing is that you invest in equipment that’s easy to use and understand when you’re first starting out. Otherwise, you’re liable to get frustrated and give up before you ever really get started.
Depending on your existing skillset as a photographer, your best choice of camera might be a fairly straightforward DSLR rather than a cutting edge new release. Likewise, you might fare better starting out with some free photo editing software if you’ve never touched a more complicated program like Photoshop.
Where’s the best place to go for advice?
Somewhere in the course of your astrophotography journey, you’re going to have to turn for help. Especially as you begin delving into trickier, deep space subjects, the process becomes a lot less intuitive than you may be accustomed to.
The short and sweet answer to this question: use the resources that you have available to you. Youtube tutorials can take you a long way, if you’re willing to give them a chance. You can also seek out local astronomy clubs for a surefire encounter with a flesh-and-blood astrophotographer or two.
If you’re a fan of Jones’ work in particular, you may also want to take a look at his beginner-friendly Astrophotography Image Processing Guide.
Other tips:
Of course, there’s plenty more to cover on the topic of astrophotography. Before signing off, here’s a few takeaway tidbits to get you headed in the right direction.
- There are apps for your smartphone available to help you isolate far off targets. Specifically, Jones references an open-source option called Stellarium.
- Though the night sky may seem very still, you’ll notice when taking long exposures that the stars and planets move very, very slowly. For this reason, you’ll want to research tracking mounts if you intend on getting serious with nightscape photos. Some more advanced telescopes even allow for computer-controlled automated imaging sequences to ease the process.
- If you’re having trouble framing your photographs, take a test shot. Aim approximately where you believe your subject is, then make an exposure of about 30 seconds. This should be enough time to give you an idea of where your subject is exactly and neatly frame things up.
“Any experience with astronomy and looking through telescopes…that’s a huge advantage. And, of course, photography, in general. Although I had no experience in either of those disciplines going in, and it all worked out fine for me.”
Like This Article?
Don't Miss The Next One!
Join over 100,000 photographers of all experience levels who receive our free photography tips and articles to stay current:


Leave a Reply