Ever wondered how pro photographers take such stunning night photography? If yours look more like “deer-in-a-headlight” candids or inky Rorschach tests, Jason Vong has some tips for you. In this photography tutorial, he exposes the top mistakes beginners make when photographing in low light — and how best to fix them.
Levitate Towards the Light
Chances are, no matter where you are or what time of the night it is, there is some nearby light available. Perhaps emanating from a neon light, candles, or lanterns, or maybe reflecting from a streetlight, billboard, or floodlight.
Regardless, you should always utilize this illumination when photographing in low-lighting conditions. Though artificial, its unique tone, shade, and glow may even create a striking effect you won’t get during the daytime. Any unique shadows nearby lights cast can also be leveraged.
Take The Light With You
Low light may be a reality, but having no lighting is optional. Professional photographers make sure they always pack a light. Artificial lights come in all shapes and sizes — including easy-to-use and portable options like flash or speed lights.
Jason’s favorites include the following:
- Aputure Amaran MC
- Lumecube Mini LED Panel
- An off-camera flash
- On-camera flash with a white napkin over it
However, you can even pack a torch or use your phone. You may just need to play around with the settings, angles, and screen background for the best effect.
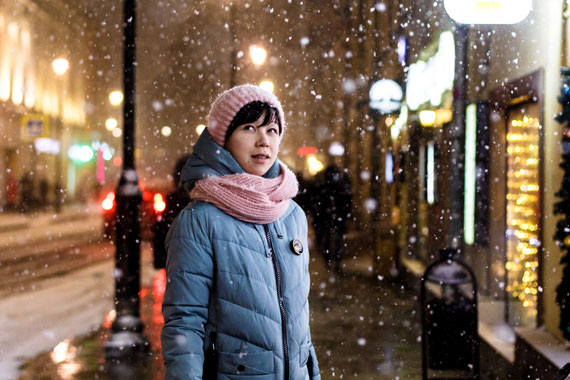
Low light street photo captured by Mikhail Vasilyev
Use a Smaller AF Point
One of the reasons why cameras have trouble capturing night scenes is because low light also affects focus efficiency.
Most cameras have trouble finding focus in the dark. Think of “Where’s Waldo” — you’re scanning… cursing under your breath, where is this guy? That’s what your camera is doing in the dark…
To help your camera out, Jason suggests using a smaller focus area and aiming exactly where you wish to shoot. That way, your camera will quickly pick up your subject and take the image. So, you won’t have to mess around with manual focus or your settings in the dark and risk missing it.
Prioritize Exposing The Brightest Subject
One rookie mistake that beginner low-light photographers make is to over-expose their images in order to improve illumination. Ideally, your highlights should be blown up to prioritize your brightest subject, though — not the dimmest! At night, these subjects would most likely be any street lights and or lit-up billboards.
Set your camera to capture these artificial lights accurately, with all details showing and no light bleeding. Otherwise, you’ll have trouble adjusting your exposure settings and editing any lost or distorted details out — or in — later on. In contrast, you can easily adjust the darker areas without losing clarity or detail — especially if you shoot RAW files, which are much easier to edit.
Wrapping Up
Shooting at night is a whole new world, but not with its challenges. Jason has made it easy for beginner photographers to get the most out of their low-light photography with his tutorial. Try some of these fun tips on your next night street or event photography shoot.
Like This Article?
Don't Miss The Next One!
Join over 100,000 photographers of all experience levels who receive our free photography tips and articles to stay current:


