
Studio Photography and Digital Backgrounds
Most photographers who are serious about improving their portrait taking skills have realized that a beautiful background can greatly enhance their photographs.
We’ve compiled thousands of photography tips for photographers of all sorts, from beginners to pros. Follow us for new tips every day, all from the world’s leading photography experts.

Most photographers who are serious about improving their portrait taking skills have realized that a beautiful background can greatly enhance their photographs.

Great strides have been made in digital technology over the past few years, but more sophisticated digital cameras have only recently come down in price enough to attract the “serious amateur” market.

Professional photographers rely on the flash on their camera to capture the action at a wedding or other social event. They are probably not aware of the effect of their flash on the faces of their subject. Here is an analysis of the effect of different distances between the flash head and the lens.

Before you can even jump to tinkering with digital photography techniques, it would be good to learn basic composition skills to produce good-looking photographs. By composition, we mean that the elements in the captured image are interacting with each other in harmonious relationship.

What makes a great picture of people? Ninety percent of its quality lies in the facial expression, the rest is composition, lighting, and the natural presentation of body language.

“We don’t want any posed pictures” is a common admonishment from young people these days. What they mean is that they want to appear natural and relaxed in their portrait of the family. A certain amount of posing is a necessary evil in order to accomplish what they want.
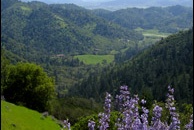
Hyperfocal focusing is based on the fact that depth of field typically extends 2/3 behind the point focused on and 1/3 in front, but if you focus on infinity, the depth of field behind is completely wasted.

Well, I’m here today to try to illustrate the benefits of ISO. It is a prominent feature on all of the latest digital cameras, and is something that you should be aware of when you’re trying to take photos in available light.

First thing that you must know is that to get really great landscape and nature shots you really need an SLR with appropriate film for the job, but these tips will help you even if you are using a point and shoot.

Understanding natural light is a “must” for good landscape images. The job of a landscape photographer is to record a scene. Yet, photographers often fail to capture what it felt like to be actually at a scene.