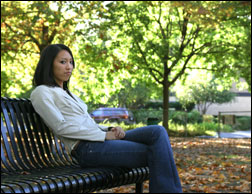
This tutorial is to help you learn how to convert a normal photo into a realistic charcoal drawing, and then how to add some colored pencil in just the places you choose to. This can create a really artistic effect and viewers will wonder how it was done. Ok, once you have your picture open in photoshop:
1. Copy the Background Layer so you have two of the exact same photos on different layers. (Layer>Duplicate Layer).
2. On the upper layer (the copy you just created) Apply a Chalk and Charcoal Sketch Filter (Filter>Sketch>Chalk and Charcoal). And be sure to use some settings similar to these:
Charcoal Area: 13
Chalk Area: 4
Stroke Pressure: 1
3. Then add a Reveal All Mask to the upper layer that you just applied the filer to (Layer>Add Layer Mask>Reveal All).
4. Then pick a big soft paintbrush and lower the opacity to around 20%.
5. Then (with the layer mask selected) simply paint brush the color black anywhere on the photo where you would like to add some colored pencil.
For different photos, the process and amount of adjustment won’t be exactly the same. But experiment with this technique and you can make amazing realistic looking hand drawn art pieces.
For Further Training on Photo Effects:
Check out this best-selling eBook on how to do amazing photography tricks and photoshop effects. It can be found here: Trick Photography and Special Effects
Like This Article?
Don't Miss The Next One!
Join over 100,000 photographers of all experience levels who receive our free photography tips and articles to stay current:


hi,
in article <> you don’t say with wich software you do that !
Gimp ? RawTherapee ? PhotoFiltre ? Photoshop Elements ? Photoshop ? or other unknown soft ?
Thanks for answer
Alfred