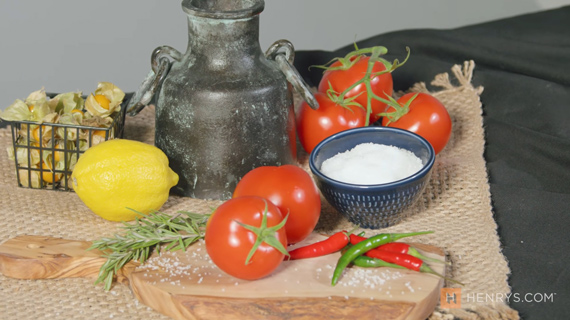
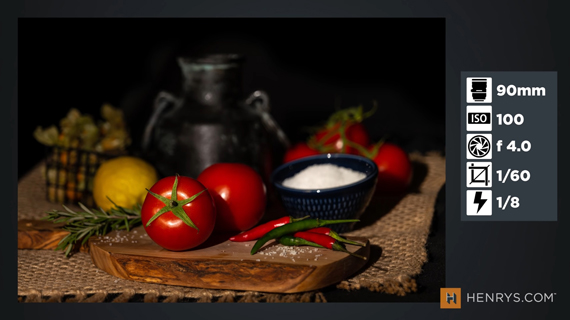
In any genre of photography, it is quite important that your subject is well lit. This helps in drawing the viewer’s attention toward what’s important. And food photography is no exception to this principle. By highlighting the food, and using the background and other elements to add contrast, you can create some dramatic yet mouth-watering food photos. Photographer Gajan Balan and Henry’s Camera explain how you can do this using the chiaroscuro technique:
“Chiaroscuro literally means the contrast between light and darkness.”
Using the chiaroscuro lighting technique, you can create images that look really rich. The images created using this technique have depth and character to them. To use this technique, you can just use one light source, and creatively use darkness and negative fill to add some punch. Further, when it comes to food photography, be sure to really pay attention to the styling, the props, and other details.
“We’re gonna create something that is supposed to feel really rustic, really Renaissance, almost primordial in a way. And for that, the props that we use is gonna be critical to the image we’re trying to capture.”
Building Your Scene
Start by building your scene. Place your food, along with the cutlery or any other props that go with the food. When arranging the scene, pay attention to colors, textures, and contrast.
Make use of colors that pop, and add contrast with flat and neutral colors. You can also make use of wooden materials and ceramic that add beautiful texture to the composition.
“It takes a lot of effort and you have to be very meticulous with it, but it gives that effortless look. Everything coming together is what gives it this old-world feel.”
Using Light and Darkness
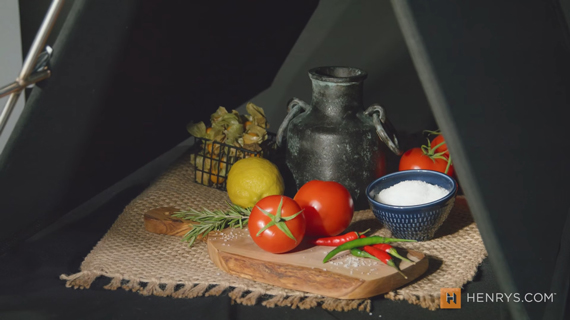
With chiaroscuro, the aim is to mix light with darkness. With the food being illuminated with light, you can use a dark background to give the feeling of a dark room. Further, to cut out any other light falling on the food setup, you can use black colored boards on the sides to create a tent. They also help in absorbing any spill from the light source.
In order to light up the food, Balan uses a Godox AD200 Pro with a grid to narrow down the beam. He also uses a barn door to feather the light on the food. Furthermore, to cut out light from reaching the cutting board, he places another black flag close to the light source. This way he selectively lights up what he wants, adding depth and interest to the image.
The good thing about this setup is that you can use DIY methods to achieve it. Getting professional looking results doesn’t necessarily mean that you need to use pro gears only. Try out this lighting setup even at home, and take your food photography to the next level.
Like This Article?
Don't Miss The Next One!
Join over 100,000 photographers of all experience levels who receive our free photography tips and articles to stay current:


Leave a Reply