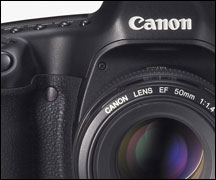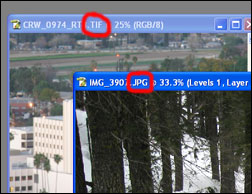
Any kind of JPG written to your camera’s memory card will be processed in some way. JPGs, by their very nature, lose information in an image. If you repeatedly save a JPG, you’ll lose more and more detail in it and see more artifacts appearing. Also, if you’ve set your camera up to do some image manipulation (e.g. contast/brightness adjustments), these will also be applied before your camera writes the image out to the memory card. In such cases, you could end up with images that have burned out highlights or shadows that are so deep that they contain no detail. Such areas of an image may be irreparable even with the likes of Adobe PhotoShop.
RAW images, on the other hand, are simply that – raw. What the camera sees is dumped (without any image manipulation whatsoever) onto the memory card. RAW images also tend to contain more information and detail and have larger file sizes than similar resolution JPGs. The problem with RAW files is that they’ve not been the easiest to work with; for example, Windows Explorer cannot show RAW files as thumbnail images so, unless you’ve renamed your image files with meaningful names, you won’t know what the images are when you come back to them a couple of months later.
This is where software such as RAWShooter Essentials [http://www.pixmantec.com/index2.html] (RSE) comes in. This software lets digital photographers of all abilities import, view, edit and convert large batches of RAW files (to TIF files). RSE is currently free – it won’t be for too long – so grab a copy now. Having used it (i have no association with the company who produce it), I can say it makes working with RAW files a doddle; much easier than using the software that came with my Canon EOS Digital Rebel.
With your converted RAW files, you have full control over what manipulations will be carried out to produce the final image, using packages such as Adobe Photoshop, Adobe Elements or Paint Shop Pro. The better RAW conversion packages also include basic contrast, brightness and color management controls, so you may not even need a separate image manipulation package. Some even provide tools for compensating for over- or under-exposed images.
By shooting RAW images, you give yourself complete control over color and exposure and it’s you, rather than the camera, that decides what adjustments are applied to reproduce the tones and contrast of the original scene. It also lets you maximize the quality of your final image for whatever output you want, whether that’s on a monitor, as an inkjet print or sent to one of the digital photo labs for printing.

Probably like yourself, I shot all my photos in hires JPG mode until I got switched on to recording my images in RAW mode. Yes, I had to buy a larger capacity memory card, but even 1Gb cards are pretty cheap these days, and with image files being about 6Mb a piece, that still lets me record well over 200 images on the card – that’s equivalent to over 6 rolls of 35mm film (at 36 frames per roll)!
So, if you’re not already recording in RAW mode, make the switch today and take full creative control of your photographs.
Just after I’d finished this article, I was looking around the websites of some professional photographers who use digital cameras to see if what they had to say on the topic of RAW Vs JPG. What I learned surprised me. Quite a number of them shoot in JPG mode rather than RAW. The reason is time. Professionals expect to get “the image” in camera using compositional techniques, filters and a knowledge of their subject and they simply don’t have the time to manipulate images to achieve a desired result. Any such time would cost them money by taking time away from being out there taking photos and earning a living.
The amateur photographer is in a more luxurious position. Our livelihoods don’t depend on our results and, if a photo isn’t quite up to spec. we have the time to tweak it and bring out its hidden attractions, rather than junking it and moving on the the next photo. The lesson to be learned is that we should always try to get the best picture possible on the day with the camera rather than becoming lazy and assuming sloppy pictures can always be corrected, cropped and manipulated when we get home. Post-processing of photos should be about making good pictures even better rather than so-so or bad pictures just acceptable.
Gary Nugent is a software engineer by profession and has been in the business for over 20 years. Photography has been a hobby for an even longer period of time and he’s now even more passionate about it since making the switch to using a digital SLR camera.
Gary is also passionate about astronomy and publishes the “Photon” PDF astronomy ezine along with writing the acclaimed LunarPhase Pro and JupSat Pro astronomy software packages (available through his Night Sky Observer website).
Great Landscape Photography: http://www.great-landscape-photography.com
Night Sky Observer: http://www.nightskyobserver.com
Like This Article?
Don't Miss The Next One!
Join over 100,000 photographers of all experience levels who receive our free photography tips and articles to stay current:


Leave a Reply