We’ve all heard about foreground and background. Generally the foreground is where you find the main subject. The background is, well . . . in the back. It’s just back behind everything else, right?
Wrong! The background is just as important and in some cases even more important than the subject itself. How is that even possible you ask?
Take for example a picture of a car. If it was shot in a studio, the background could be entirely blank. That would make the car very important in the shot. If you shot that same car in the middle of a parking lot while it was full of other cars, your car becomes almost insignificant. (Unless there was something unique about it, like it was red and all the other cars were blue.) Now take it one step further, imagine your car on the racetrack with two or three other cars, but it is clearly in the lead. The car is again important, but not all by itself. Now it becomes a key element in a much bigger shot—the race.
What is dominant space?
I define dominant space as the environment that most compliments your subject. Taking a picture of a young lady in a string bikini sitting on your couch just doesn’t have the same impact as her coming out of the crashing waves with the sun reflecting off her golden hair and water glistening off her beautiful . . . well, you get the idea. Dominant space means that there is no such thing as “just a background.” While the image you take may or may not fill the entire viewfinder, whatever is not the subject must support the subject.
Too often people will snap a shot of a cute baby, or cute puppy, or a cute anything and totally ignore what is around the subject. Yes, the baby may be cute, but do you really want that dirty diaper sitting in the corner to be noticeable? Now obviously, you are not going to set up every single shot you ever take; however, there are three simple things you can do that will greatly enhance your everyday shots.
1. Get Closer
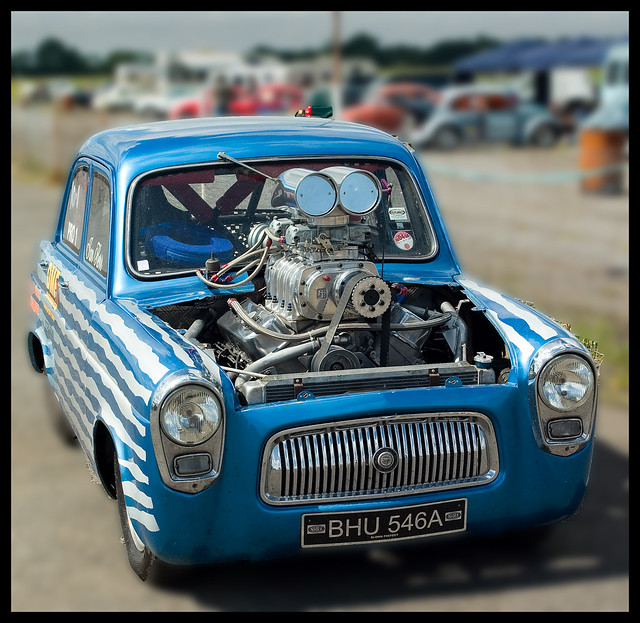
The first thing is actually the easiest. As Robert Capa once said, “If your pictures aren’t good enough, you’re not close enough.” Move in closer to your subject. You can either do this physically or with a zoom lens. Fill the frame even tighter. A good rule of thumb is: Whatever doesn’t add to the shot distracts. Eliminate ALL distractions.

“big engine, little car!” captured by stephen bowler
2. Use a Narrow Depth of Field
The second creative option is use a very narrow depth of field. What this means is that you set your camera so it only has a limited amount of every shot in focus, usually from say 6 to 12 inches. Some people have the mistaken idea that this is limiting what type of shots you can take. Au contraire, my friend. Now when you take a picture of the baby, the baby is all you notice, because everything else has gone to a blurry, soft focus. Even if baby is really cute right beside the garbage can he or she just knocked over, you can still get a really nice shot.
3. Change Your Perspective
The third option that is simpler than staging every single shot is to change your perspective. By your perspective, I mean you the photographer, not the subject. In most cases you have at least 360 degrees to choose from. While the baby might look cute right beside the garbage can, that’s only if you shoot him from the right. What happens when you take one step to the left? Now maybe you only see cabinets behind the little one. Hey, it may not be as cool as a bright grassy field, but it still looks a lot nicer than a pile of garbage in the background.

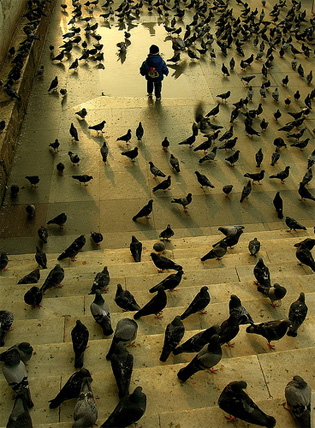
“baby playing” captured by Philippe Put
Being aware of the dominant space means that when you look into that viewfinder you look at every detail from edge to edge. Never take a picture of just a car or just a baby; take the time to put it all together. Watch out for the things that distract, sure (obviously you don’t want a telephone line coming out someone’s ear), but more importantly look for the things that actually support the shot. By looking at the whole picture—visualizing the entire canvas—you go from snapshots to photographs to works of art. The choice is yours.
About the Author:
Award winning writer / photographer Tedric Garrison has 30 years experience in photography (better-photo-tips.blogspot.com). As a Graphic Art Major, he has a unique perspective. His photo eBook “Your Creative Edge” proves creativity can be taught. Today, he shares his wealth of knowledge with the world through his website.
Like This Article?
Don't Miss The Next One!
Join over 100,000 photographers of all experience levels who receive our free photography tips and articles to stay current:


For me the macro lens are very usefull
Tanks for this post was very intersting
Zoom lenses also help out with this, especially when said lens covers a wide range of zoom. That extra 10 or 50mm can make a huge difference. That’s not to say zooming in will always fix your problem though… ;)