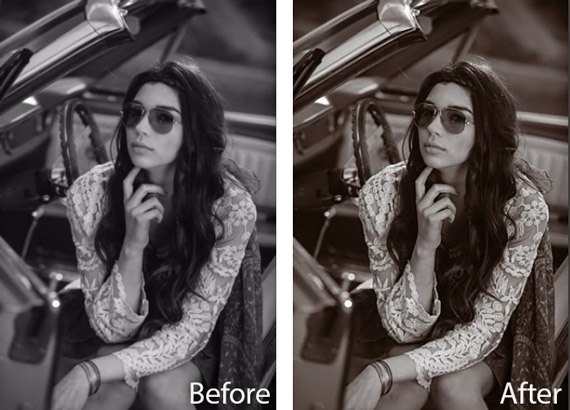
Before the days of digital photography, black and white photos had a different look and feel. The tones were more selenium based or they had more of a sepia feel. With a little post-processing, you can achieve those timeless looks or create your own unique style. In the video below, Kevin Kubota walks us through the process he uses to adjust and improve the tones in his black and white images using Adobe Lightroom:
Changing the Tone of a Black & White Photo
- To change skin tone, go to the Black & White Mix panel in Lightroom and adjust the sliders until the desired tone is reached. You’ll probably focus mostly on the Red, Orange, and Yellow sliders when working on the skin tone.
- If you want to give your image a psuedo-infrared feel, boost the Green slider and drop the Aqua and Blue sliders.
- Now, move on to the Split Toning panel to add a chocolate tone to the overall image. In the Shadows section, click on the color swatch and pick a chocolatey tone that suits your taste. At this point, don’t worry about the saturation level. In fact, you can dial it up to help you find the right color.
- Once the chocolate tone is picked, adjust the Balance slider until the shadows have a nice chocolate tone while the highlights remain more pure and bright. Now you can bring the Saturation slider up or down as needed. For this tutorial Kubota decreased the saturation for a more subtle look.

Before and After Kubota’s Lightroom Workflow
How to Create a Black & White Lightroom Preset
Now that you have the image toned to perfection, you can save the workflow you just went through as a preset that can easily be accessed for future images. To do this, simply go over to the left hand side of the screen to find the Preset panel and click on the + sign. A dialog box will appear. Rename the preset to something easy to recognize. Now, check the boxes next to all the changes that you wish to save in the preset. In this case, we’ll check the Tone Curve, Black & White Mix, and Split Toning. Press Create, then save your image, and you’re all done!
Like This Article?
Don't Miss The Next One!
Join over 100,000 photographers of all experience levels who receive our free photography tips and articles to stay current:


Leave a Reply