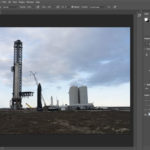
Whether it’s fine lines, acne, or a stain on a shirt, quick spot removal techniques are always welcomed by photographers. Although Photoshop is king when it comes to intense editing, Lightroom is a great program for a wide range of editing needs. Adam Lerner shows us how easy it is to remove unwanted areas in a photograph with Lightroom 5‘s spot healing brush:
Save the heavy airbrushing for magazine covers. When editing your portraits keeping a small amount of facial lines and texture helps to keep things looking natural. This technique is great for removing bumps and dark spots, and lessening the intensity of wrinkles and lines.
How to Do Spot Healing in Lightroom
- Select the healing/cloning tool from the develop module or hit the Q key.
- Set feather to zero.
- Set the opacity to 100.
- Set your brush size appropriately to the area you’re trying to edit.

Use the healing brush tool and paint over undesired lines, bumps or spots.
- Use the healing tool and paint along the desired area. Pressing the H key will show the pins where the area is being sampled.
- You can click and drag the sample selection to a desired area where it matches best with the tone, lightness, and texture of the spot to be edited.

Click and drag to a desired sample area
- Pull back the opacity so that some of the original texture shows through. Lerner explains that you don’t want to completely remove lines on the forehead, but minimize them for a natural looking edit.

The final image.

Unedited VS Edited
There are a multitude of ways to edit unwanted lines and spots. However, Lightroom is a great tool to effectively and quickly get rid of these areas—with natural looking results.
Like This Article?
Don't Miss The Next One!
Join over 100,000 photographers of all experience levels who receive our free photography tips and articles to stay current:


Leave a Reply