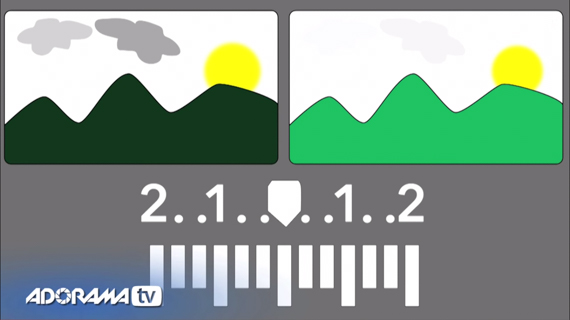
Auto exposure bracketing (AEB) is an excellent—yet surprisingly overlooked—feature on most DSLR cameras. Few people know about it and even fewer actually use it. In this video, Mark Wallace explains the nuances of auto exposure bracketing. Let’s delve right into the what, why, and how:
What is Auto Exposure Bracketing?
Auto exposure bracketing, or simply exposure bracketing, means taking several exposures–usually three or more—of the same scene, using different exposure settings. Most often, one of the exposures is correctly exposed, one is underexposed, and the other is overexposed.

When using auto-exposure bracketing you can choose how much exposure compensation to use for each shot.
Though there is no hard and fast rule, your exposures should be equally spaced out. That is, if you underexpose the scene by 1-stop, the overexposed shot should also be off by 1-stop.
Does My Camera Have AEB?
If you have a DSLR then it likely has an exposure bracketing setting. If you have a compact point-and-shoot, refer to your manual to confirm. Your DSLR might have a button labeled AEB or similar. If not, check your manual to confirm how to reach it via the menu.

Look for this symbol in your camera’s menu.
Why Would You Use Auto Exposure Bracketing?
There are two main uses for AEB:
1. It’s useful when you are not quite sure about the correct exposure settings for a scene but you need to get the exposure absolutely right. Incidentally, this is something that landscape photographers have been doing for years; it helps them to get the right exposure more times than not.

Auto-exposure bracketing is frequently used to create HDR photos.
2. AEB is great for creating HDR (High Dynamic Range) images. These are images where you take three or more shots of the same scene using different exposures and then combine them together to create a single, properly exposed image, like the image above.
How Do I Use Auto-Exposure Bracketing?
These are the steps to use auto-exposure bracketing on your camera:
- First, turn on auto-exposure.
- Select how many shots you need to take. Most cameras allow you to select the number of shots.
- Set the amount of exposure compensation that should be used for each shot. Starting from 1/3of a stop, you can go all the way up to 3 full stops.
- Change the drive mode from single shot to continuous. This will allow you to just press the shutter release once and all three pictures would be taken one after the other.
- Alternatively, if you select single-shot, then you will need to press the shutter release individually to take each shot.
Which Shooting Mode Should I Use?
Auto-exposure bracketing works differently in different shooting modes.
In aperture priority mode, AEB will change the shutter speed to adjust the exposure while the aperture remains the same. Let’s say you have selected an AEB of 1-stop at f/8. A correctly exposed shot at that aperture is metered at 1/250 of a second. The underexposed shot would thus be taken at 1/500 of a second and the overexposed one at 1/125 of a second.

AEB in Aperture Priority Mode
In shutter priority mode, the reverse happens; the shutter speed remains the same while aperture value changes. Here, some problems can crop up. As the camera changes the aperture to adjust the exposure, the depth of field is affected.
The most severe issue is when the camera meters a scene at the widest aperture possible. Let’s say you are using a lens that can open up to f/2.8. You set 1-stop AEB and select a shutter speed of 1/60. The camera meters the first properly exposed shot at f/2.8. The next underexposed scene is taken at f/4. But, when the camera tries to make an overexposed image, it will not be able to set the aperture to f/2 (1-stop over f/2.8). Thus, another image at f/2.8 will be taken. In situations such as these you will need to tweak the ISO value.
Now that you know how to use auto exposure bracketing, you can try out other bracketing options:
“Bracketing isn’t just for exposure. You can also bracket your white balance, you can bracket your ISO, and you can even bracket your focus.”
Like This Article?
Don't Miss The Next One!
Join over 100,000 photographers of all experience levels who receive our free photography tips and articles to stay current:


It took 6:20 out of 7:20 for you to tell us to always use Aperture Priority because of Depth of Field changes when we bracket! Why go through all that Shutter Priority and Aperture limitation stuff when DOF is the important consideration?