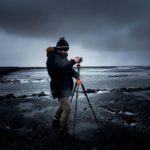
We’ve all been there – we think we’ve got the shot pretty perfect, but in reality, it’s a couple of stops underexposed. This could happen for a number of reasons, but the good thing about cameras these days is that they do a great job of recovering shadow details. We can use this to our advantage and salvage an underexposed shot. But, it’s important to note that it won’t be as good as an image that’s well-exposed in the first place. In this video, photographer Scott Choucino shows you how you can fix dark photographs using Lightroom:
It’s important that you have a raw file in order to try all the adjustments that Choucino demonstrates in the video. Raw files capture loads of data which makes them a whole lot more flexible during the editing process. If you’re working with a JPEG file, you’ll notice that such a level of recovery won’t be possible and that artifacts are easily introduced in the image.
With raw files, you can recover underexposed files just by making changes to the commonly used exposure, shadows, and black adjustments. You can also use the highlights and whites sliders in conjunction to bring balance in the image. And since such salvaged images can appear flat and lifeless, Choucino also shows you how you can use other tools like white balance, texture, clarity, vibrance, sharpening, HSL, and dodge & burn to add life to it.
Do you have an underexposed image lying around that you recover? Try out the techniques in this video and see what you get.
Like This Article?
Don't Miss The Next One!
Join over 100,000 photographers of all experience levels who receive our free photography tips and articles to stay current:


Often the number of steps and details that I find more comfortable to retake the photo is too worthwhile. Thank you for this amazing tutorial! I’m learning a lot!