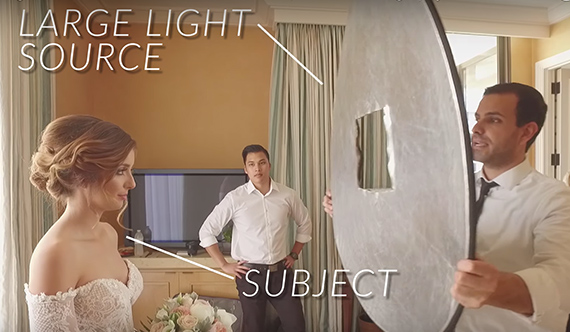
Ready to bring your portraits to the next level? As it turns out, transforming a photograph into something incredible can be as simple as an adjustment to the light being used. The folks at SLR Lounge demonstrate exactly how flat lighting is done and how it can impact a scene:
The term “flat light” refers to fact that the technique requires a photographer to match the angle in which the camera is pointed with the angle at which light hits the subject. Aside from nailing the correct angles, flat lighting requires that a large light source in comparison to the size of the subject be used. Windows and doorways work well, so long as an effort is made to avoid harsh, direct sunlight. The more diffused the light is, the better—a set of sheer curtains can help soften things up. Reflectors work well as an effective alternative for studios and scenarios where natural light may not be available.
From there, it’s just a matter of positioning a model (or yourself) in front of the light source and snapping a shot. Just be sure to shoot in the direction the light is headed rather than against it. This will prevent any sort of backlighting from occurring.
Instantaneously, the difference becomes evident. Light fills in cracks, blemishes, and imperfections, making skin appear flawless and flattering—no Photoshop necessary! Flat lighting is one of the most simple setups out there, and it takes hardly any time at all to achieve. For portrait photographers of all levels, it’s a skill worth taking the time to master.
Like This Article?
Don't Miss The Next One!
Join over 100,000 photographers of all experience levels who receive our free photography tips and articles to stay current:


Leave a Reply