American football photography offers challenges which are very different than those of traditional photography. In this article, I will introduce you to helpful techniques to get you up to speed with gear and technique, so you can catch the winning touchdown this fall!
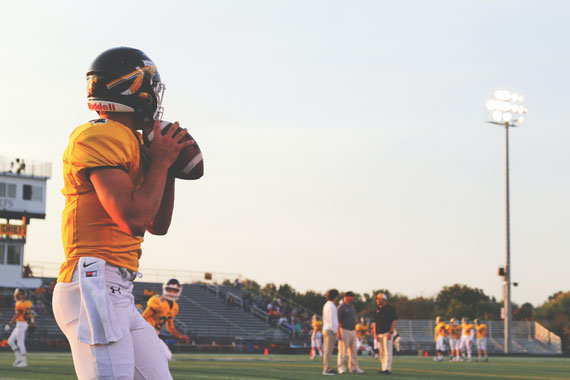
Photo captured by Riley McCullough; ISO 640, f/5.6, 1/640s, 55mm.
Equipment
A fast DSLR camera and lens are an absolute must. The camera and lens should each be able to auto focus very quickly. My camera of choice for the last several years has been Canon 1D, with the Canon 70-200 Image Stabilized f/2.8 lens attached.
The Canon 1D series is noted for its ultra fast focusing, especially when using the center point. The 1D series also represents the finest in Canon technology, producing low noise even at high ISO settings. Colors are pleasingly warm and vibrant, and images very sharp.
A monopod can been helpful at times, but if you have a steady hand you are better off hand holding the camera.
Settings
I prefer to shoot in Manual Mode at all times, with AI Servo Auto Focus. Setting exposure can be tricky on sunny days because many areas of the field will be a few stops higher or lower based on where the sun is landing.
There are no hard and fast rules, but I do have a few helpful tricks.
- Set your exposure by pointing at the grass in the general area of the field you expect the play to occur. Adjust your aperture and shutter speed until you get the exposure to “0” or “-1/3”.
- Try exposing for white on the uniforms. You can use the white stripes of the referee’s uniform, or any player’s uniform or helmet. Adjust your exposure and take a test shot until the camera displays the whites just beginning to “blink” in the viewfinder as over exposed. This is particularly effective if you are shooting back lit and want to ensure the players’ faces are not too dark inside their helmets.
- If you are shooting during the day, consider setting your white balance to “Cloudy” instead of “Sunny” or “Auto (AWB)”. The “Cloudy” white balance setting gives a warmer and more saturated look to subjects under a sunny sky.
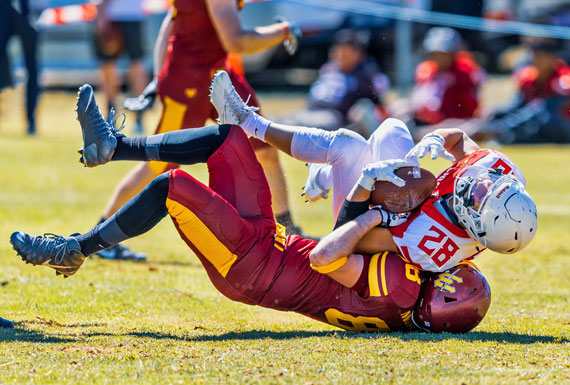
Photo captured by John Torcasio; ISO 125, f/3.5, 1/1600s, 400mm.
Technique
There is no substitute for real experience. You will get better with repeated shoots. But there are some tips to help you get better, faster.
- Learn about the game of American football. Part of the “trick” to getting great shots is to know ahead of time where the play will unfold on the field. Understanding football strategy and recognizing who the key players are on the field will help you get the best shots. Look for mismatches, where one player is superior to another.
- Use the light. I shoot mainly daytime football games, and constantly keep aware of the sun’s position to maximize my image contrast. Back lighting can be very effective, but I prefer the colors and contrasts from side lighting and angled lighting where the sun is behind the camera and slightly to the side.
- Don’t use too much shutter speed. If you are attempting to freeze the action, 1/500 to 1/1000 of a second is usually plenty fast enough for American football. Going up to 1/2000 even in very bright conditions is overkill and will cause you to sacrifice depth of field. You can still get a great out of focus background and bokeh using an aperture of f/4.0 to 5.6, and you will get more of your subject in sharp focus.
- Keep your subject in the center of the screen and follow him with center point auto focus. When you anticipate the action is about to occur, shoot in burst mode until the action comes to an end. You will end up with a lot of pictures to go through, but this greatly increases the odds that you will catch a few beauties.
About the Author:
Article written by Daniel Padavona from Warmpicture Sports Stock Photos.
Like This Article?
Don't Miss The Next One!
Join over 100,000 photographers of all experience levels who receive our free photography tips and articles to stay current:





Thanks for such detailes tips on how to shoot American football. I’ve also seen the relevant post from Dan here http://www.photogallerycms.com/blog/tips-for-photographers/shooting-american-football/. He’s the real professional :)
Thank you for the kind comments everyone. I agree with Randy regarding the use of flash. If you are dealing with a sideline with little competition for space, you can get away with off camera flash. I have attached mine to tripods using bungees. One off camera flash, plus one on-camera, being synched via wizard, can give you some awesome exposures.
I also shoot mainly night games. And thus shoot 2.8 for the entire game. And manual is pretty much a necessity.
I enjoyed the article also. I hope you will do something for basketball when the high school season begins in November. It would help to know what lenses to use if you have floor access and if not, how to handle poorly lit gyms, how high the ISO should be, and other creative techniques.
It is a good article if you shoot in daylight. For me shooting high school football, most of my shooting is done at night. Yes a good lens is a must. A 70-200 mm F2.8 is a great lens to start off with and I prefer a 300 mm F2.8. I use manuel mode for all my shots. In some small schools the football fields don’t have good lighting so a flash is needed. Also if you live in an area that is served with a small newspaper you might be able to get a press pass to shoot a game and help the newspaper out and make some money at the same time. One thing though with a photo in a newspaper they will give you credit for the photograph. it is also call a free advertisement .