In the captivating world of photography, few techniques are as cherished and revered as the art of creating panorama and High Dynamic Range (HDR) images. These awe-inspiring panoramas have an innate ability to transport viewers into the very heart of a scene, offering a breathtaking perspective that extends beyond the confines of a single frame.
To fuel the creative passion of photographers even further, the groundbreaking release of Luminar Neo’s newest extension, Panorama Stitching, has emerged as a game-changer—giving photographers the remarkable ability to seamlessly merge the realms of panorama and HDR photography from not only still images but even video footage! Imagine the possibilities when two remarkable techniques intertwine to produce unparalleled visual masterpieces! Let me show you how it’s done.
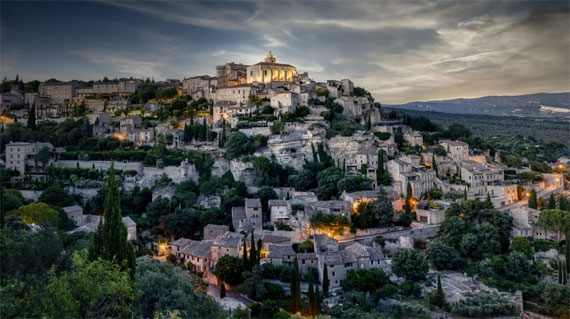
HDR Panorama captured by Jakub Bors
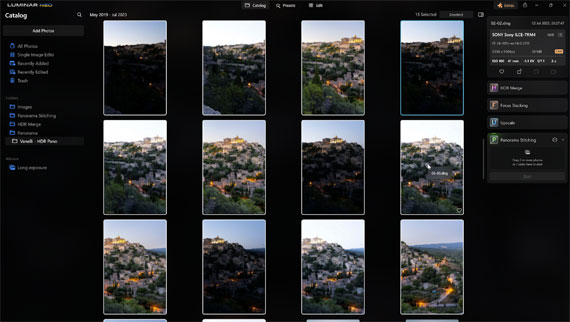
Step 1: Select Your Images
To begin crafting your stunning panorama, choose the series of images you wish to merge. Make sure they capture the complete scene you want to showcase in all its grandeur. Whether it’s a majestic landscape or a bustling cityscape, a well-curated selection of images is the key to a mesmerizing panorama.
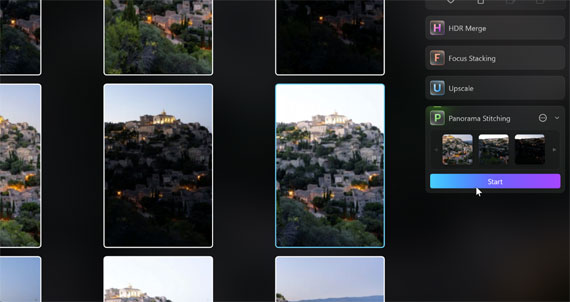
Step 2: Drag and Drop to Panorama Stitching Extension
With your chosen images at the ready, open Luminar Neo and drag them into the Panorama Stitching extension. Watch in awe as Luminar’s intelligent algorithms identify bracketed images effortlessly, streamlining the entire process. This smart recognition system saves you time and ensures a smooth blending of HDR images.
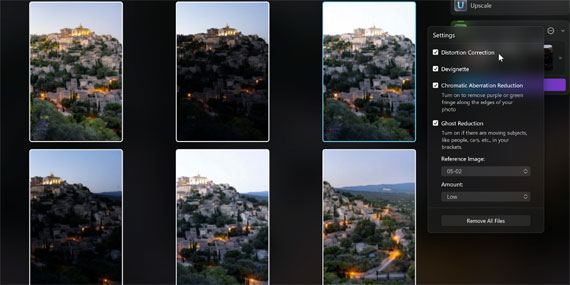
Step 3: Customize Your Panorama
Once your images are loaded into the Panorama Stitching extension, explore the various options available to unleash your creativity by fine-tuning your masterpiece. Correct distortion, eliminate vignettes, address chromatic aberration, and reduce ghosting.
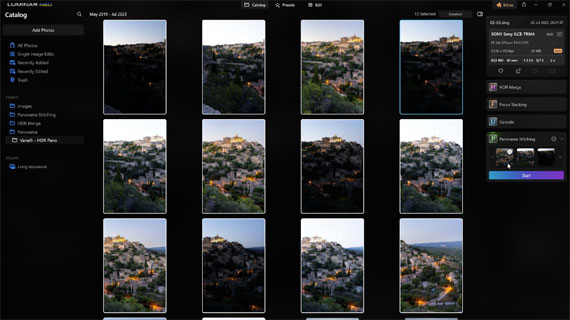
Step 4: Begin Panorama Stitching
With your customizations in place, it’s time to bring your panorama to life. Click the “Start” button and watch in amazement as Luminar Neo seamlessly weaves together your selected images. As the software works its magic, you’ll witness the gradual merging of individual frames into a breathtaking, unified panorama.
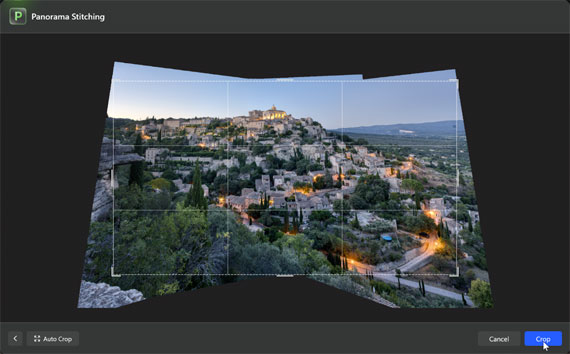
Step 5: Fine-Tune and Crop if needed
Explore a range of projection modes, including spherical, cylindrical, mercator, plane, or fisheye, to discover the perfect match for your scene. Tailor the projection to complement your panorama best and crop the image as required, allowing you to create a visually captivating and harmonious composition. Once the image is created, it will be stored in the Panorama Stitching folder.
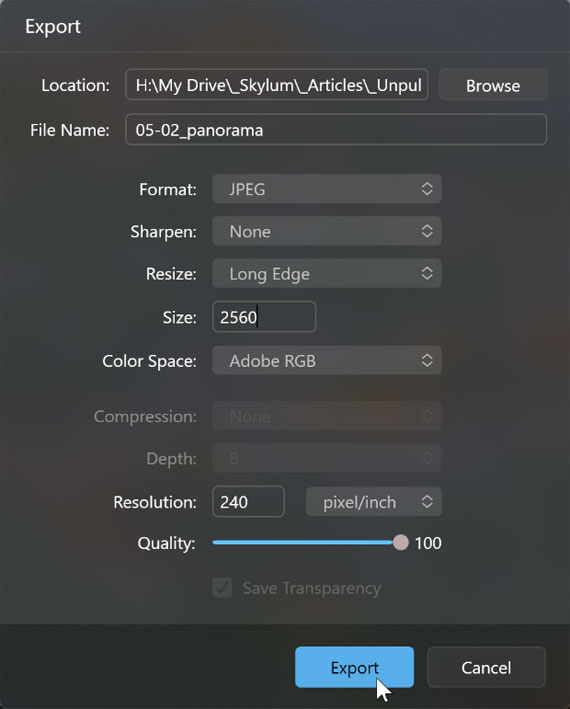
Step 6: Export
Once the panorama stitching process is complete, take a moment to inspect your masterpiece. If needed, make any final adjustments to ensure your panorama is flawless. Once satisfied, save your creation in your preferred file format and resolution. Your masterpiece is now ready to be shared and admired by audiences far and wide.
In conclusion, the world of photography is constantly evolving, and the introduction of Luminar Neo’s Panorama Stitching extension is a testament to this progress. Marrying the marvels of panorama and HDR photography, this innovative tool offers photographers an avenue to push the boundaries of visual storytelling.
See how it works: Panoramic Photography Stitching in Luminar Neo
Like This Article?
Don't Miss The Next One!
Join over 100,000 photographers of all experience levels who receive our free photography tips and articles to stay current:


Leave a Reply