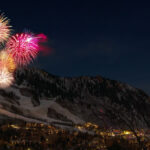
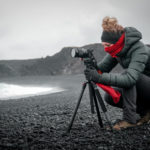
Beautiful time-lapse photography is difficult enough to achieve, but attempting it in HDR (high dynamic range) photography adds another layer of complexity as was done here successfully in France (Normandy & Britany). This means the photographer has to take bracketed photos at different exposure levels for each individual frame, and then post-process those bracketed sets into HDR in a way that the lighting stays consistent so something called “flickering” does not occur due to rapid changes in lighting between the video frames. This new video has created a lot of discussion between photographers because it is such a difficult technique to master. Take a moment and enjoy:
This video was created by Tanguy Louvigny on Canon 400D and 60D digital SLR cameras along with a Sigma 10-20 mm lens. Louvigny hand made a 3 axis motion control rig to control the slow movement of the camera. The HDR photo sets were tone-mapped with Photomatix. The post-processed photo sets were edited into the video using Adobe Premiere & After Effects CS5. And I think Louvigny also personally composed the music for this video using a Roland mc-808 Sampling Groovebox.
I was personally blown away by the custom motion rig he created for this project. It’s appearance is pretty intimidating to say the least. It is based on Tetrix Robotics (tetrixrobotics.com), interestingly enough controlled by mindstorms brick – a division of LEGO (mindstorms.lego.com), and programmed in Robot C (robotc.net). Here it is on location:

Custom Rig for HDR Time-lapse Photography

HDR Time-lapse Motion Control Rig

Front of the HDR Timelapse Motion Rig

Setting Up the Rig to Capture a Sunset HDR Sequence
Questions Answered by the Photographer:
- Are you using a 3 bracket shot or more?
3 shots sequences, 3 f-stops spacing on 60D, it’s sufficient to get enough dynamic range in most situations (well, more would be better but would require more time between moves). The motion control has to stop between each move to give enough time for the bracketing sequence to finish, it’s custom programmed to do so…
- Can you provide more details and cost information on your amazing motion rig?
A lot of time and effort :) Seriously it costed 1 Tetrix kit starter set + ressource set + Tetrix encoders + mindstorms set + some aluminium rods and 2 x 547b tripods to firmly attach them (and a camera !) So all included maybe 2k € or so (those kits are way more expensive in Europe than in the US !)
- Can you reveal your Photomatix 4 settings to avoid flicker? I find it tricky, sometimes it works well with near to default settings, but many times flicker is too strong. Can you share?
Sure ! I have no perfect solution to avoid flicker, but here are my (usual) settings in Photomatix:
Strength 70
Color sat 80
Luminosity 0
Microcontrast 1.0
White point vary, usualy around 0,800%
Black point rather low, 0.030% or so
Micro-smoothing 5.5 when too much noise
I try to minimize flicker when shooting, and use Msu deflicker to cure severe flicker in post, that’s it !
- How long on average does it take to capture a sequence on location?
Each take is about 1 1/2 hours real time compressed in 10 seconds or so.
- How long did it take you to create this amazing video?
It’s a compilation of various shots, so let’s say it took me a year!
- Would you have any tips for us regarding sunset and sunrises?
No particular tip for sunsets except exposure bracketing as it helps sustain great sky brightness changes…i do not shoot many sunrises, much more difficult to achieve in my opinion.
- How long did it take to build your custom rig?
Worked a month on the first crane version with lots of trial and errors, but it wasn’t sturdy enough so i reworked it to make this 3 axis slider (this was the easy part)!
- Did you have to take 3 bracketed shots into into Photomatix each time you were making a frame or was there a bulk method to doing it. Meaning, in order to create a second of video at 24 frames, did you have to bring three bracketed photos into Photomatix 24 times in order to create one second?
Yes 30 times for one second of video, but automated with batch mode processing in Photomatix
Try the Leading HDR Photography Software:
Photomatix is the software of choice for most professional HDR photographers. Create high dynamic range photos with the look you want, from realistic to creative, using one-click presets and a large range of settings. Includes alignment of hand-held shots, powerful ghost removal tools, batch processing and more: Try Photomatix HDR on Your Photos
For Further Training on Time-lapse Photography:
Check out this new COMPLETE guide (146 pages) to shooting, processing and rendering time-lapses using a dslr camera. It can be found here: Time-lapse Photography Guide
Like This Article?
Don't Miss The Next One!
Join over 100,000 photographers of all experience levels who receive our free photography tips and articles to stay current:


@Douglas Leib – You don’t need a motorised rig to start out. You can do a lot of ‘simulated movement’ in video editing. That’d probably be an easier way to go to start out. Your 7D is 5184 x 3456 pixels. That gives you a lot of space to move a full HD 1920×1080 portion of that around. Even more room if you want to go with 720 HD.
Wow, I am simply astounded. This is beyond beautiful. My favorite scenes are the cross sunset and the one that looks like the sunset is exploding.
That was an honor to watch.
GREAT JOB!! I am new to digital photog & HD Video. In feb of 2011 I purchased canon XH-A1S & in Oct 2011 I purchased a canon 7d. I have been having a ball with both of them. I just purchased an intervalometer to start doing time lapse. I shoot a lot in Glacier & yellowstone Nat Parks here in NW Montana. I see that I need to also make/buy a motorized platform for my work. Great job & thanks for sharing the tech info.!! Wildlifeman.