Looking to do something a little different with your photography to mix things up a little? Below, this video teaches us how to use multiple exposures to create a finished piece of art that looks stunningly painterly. The process, from taking the images to post production, isn’t too difficult, making this project suitable for new photographers, too:
Taking the Exposures
As mentioned before, it’s not difficult to create one of these images, but it is slightly time consuming. With practice, it does go faster. For starters, you’ll have to take quite a few exposures to get a really nice effect. Hoey says that 10 is the absolute minimum, but numbers closer to 50 frames are ideal. For the example in the video, Hoey used a total of 80 frames. Basically, the more you take, the better your final artwork will look.

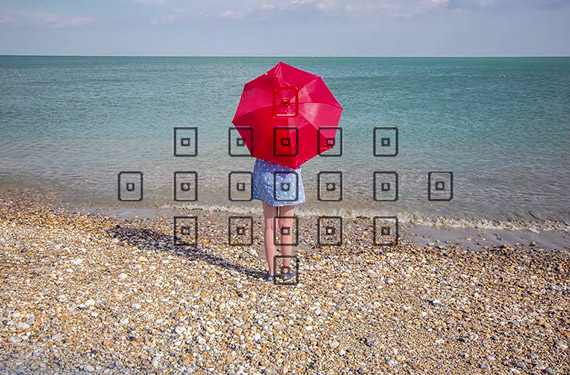
Keep the subject in the same spot for all the frames.
Another thing to keep in mind when shooting is to ensure that the subject stays in the same spot in your viewfinder between each frame. Pick out an obvious reference point and line it up with one of the focus points on your viewfinder. In the image above, you see that Hoey selected the center of the umbrella and kept it at the top focusing point for each of his 80 shots.
Photoshop Workflow
The next thing to do is bring all your images into Photoshop as Layers. To do this open Photoshop and click on File > Scripts > Load Files Into Stack, browse to the images you want to edit and select all of them. Click OK. Be patient as Photoshop loads the files. Depending on the number of images you are using, it can take several minutes to load all the layers.
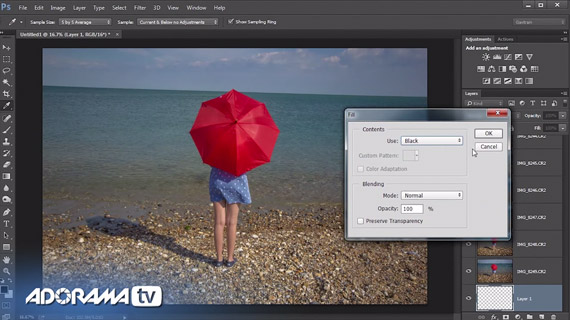
Next, scroll down to the very bottom layer in the Layers Palette, click on it once then create a new layer by going to Layer > New > Layer. Click OK then fill new layer with Black by clicking Edit > Fill. In the pop up window make sure Black is selected for the Use option, Mode is set to Normal, and Opacity is at 100 percet. Click OK. Drag the Black layer to the bottom of the layers in the Layer Palette.
Now, click once on the image layer that is second from the bottom (the image directly above the Black layer). Press and hold the Shift key as you scroll to the top of the Layer stack and, still holding the shift key, click on the top most layer. This should have easily and quickly selected all the image layers (via Gavin Hoey).
The last thing to do is to adjust the opacity of all the image layers. With the layers still selected, drag the Opacity slider to the left to decrease the opacity. You’ll notice how much stronger the effect becomes as you lower the opacity. After sliding through different opacity levels, Hoey chose 8 percent for his image.

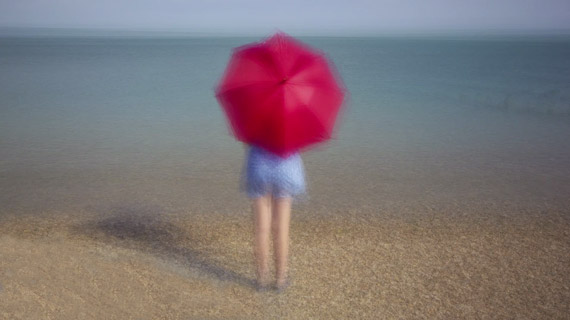
Painterly Art Created from Multiple Exposures
The above image is the photo Hoey made by using this technique and adjusting the brightness and contrast slightly. There are lots of creative applications for this style, such as abstract portraits, landscapes, etc. This look really lends itself to being printed on a canvas and used as decor.
Like This Article?
Don't Miss The Next One!
Join over 100,000 photographers of all experience levels who receive our free photography tips and articles to stay current:


Leave a Reply