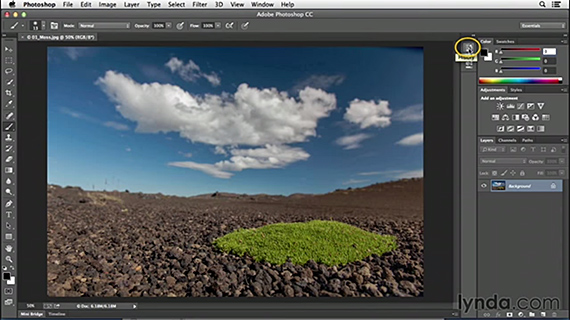
The world of digital photography can be mind blowing sometimes, or at the very least, super convenient. With today’s advancements in image editing, it’s almost impossible to lose an original photograph to bad editing. This video shows us how to use the History Panel in Photoshop CC to step back and forth through our editing history:

It’s pretty easy to step back and undo an unwanted edit in Photoshop. Most of us just click on Edit, then Undo, or even faster, use the shortcut cmd + z (Mac) or ctrl + z (Windows). That’s great for the last edit made, but what about that edit you made 15 minutes ago that you’ve been doubting?
As you make more changes to your image, Photoshop keeps track of everything, each step, all of which can be accessed through the History Panel. If you’re in the Essentials work space, you’ll find the History icon to the top right corner of your image. If you’re in a different work space or can’t see an icon, go to the Window tab at the top of the screen and select History.
Each time you edit the image in any way, a list of steps/changes will appear in the History Panel. Now, if you need to go back in time to any of these previous steps, you can simply click on the one you need, and any change you made after that one will not be visible. If you then make a change while on that step, the next ones down the list will disappear. Essentially, you are starting over from that step.
If, however, you want Photoshop to keep track of all steps, no matter if you go back and make another change, you can make it so non-linear history is recorded. You can change these settings by going to the flyout menu on the History Panel icon and choosing History Options. Here, select Allow Non-Linear History and OK. Now, if you make an edit to your image, that step will be added to the existing list, so you can still move back through all of those different states.
You can also use the Step Backward and Step Forward keyboard shortcuts to move through your history.
How to Step Backward in Photoshop
Mac: cmd + opt +z
Windows: ctrl + alt +z
How to Step Forward in Photoshop
Mac: cmd +shift + z
Windows: ctrl +shift +z
Changing Your History Preferences
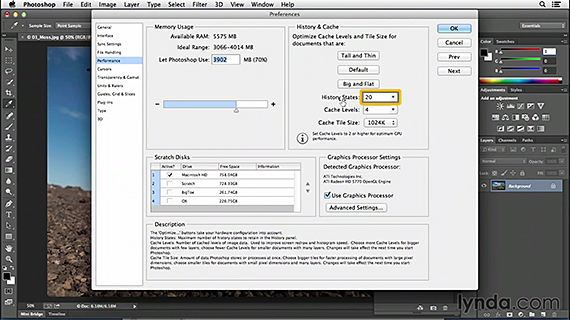
As a default, Photoshop only records 20 steps before deleting the first from the list. You can increase this limit by changing your preferences:
Mac: Go to the Photoshop tab at the top of the page.
Windows: Go to Edit.
Then Preferences –> Performance and find History States.
Before setting the limit super high, remember that Photoshop has to store the memory of each stage somewhere. When editing large files and making dozens or even hundreds of edits, this could lead to you running out of RAM, forcing Photoshop to write all its temporary files to the hard drive, which could lead to performance issues.
How to Go Back to the Beginning
If you get so far along in your editing that you can’t return to a beginning stage, there are a few options:
1. Close the file without saving it.
2. Go to File –> Revert
3. Click on Snapshot at top of History Panel.
“Just knowing that nothing that you do in Photoshop is permanent allows you to experiment and really play with your images.”
Like This Article?
Don't Miss The Next One!
Join over 100,000 photographers of all experience levels who receive our free photography tips and articles to stay current:


Leave a Reply