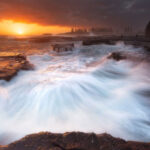
It doesn’t matter if you’re a photography junkie or just starting out; one of the easiest ways to add a little extra flair to your images is by turning your sun into a sunstar (also known as a sunburst). This helpful photography option provides character and prevents the sun from becoming just a blown out section of your image. Landscape photographer Joshua Cripps shows just how easily you can create a sunstar:
Use the Right Aperture
Using the correct aperture is the first and most important tip to remember. The proper aperture for a sunstar requires a high f number (f/16 to f/22) to create. The smaller, the better, because the smaller the aperture, the more the rays dissect through the opening, creating the burst.
Make the Sun Small
To create the best burst effect for your sunstar, you want the sun to be as tiny as possible. The more of a pinpoint the light source is, the better the effect will be. While you can create a sunstar effect when the sun is high in the sky, sunstars generate the most impact when the sun is rising just above, or setting just behind, another object within your frame.

Experiment with your lenses to find what works best for you.
Make Sure the Air is Clear
Any clouds or haze in the air will either filter or block out the sun’s rays, significantly reducing the effects of the sunburst. While some rays can still appear when there are clouds and/or haze, the rays are considerably less prominent than they would appear within an image with an unobstructed view.
Watch Your Exposure
Whenever you’re purposefully placing the sun within your image, you have to pay extremely close attention to your exposure. Otherwise, you will most likely end up with a pure white photo. A good starting point for sunstars is to underexpose your image by two complete stops. After you begin shooting, make sure to pay attention to your histogram. Keep an eye on your shadows, and avoid any clipping. Once completed, use a software editing program like Lightroom or Photoshop to recover the darker sections of your image.

For the best burst effect, keep the sun as small as possible
Choose a Good Lens
Thankfully, as long as you execute the first four tips, you should be able to create a great sunstar in your photos. However, keep in a mind that a big part of the process is the lens you choose. Each lens is different, and the number and shape of the aperture blades of the lens will determine how your sunstars look. To find what works best for you, experiment with your lenses.
Do you use sunstars in your photography? If so, what tips do you use to create the perfect sunburst?
Like This Article?
Don't Miss The Next One!
Join over 100,000 photographers of all experience levels who receive our free photography tips and articles to stay current:


Leave a Reply