Cities often look their best at night, but finding the right angle and camera settings can be a challenge if you don’t take the time to plan your shot. In this video, Mark Wallace shows us how to shoot a dramatic wide-angle view of a city at dusk. He headed out to Quito, Ecuador and looked for locations to get a good view of the city. After a long scouting session, followed by careful planning and delicate post-processing he finally got what he wanted:
Travel Photography Tips
In creating his cityscape, Wallace, shared some tips for other travel photographers:
- Scout for locations ahead of time to find out possible interesting places to photograph.
- Walking is the best way to scout, as it allows you to soak in the atmosphere and find inspiration.

Tools such as GPS watches and Photographer’s Ephemeris can help you improve your landscape photography.
- Make use of GPS and sunset time apps to coordinate your shoot.
- Check for lighting, position of the sun, time of sunset, and every other small detail that can help you get the shots you need.
Preparing for a Nighttime Cityscape Shot

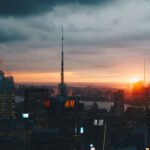
Wallace took his time to find this vantage point of the city.
Mark arrived at the spot about 30 minutes before sunset to allow for time to set up his tripod and get the composition right. He used an app to check for the sunset time and gather info on the exact spot where the sun would dip below the horizon and the conditions of the sky. Knowing that he was not going to get the golden hour effect that he wanted, he looked for other options. Thankfully, it was an overcast evening and that meant the sky had a lot of detail.
Tools and Settings for Cityscape Photography
These are the tools and settings that Wallace uses for his images:
- Canon EF 16-35mm lens for its wide field of view, set at 19mm
- Aperture priority mode
- Aperture: f/9 to ensure that a large depth of field
- ISO: 400
- Shutter speed: 1.3 sec
- One RAW frame every 10-15 minutes
Post Processing in Lightroom
Wallace made the following adjustments in Lightroom:
- Exposure reduced by about ¾ of a stop
- Contrast boosted by a touch
- Shadows and highlights opened up to retrieve some details

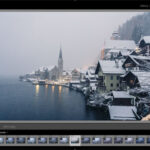
Post-processing in Lightroom involved some minor adjustments to enhance the photo.
- Whites pulled down to avoid losing details in the sky
- Clarity and vibrancy boosted to increase the color
- Color temperature tweaked
- Blue saturation increased to make the sky appear more dramatic
- Lens profile enabled to adjust for some distortions in the image

Final Image
While nature didn’t allow Wallace to get exactly what he wanted, his planning ensured that he had a usable image at the end of his shoot.
There are also presets designed to help with cityscapes: Hacking Photography Lightroom Presets
Like This Article?
Don't Miss The Next One!
Join over 100,000 photographers of all experience levels who receive our free photography tips and articles to stay current:



How did you know that you would be safe at that location in a foreign country at night, seems like a little risky.